Redux
I thought I had everything I wanted in my lab, with tons of room to grow and rock-solid stability. However, every labber should know, a lab is never finished, and has no end. If you think you're done, well think again, you've only just begun.
I had a few things I compromised on when I first thought out my lab;
A) It had to be low power
B) No rack-mount stuff, I don't have / want a rack
C) No 10GB, it's expensive, and unnecessary
And now that I've reached, and highly exceeded my goals, I decided to take things a new route: no compromises.
Phase 1: Restructure
Restructure P1: Design, Criticism
My fiancée had noted when I first started my lab that the "shelving" that came with the house was sagging quite a bit, and that if I was going to put a lab there, it better not weigh a ton or it'll only get worse.
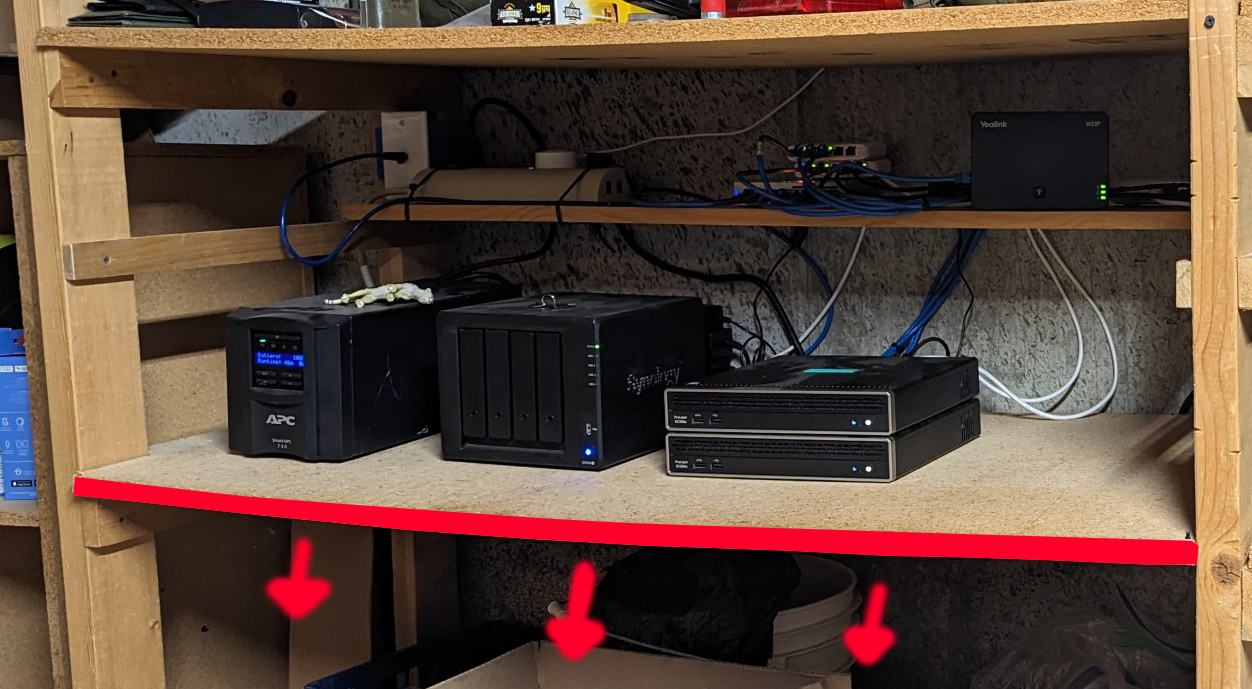
Our home has a 70% finished basement, with the 30% came a ton of shelving to make use of the space. The previous owner used 2x4's and MDF to "homebrew" some shelving together to store his stuff.
After ~2yrs of having equipment sit on the shelving, adding, subtracting, and moving equipment around started to "push down" on the wood, causing it warp. This was a bit of a problem, and if I was going to do any further progression, I'd have to do something about it.
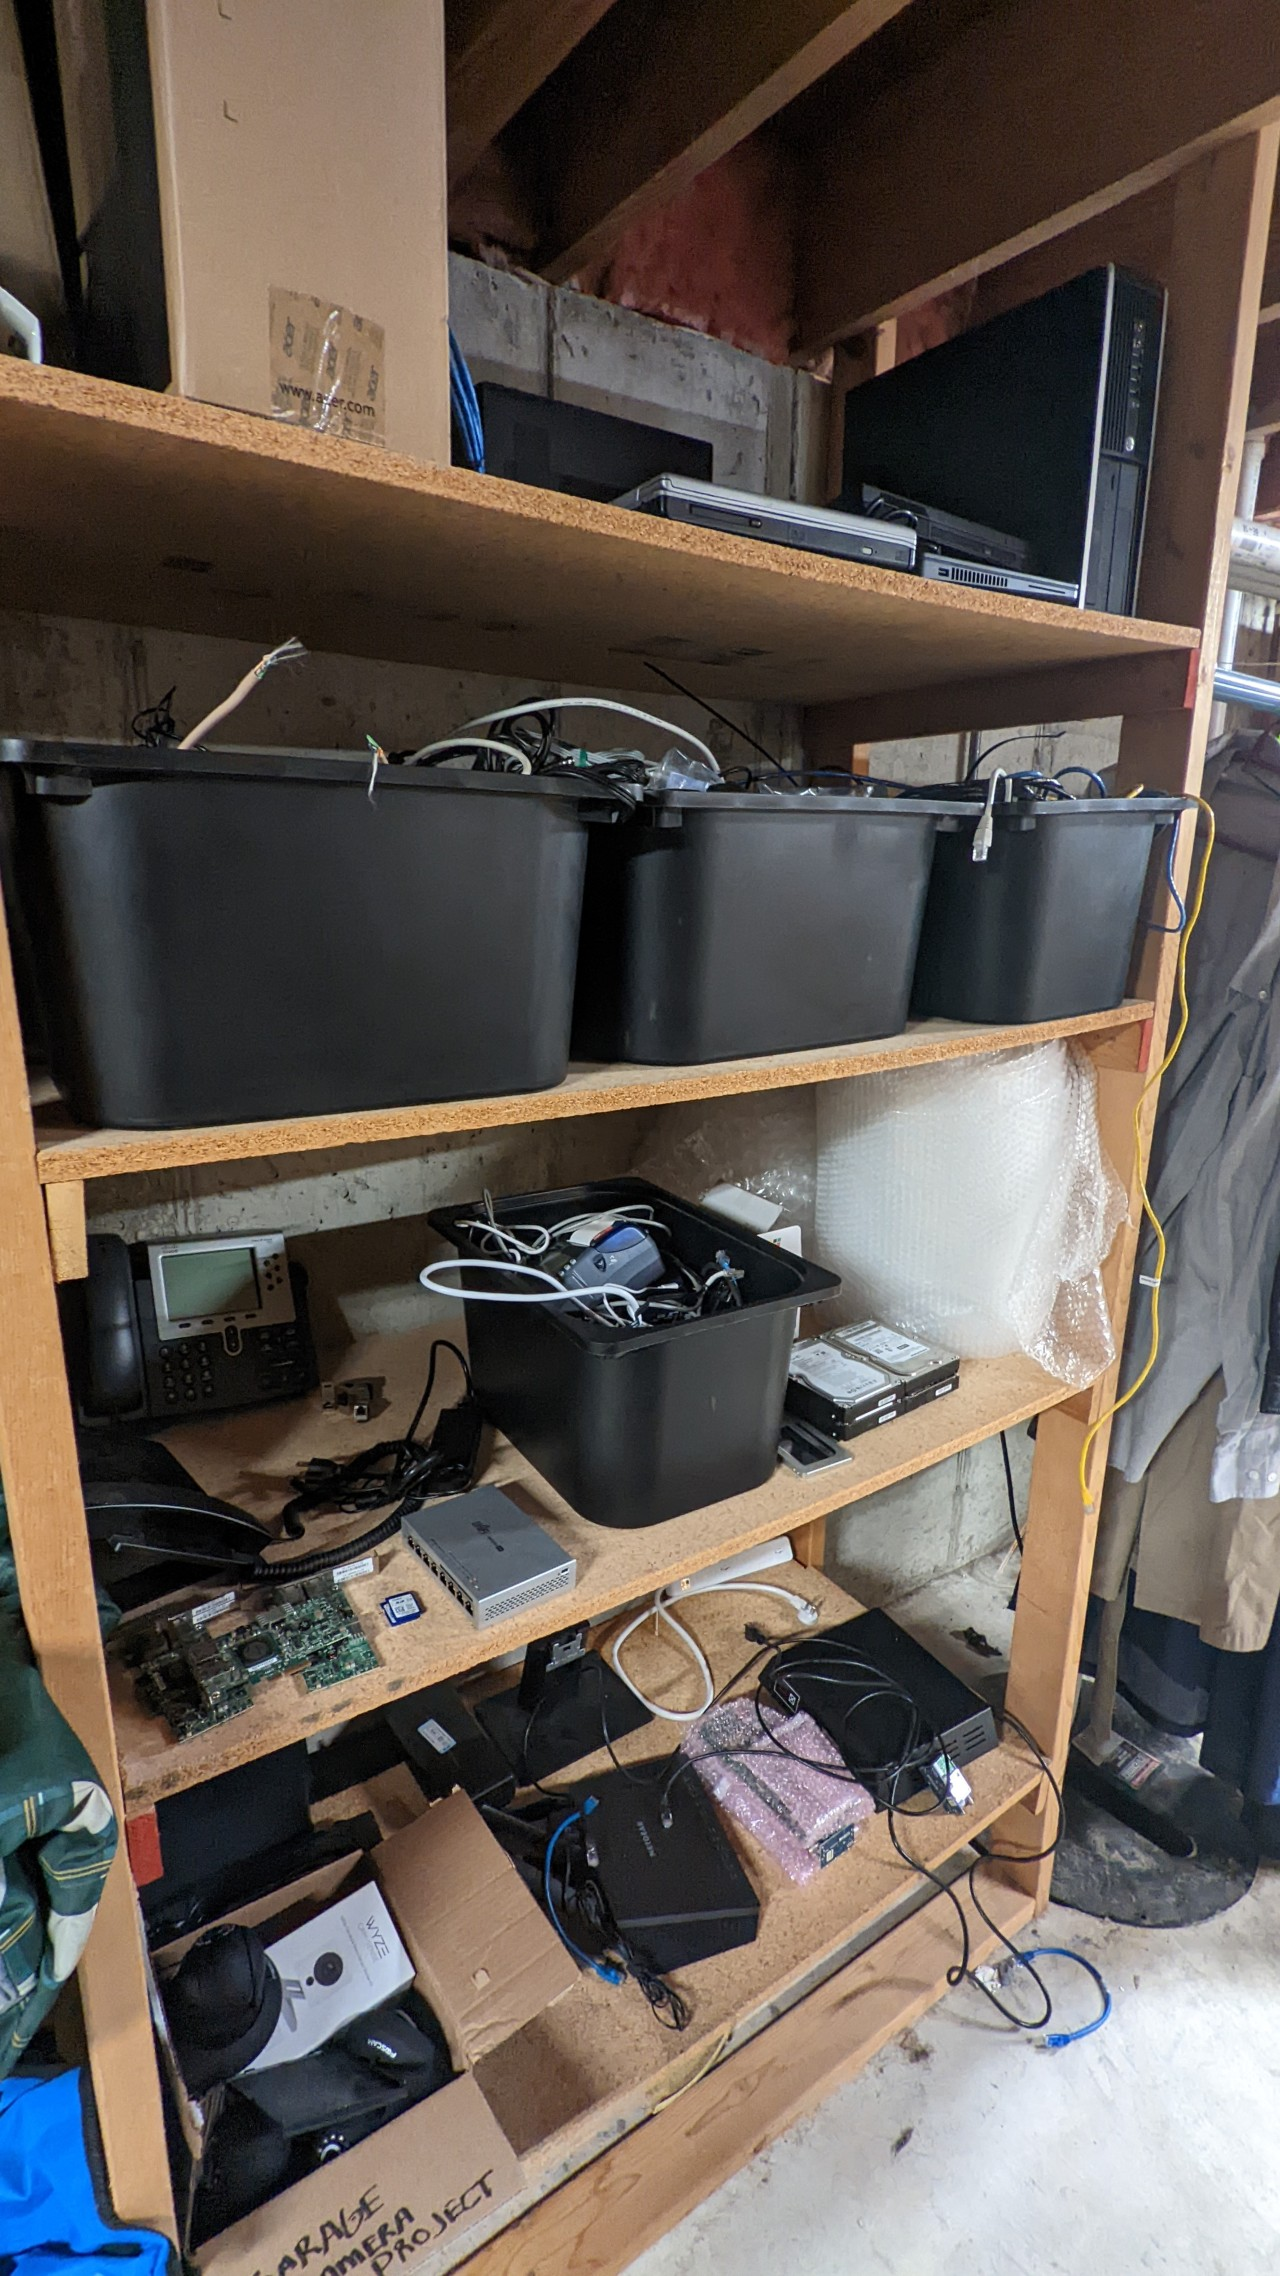
On a separate set of shelving (think turn 90 degrees, and to the right) I had been using an entire vertical unit of shelving to store my extra parts, wires, and equipment that I wasn't using. I noted that it was next to an outlet, no overhead pipes, and had prime electrical access on a dedicated circuit.
You probably won't believe this, but I actually have quite a bit of "handyman experience" with electrical, woodworking, and engineering. My previous job (and my dad) got me some wicked exposure to using power tools, and design.
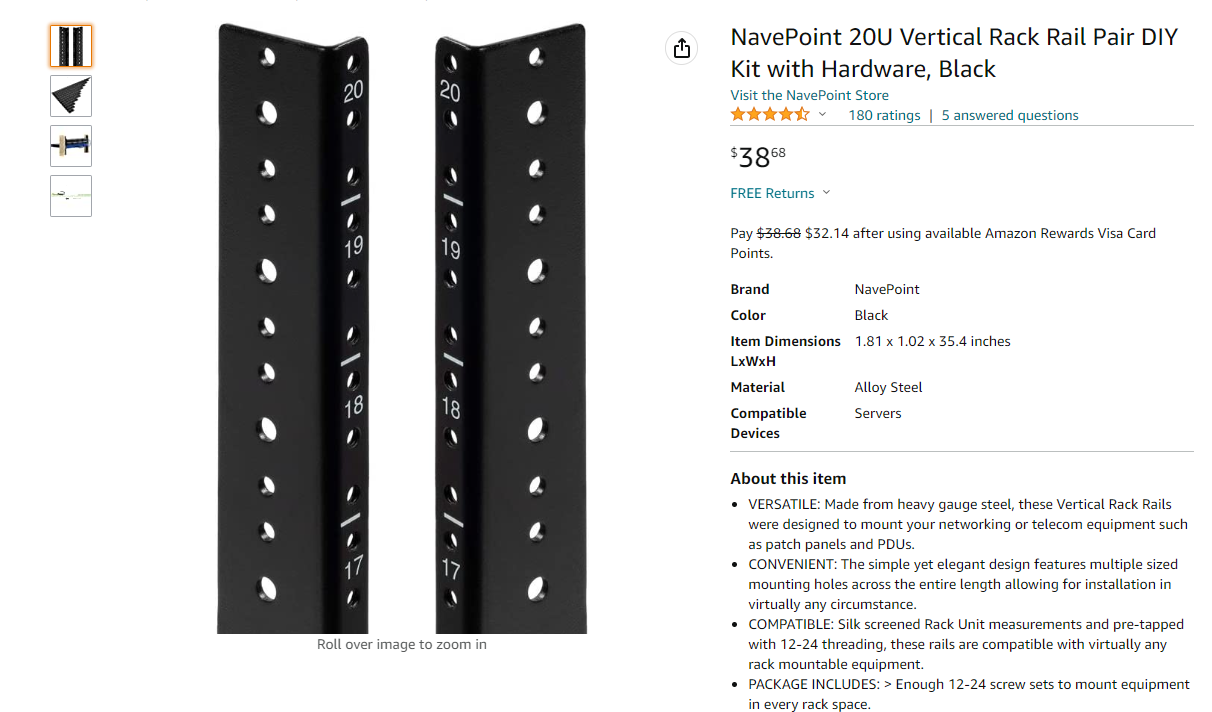
Using that "wisdom" I decided, perhaps, I can re-engineer these shelves to be load-bearing, and capable of handling electric and data-communications equipment. I had seen vertical-rack rails on Amazon that you can fasten into wood, and thought about how my dad and I had engineered shelving using 2x4's and 2x6's and MDF for retail displays to display heavy product. Sounds somewhat familiar...
I did some "rough drafting" measuring distance between the 2x4 studs, on their x and z axis's, accounting for existing supports, and for supports that would have to be made to accommodate more weight. The previous owner had taken some "shortcuts" while designing his shelving. See, he used 1 "complete" piece of MDF across two shelf units, and I was splitting them up to make building things in "units" easier for me.
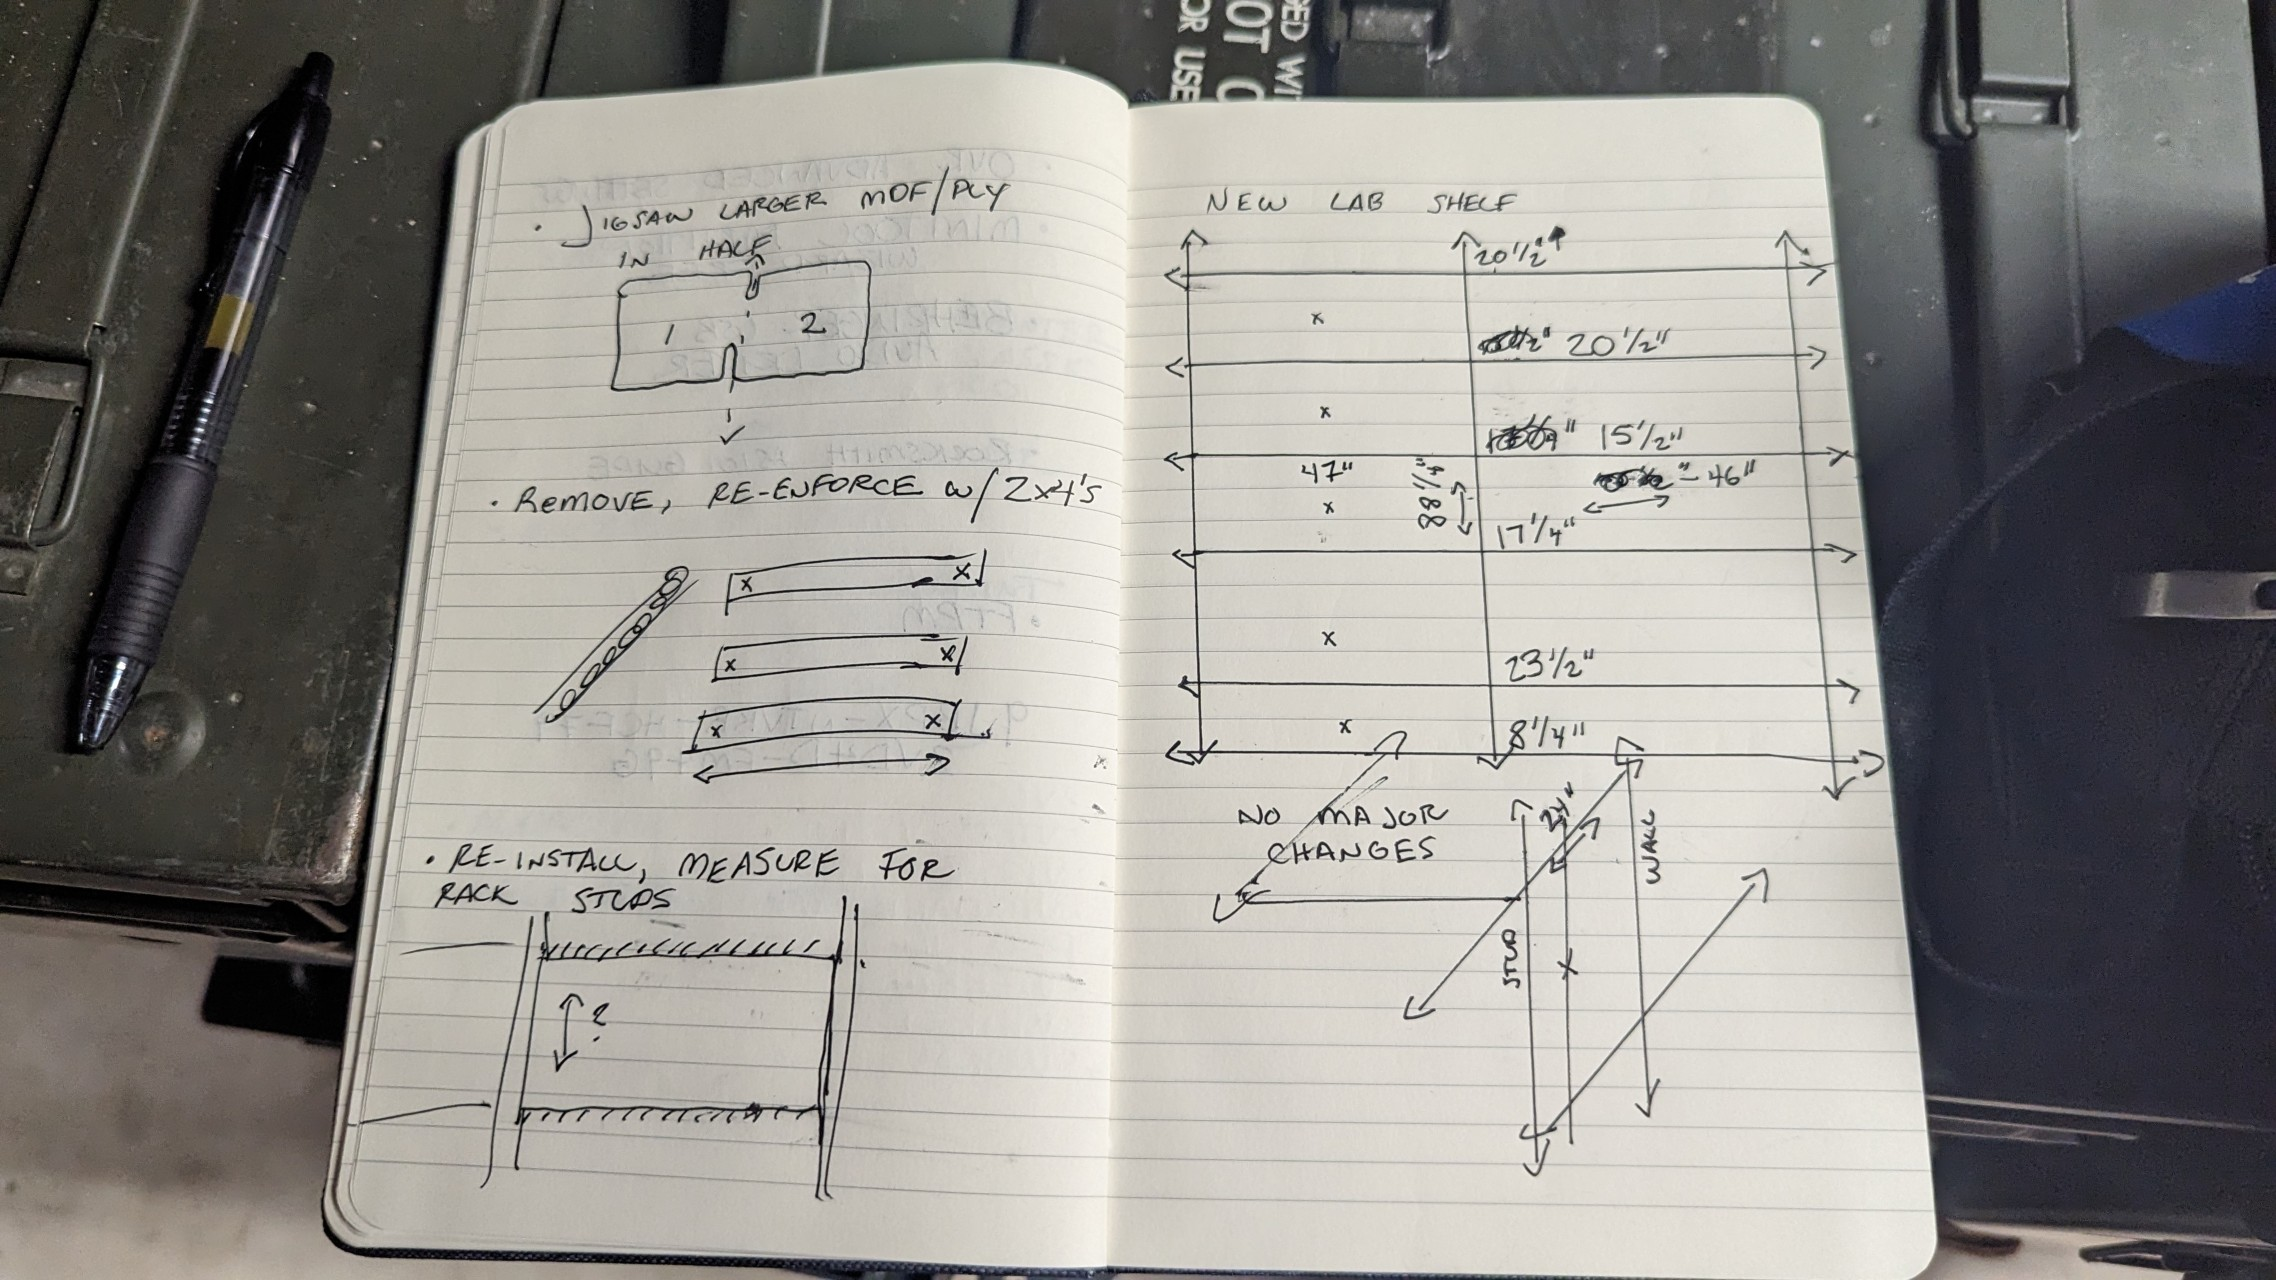
After drawing things out, and pricing out wood, I was able to devise a plan.
Restructure P2: Build
I went to Home Depot, oh how nostalgic, I used to work here. Such good vibes.
Picked up my 2x4's some wood-screws, and some new-work gang boxes for later.
Obviously, a full-length 96" 2x4 wasn't going to fit into my Ford Fiesta no matter how hard I tried. So I had them cut half-way, and then planned to rip them myself later using a circular saw.
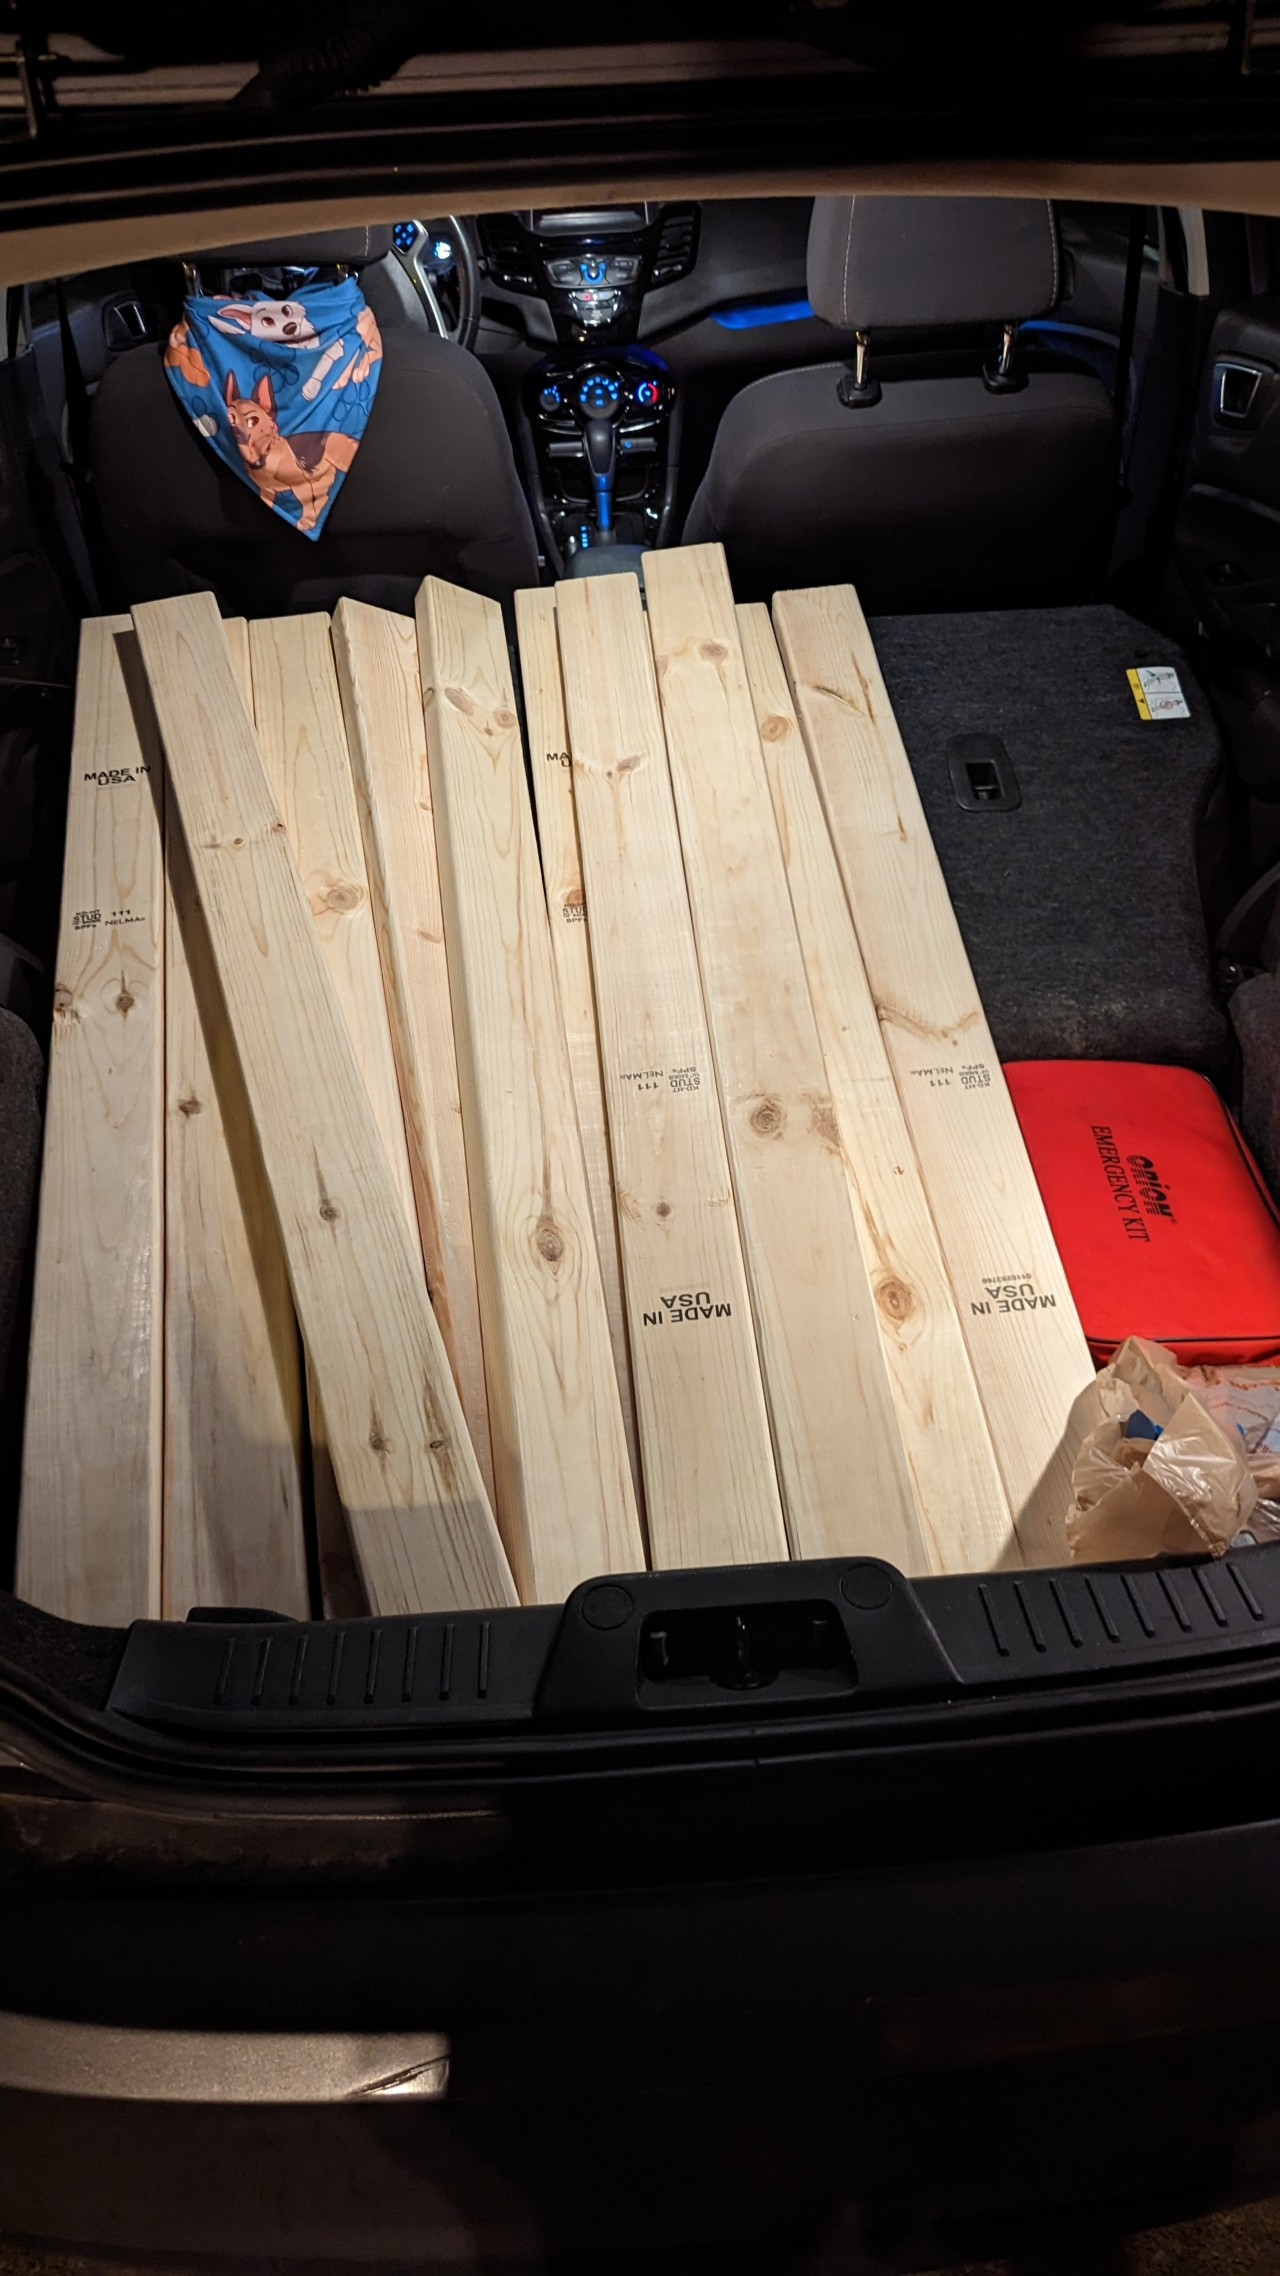
Now at home with my circular saw, I took another look at my plans. The idea was I'd cut 12 boards at 46" and 12 boards at 47" (spoiler alert, I ran out of wood)
First, I had to break down the existing shelving. Getting out the MDF was a bit rough, as previously stated, the last owner built it to never be taken apart again. I had to cut the MDF sheets in the middle with a jigsaw to free them from the shelving (without damaging them, as jig sawing MDF gets rather messy).
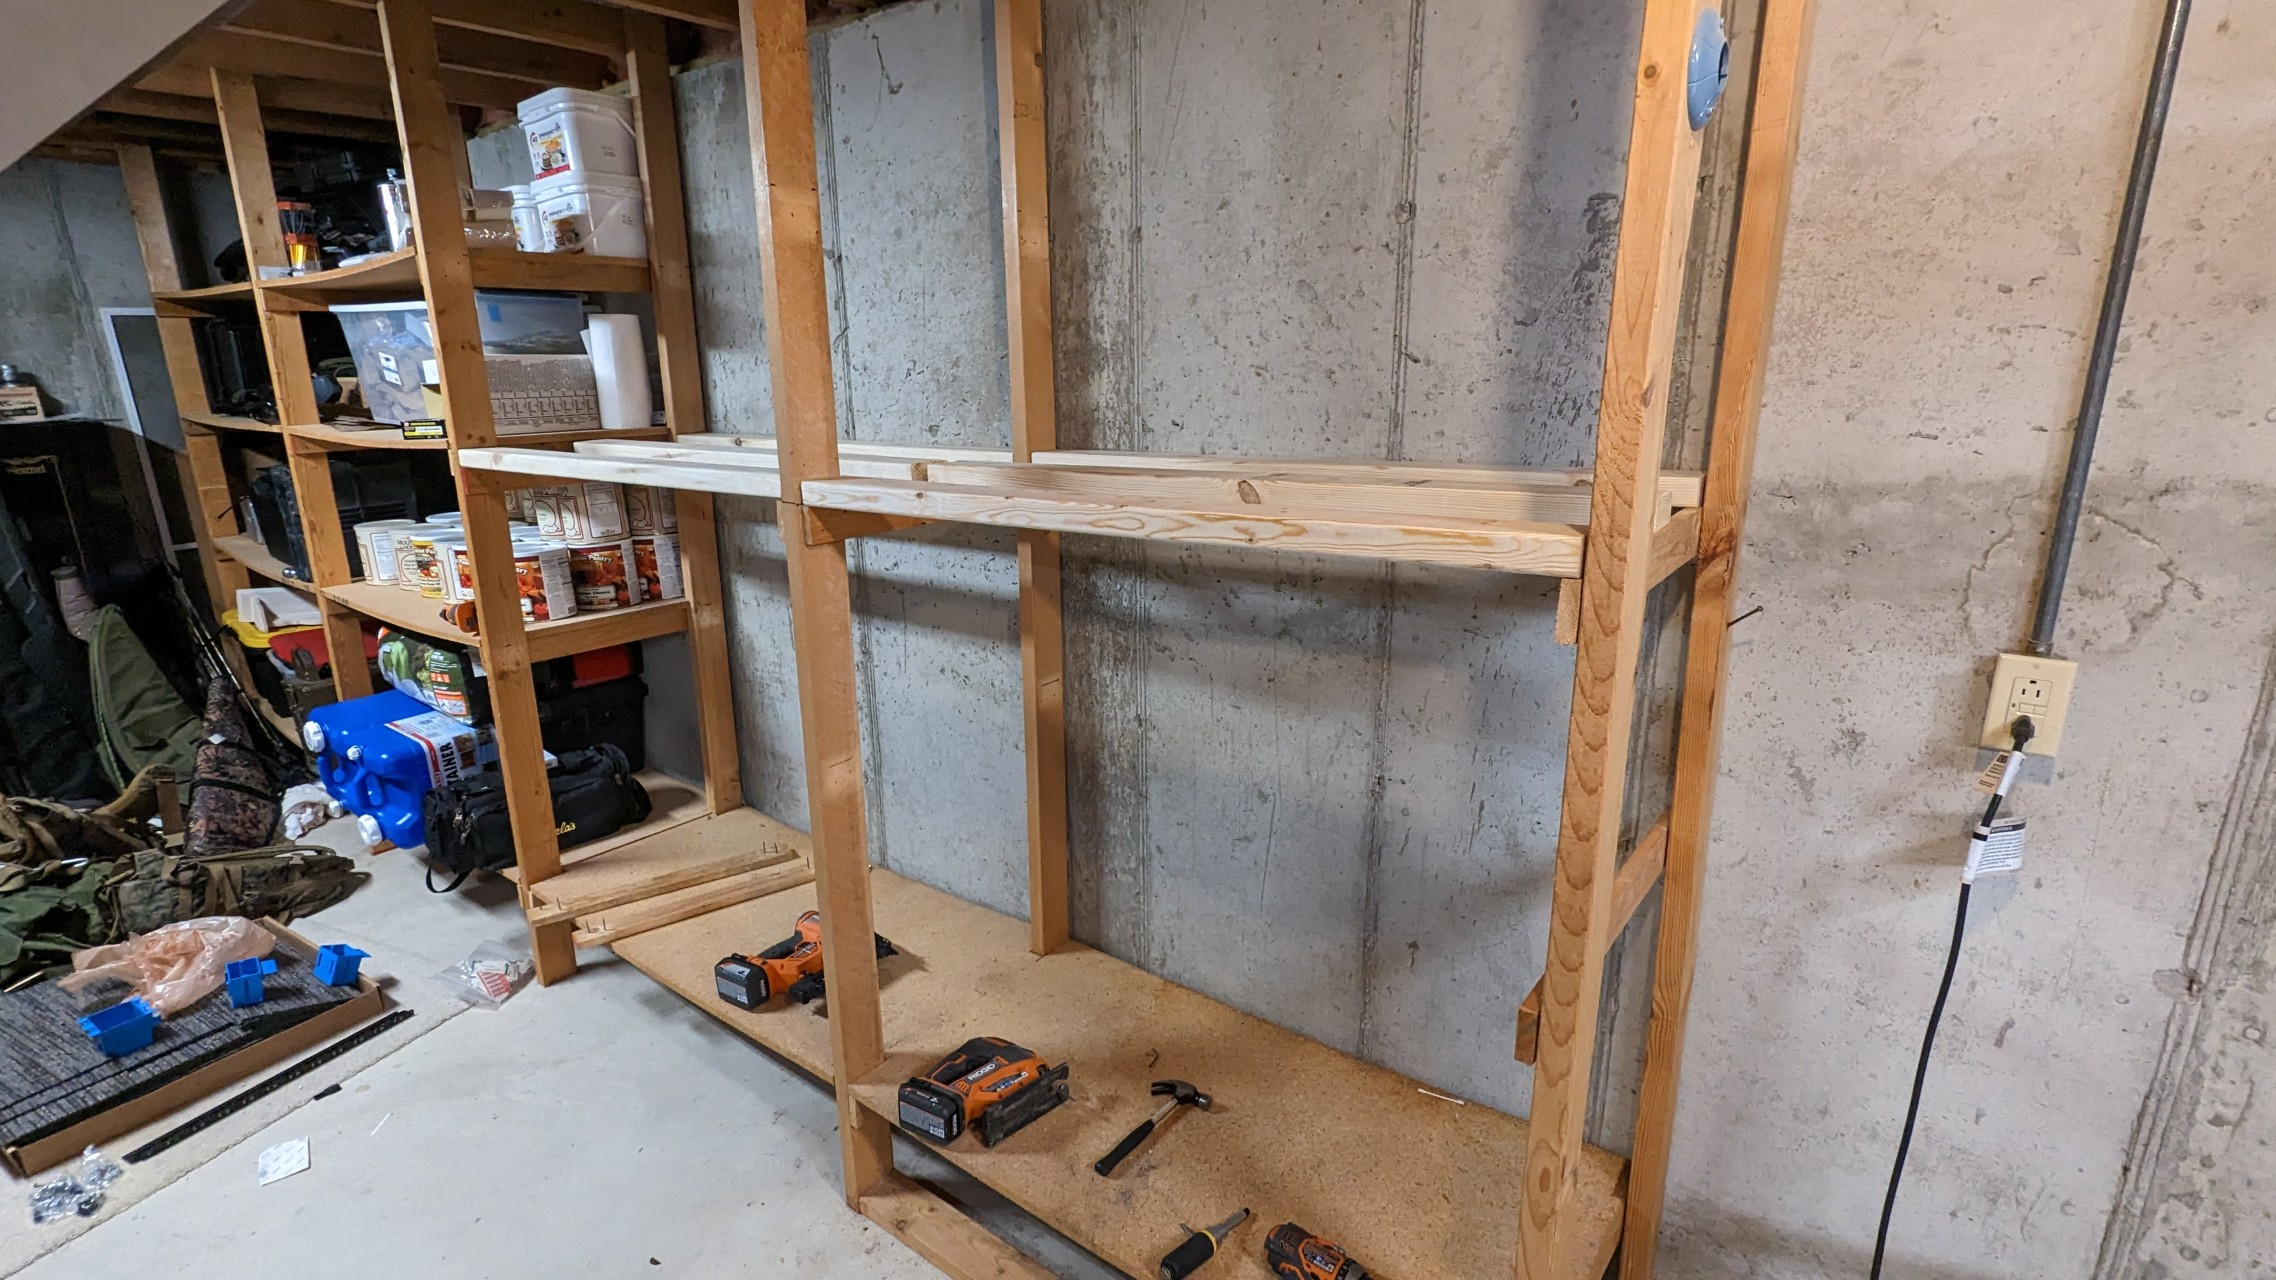
Then, I'd follow up on that ex-corner-cutting problem and make some more edge-boards attached to the existing 2x4's for the supporting 2x4's to rest on. First off, I removed all of the originals (marking their locations for a relative idea of where I should put them back) and then re-attached them using a level, ensuring that they were leveled both vertically, and horizontally.
The last thing you want is an off-kilter, slanted shelf holding your NAS / server(s) with spinning disks in them. This can cause early failure, or cause things to slide off if improperly placed.
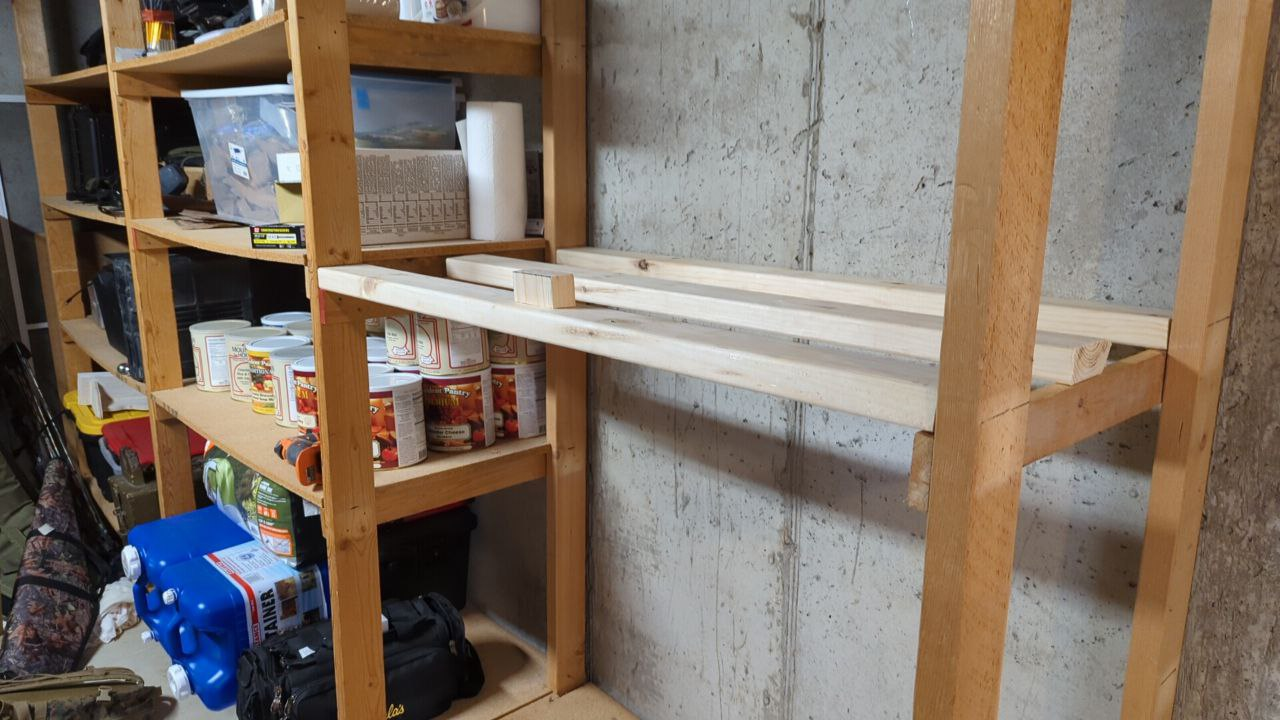
Then, I got to work on the new cross-braces for the MDF, the idea here was to support the MDF, and also counter the bowing that had already set-in from previously stored items on the shelf.
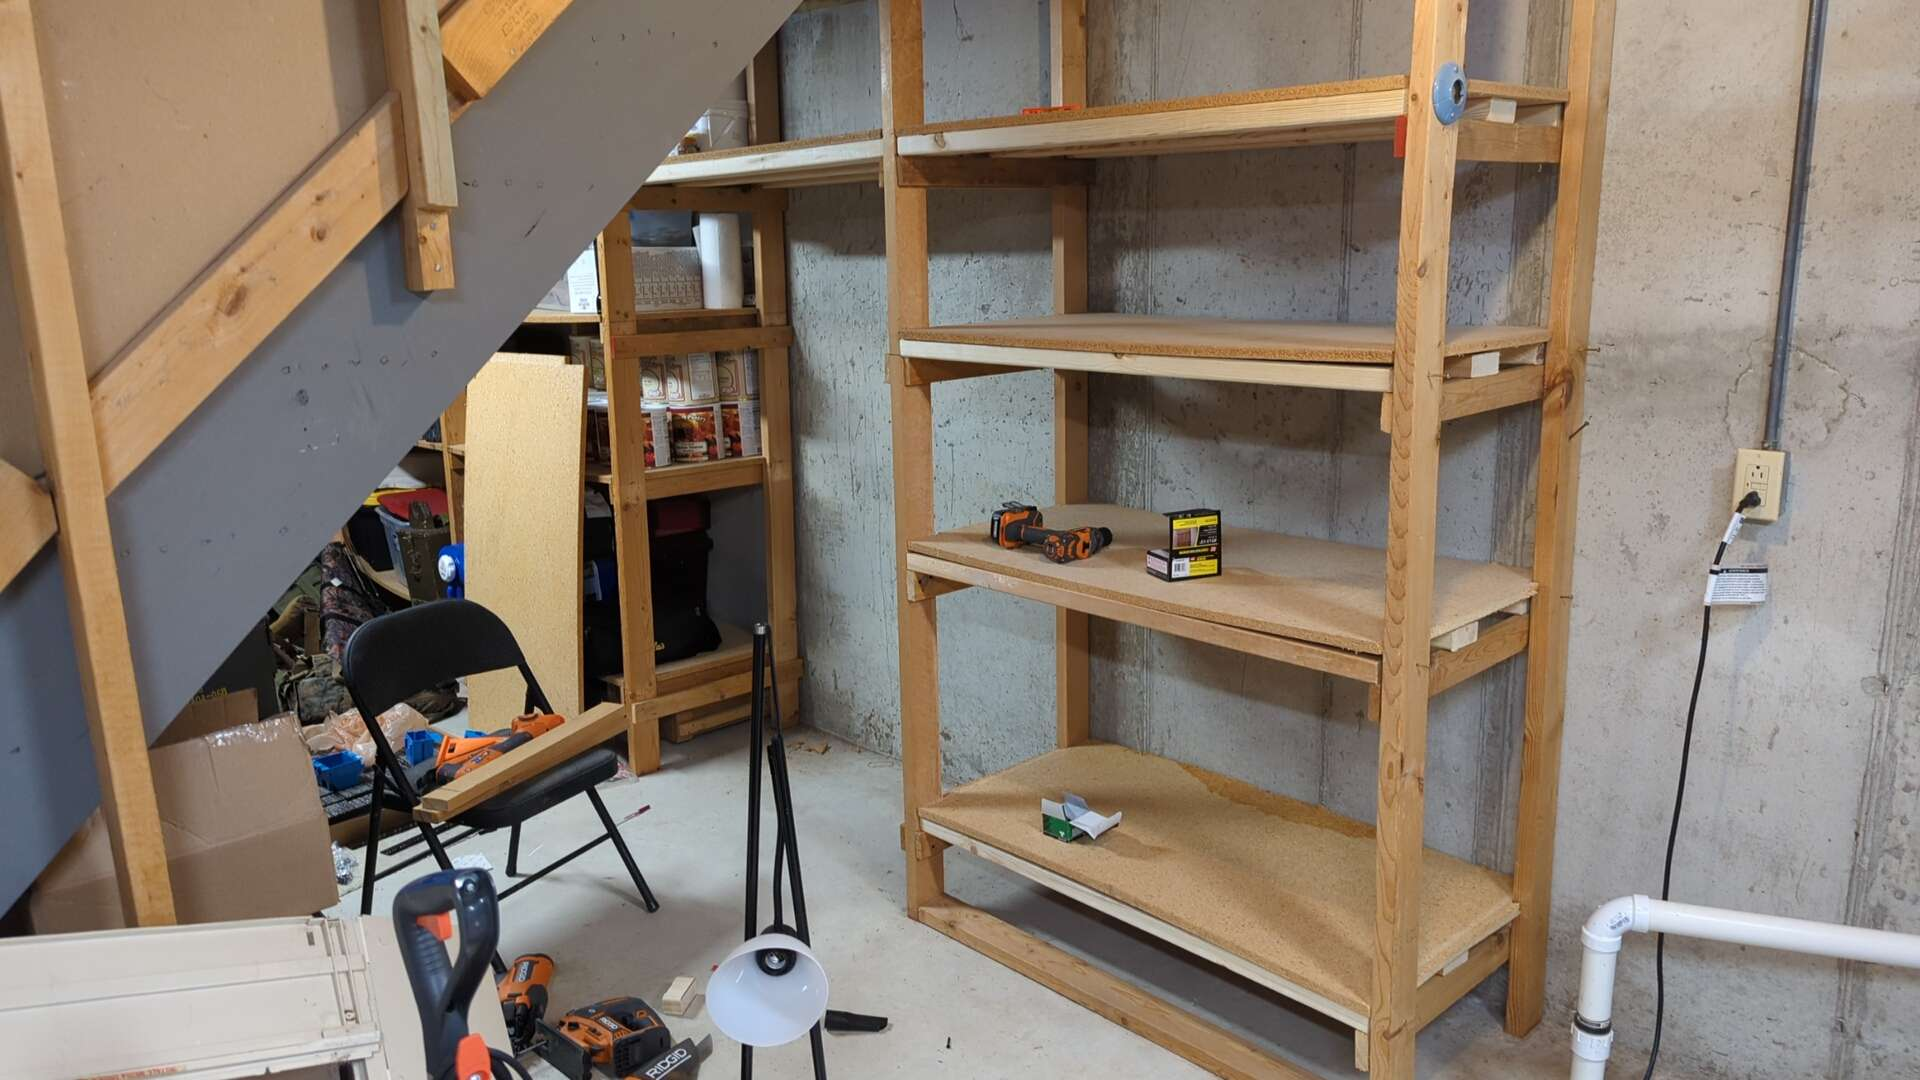
I made my cuts, not once, not twice, but three times, apparently I can't measure wood for the life of me. Thankfully, I always measured too big, and not too small!
Once I was satisfied with everything, I screwed it all together, and au-voila!
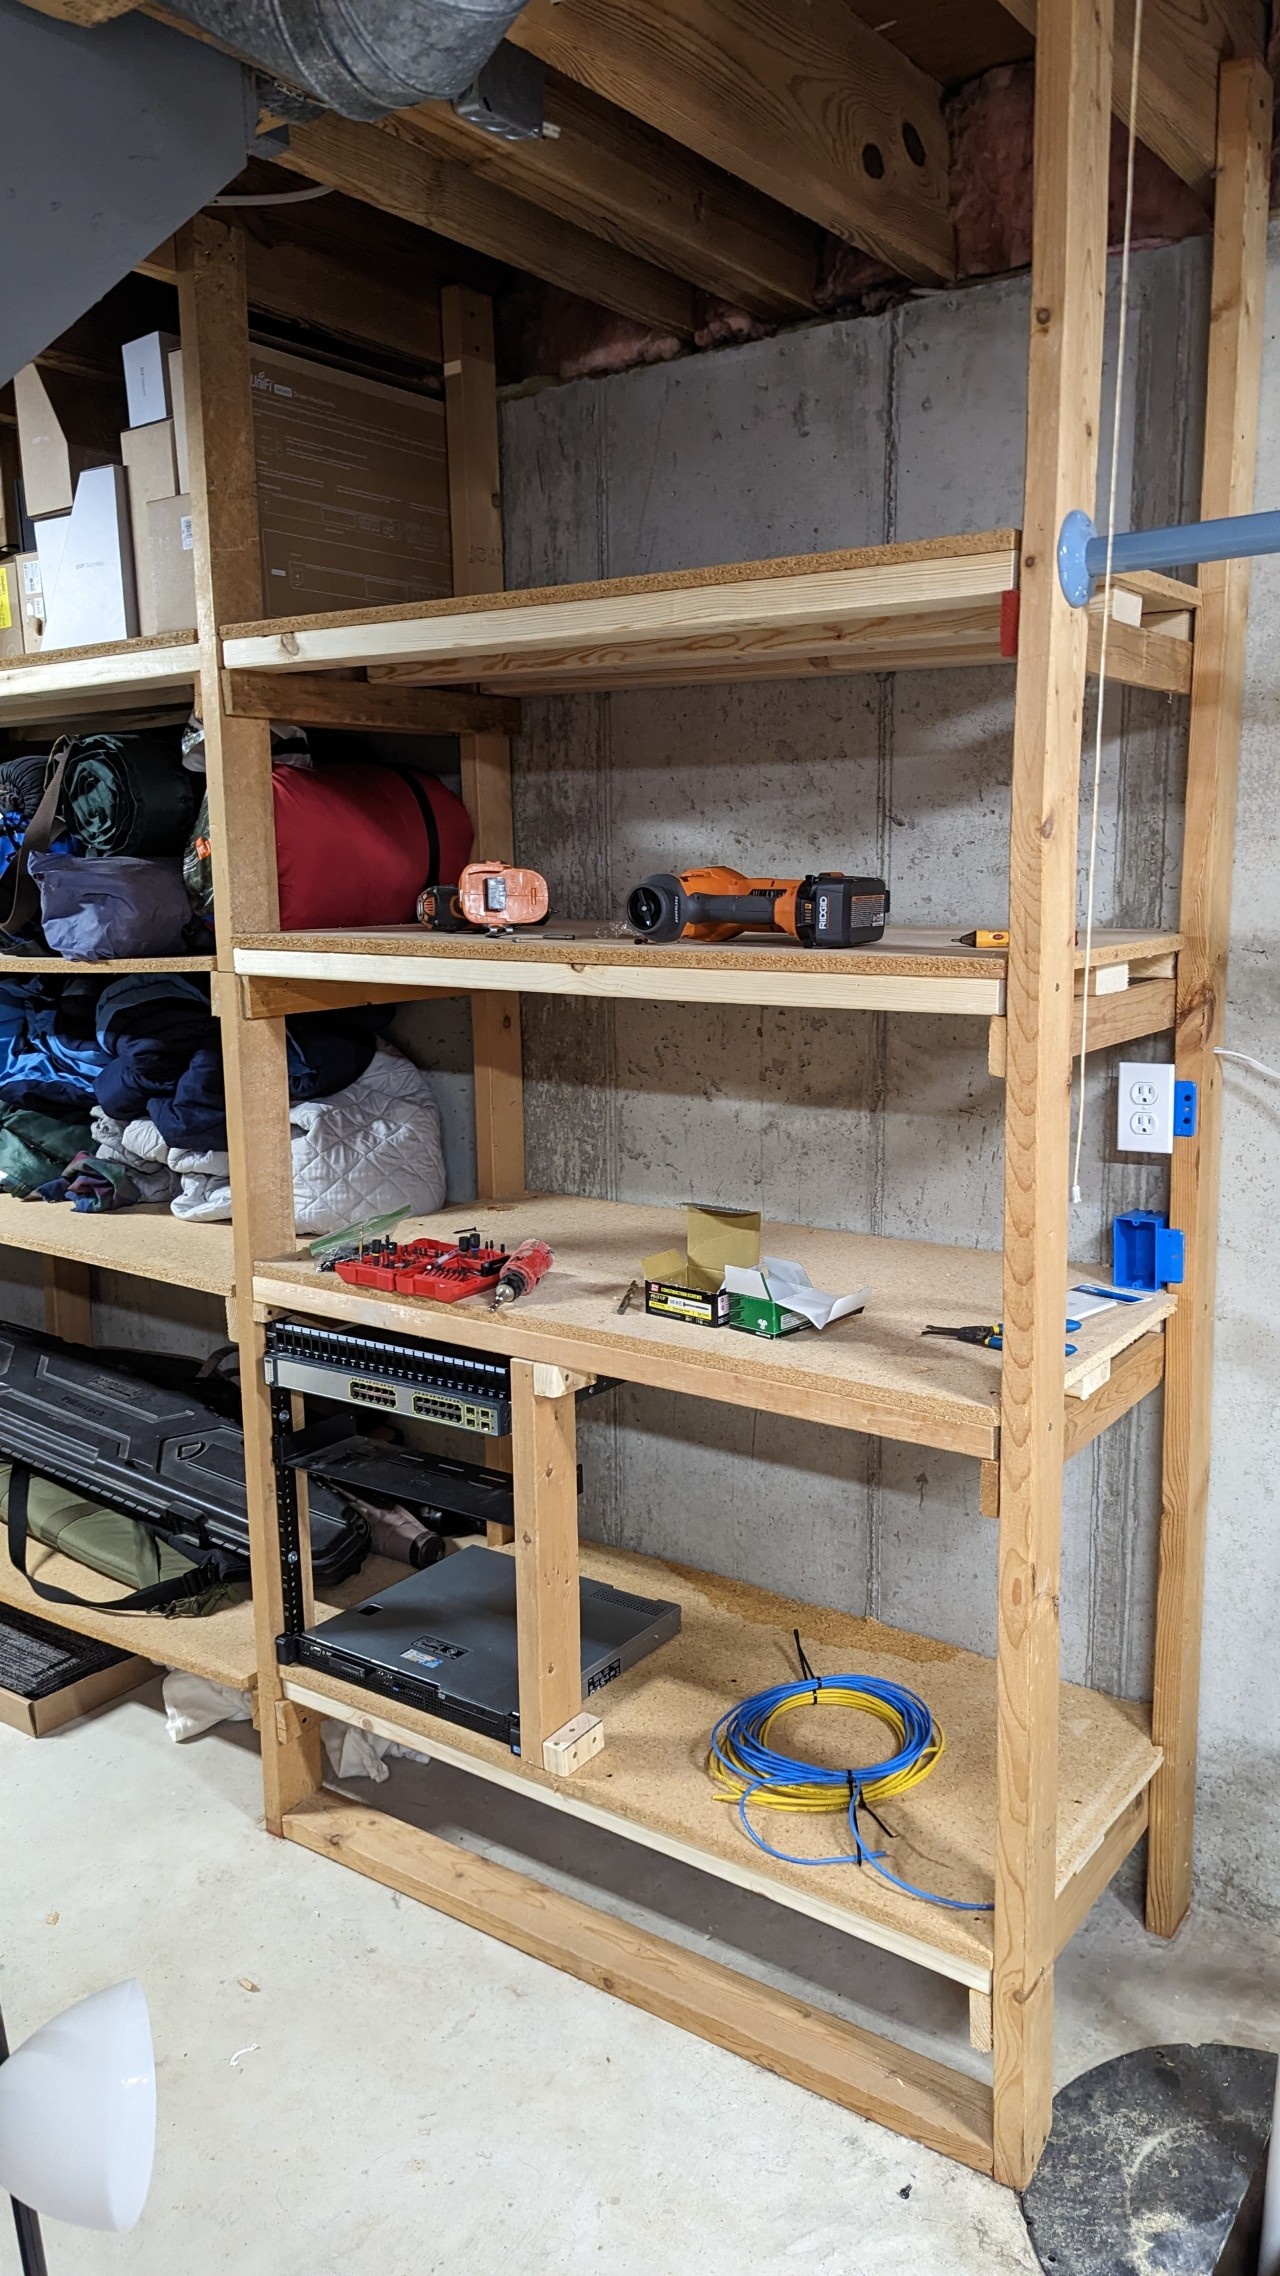
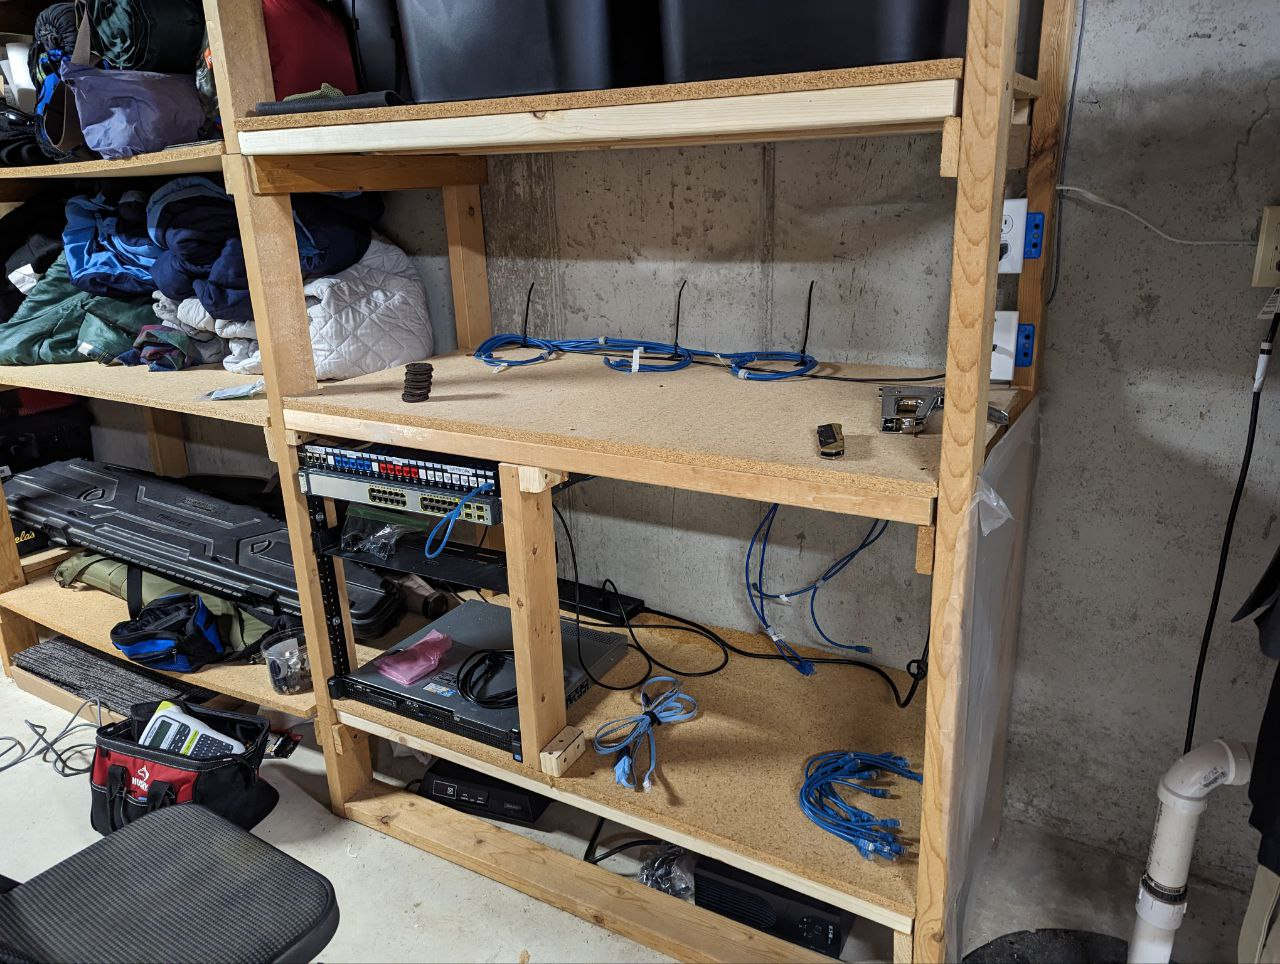
Restructure P3: DIY Rack, Wire Management
After getting the shelf built, next came modifying things to accommodate wiring. Ideally, in a well-designed lab, you want HV and LV wiring as separate as possible. When you put them side-by-side you introduce the possibility of interference.
I drilled some 2" holes using a hole specific Diablo drill attachment into the MDF on opposite sides towards the back to accommodate for this requirement. The far-left hole would be for LV (data) and the far-right hole would be for power (UPS cables, power strips, etc.)
Wanting to affix the wiring down so it didn't move around, I used adhesive-backed zip-tie squares with wood-screws (I really didn't want those suckers to move!)
After finishing "constructive" work, I installed a new electrical outlet for the shelf, and ran a cat5e line (this is going to be upgraded to 10gbe fiber in the near future 👀) from my network rack.
Now, I know this is a cardinal sin, but I decided to steal power off of my sump pump's circuit. It's a high-gauge wire, and I only realistically need 1-2 amps. Everything is on pure-sine PDUs, so nothing (but the PDUs) could get fried. So it's totally safe. Right? Right?
Restructure P4: Migration
After getting everything constructed, and electrically wired up, I followed up with laying wiring down in preparation for equipment migration.
I ordered some 7ft, 1ft, and 0.5ft patch cables from Amazon, as I figured I'd start over in that regard. I had a bit of a mess going on with different colors, sizes, and everything was super short, so not a whole lot of it was reusable.


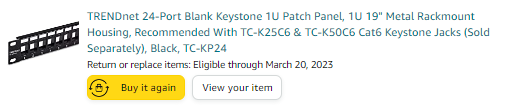
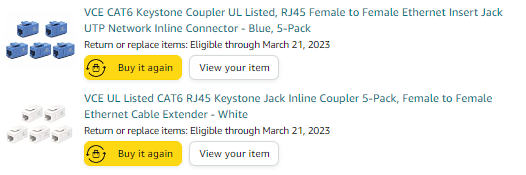
I also ordered some rackmount accessories, because you know you just have to when you have a 12u rack to fill up. Keystone panel, and keystone(s) of various colors.

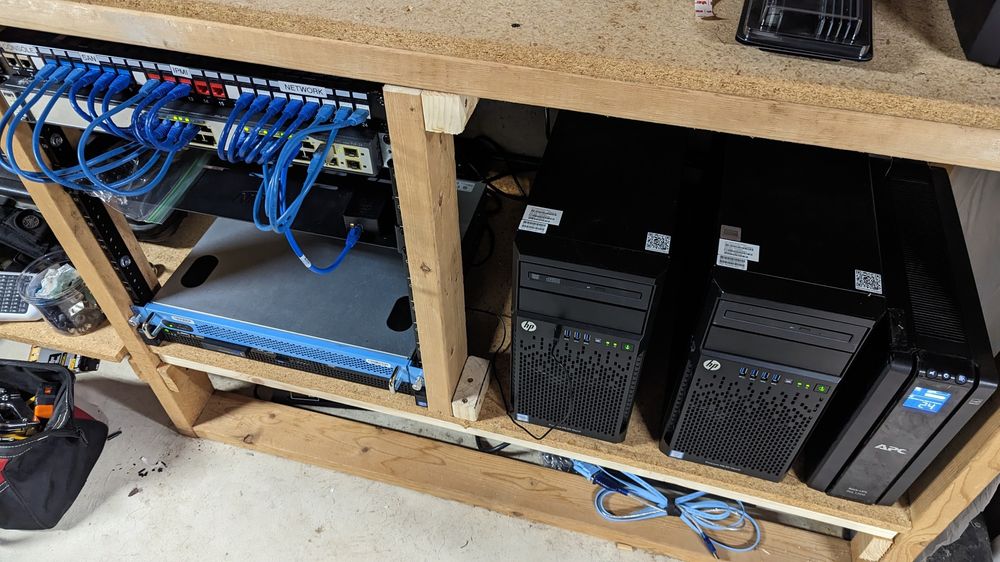
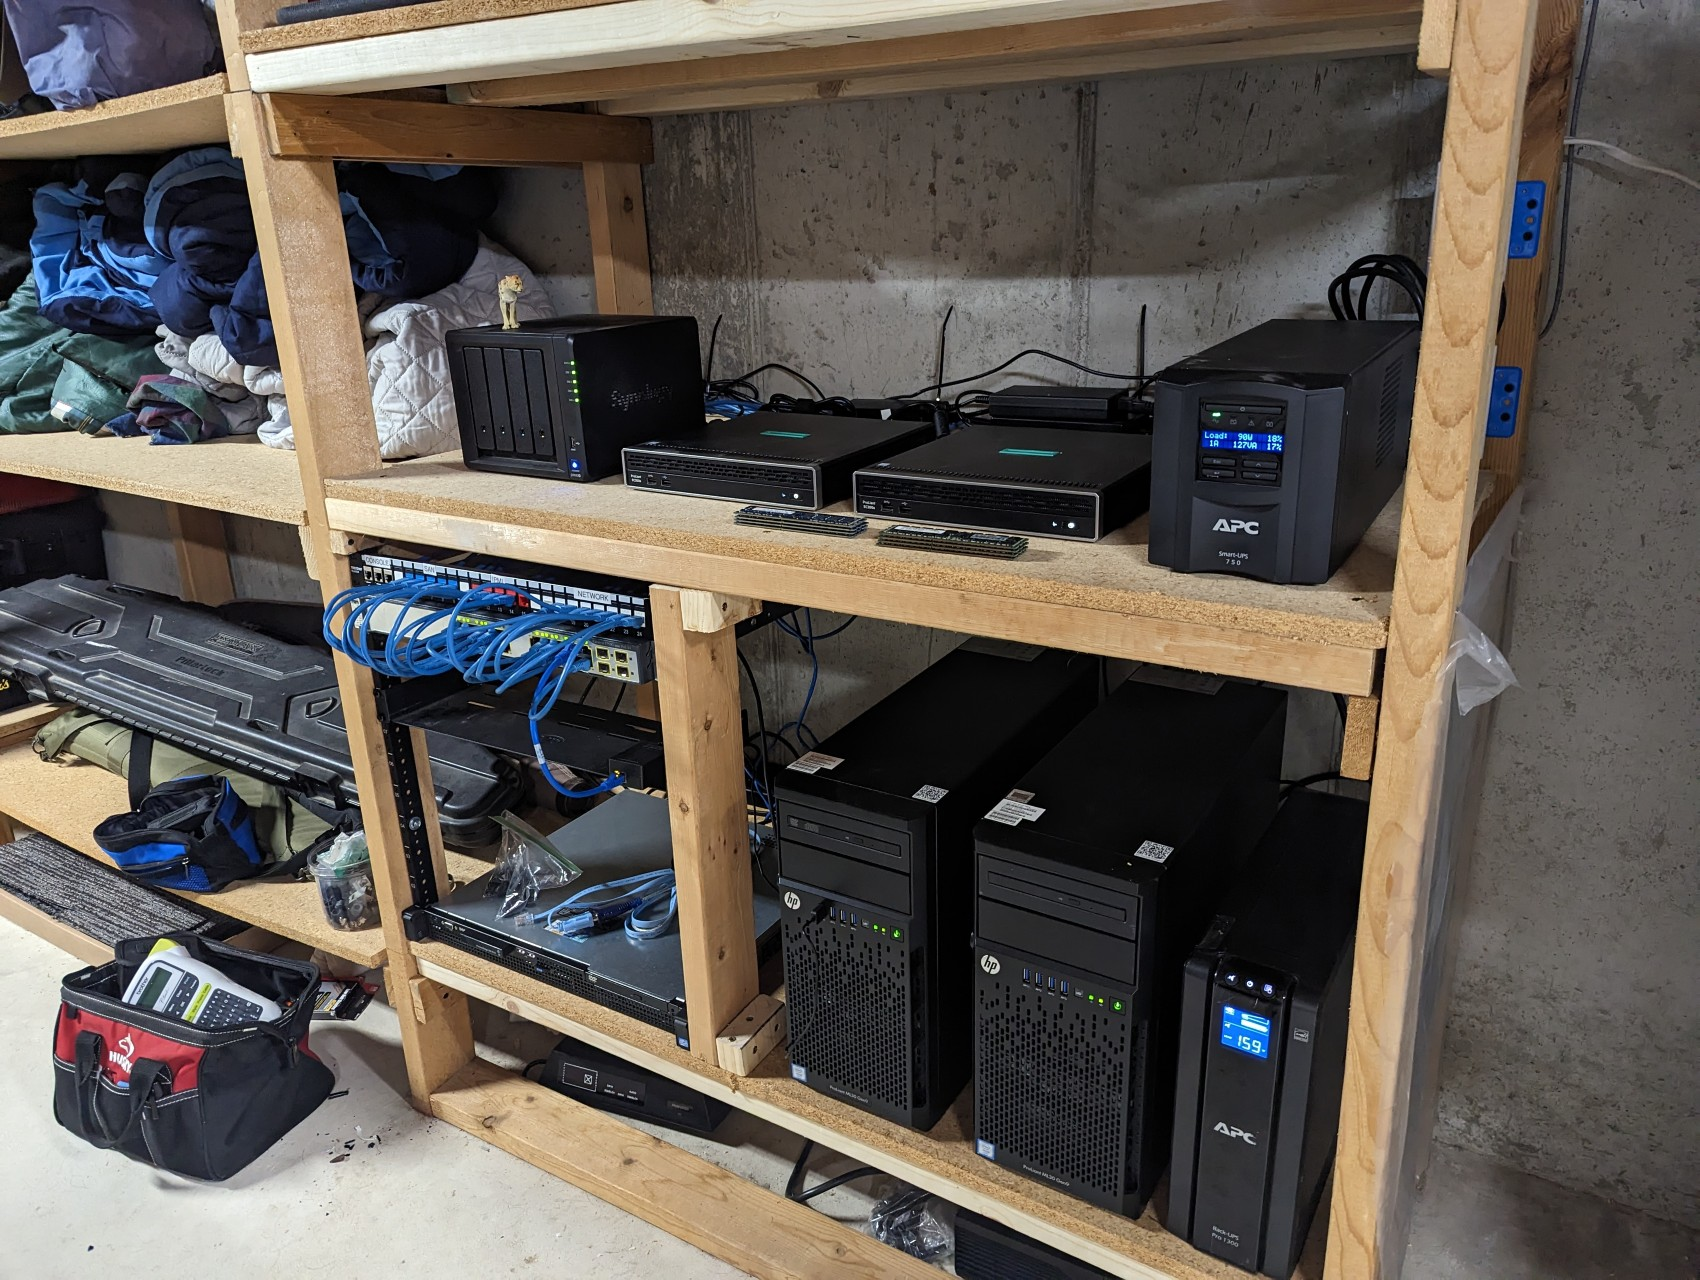
During all of this, I had decided that I wanted to upgrade my core lab-switch to a 24-port L2 switch. Previously, I had been using a daisy-chain mess of USW 5 and 8 port PoE switch(es) hacked together to get the bare minimum of ports I needed.
A friend of mine hooked me up with a Cisco (I know, not Ubiquiti, but it was cheap!) 3750g-24ts-s. I totally felt right at home with this switch, as I learned on a combination of 3750's and 2960's in high school and practically knew this switch front to back!

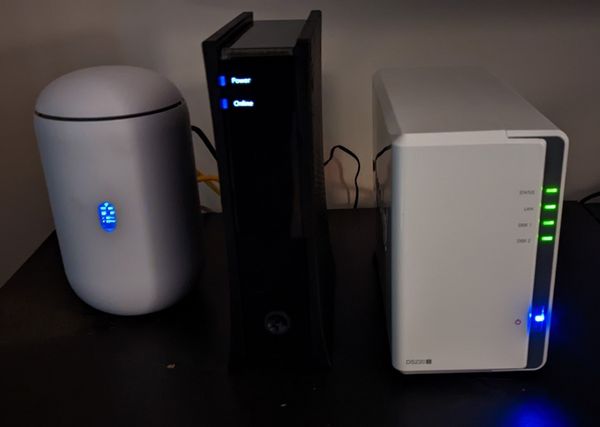
He also hooked me up with a R210ii, I've personally never used one of these before, but they're relatively low-power.
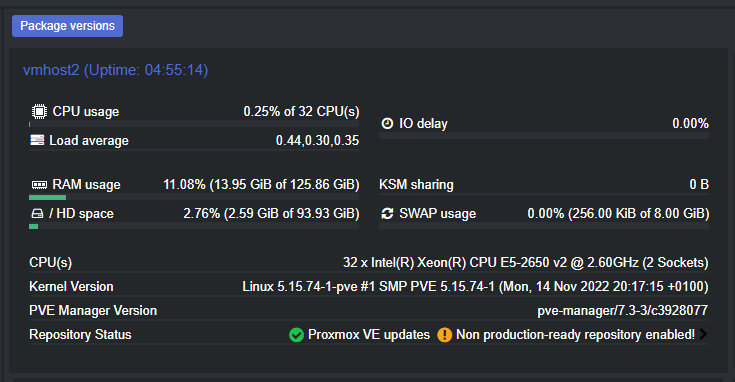
After getting the Cisco 3750G setup with VLANs, and tagging on ports for my NFS network, I migrated all of my equipment over to my new location! Not too shabby!
Phase 2: Equipment Upgrades
Now that we're all settled in our new location, it's time to get to the fun part, UPGRADES!!!
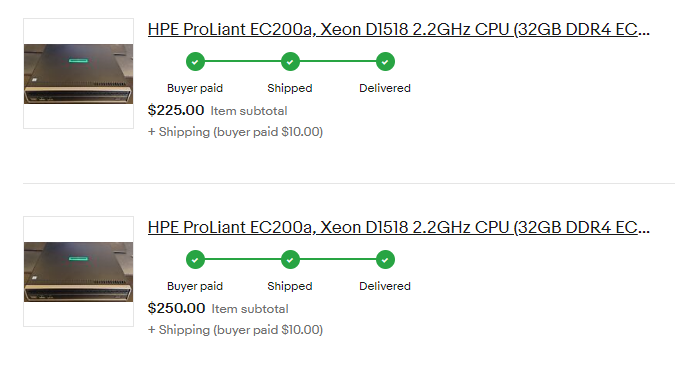
Those HPE ec200a units, while they sip power, they don't have much "kick" behind them. So, I decided to flip them.
Turns out, the seller(s) that were selling them on eBay ran out of them, so nobody was selling them in the $200ish range anymore. Bummer... Except, I could easily get $250 for each of them, and get what I put into them back!
I managed to sell both for well over $200+ each, plenty of money to invest into new equipment!
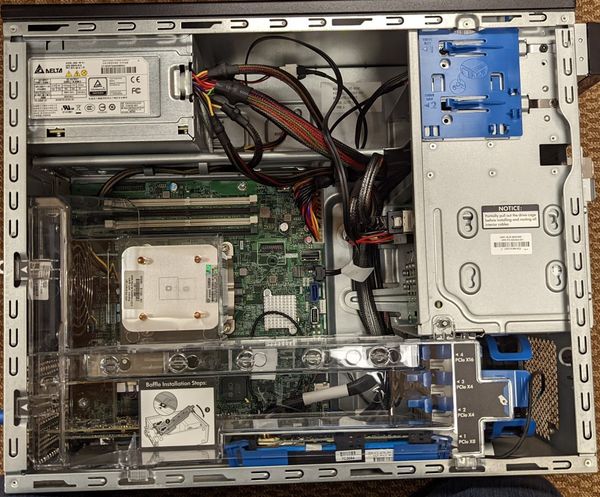
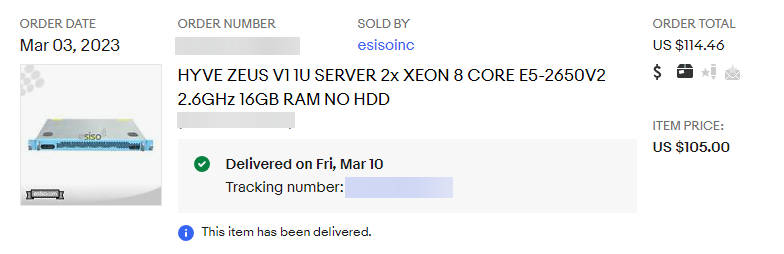
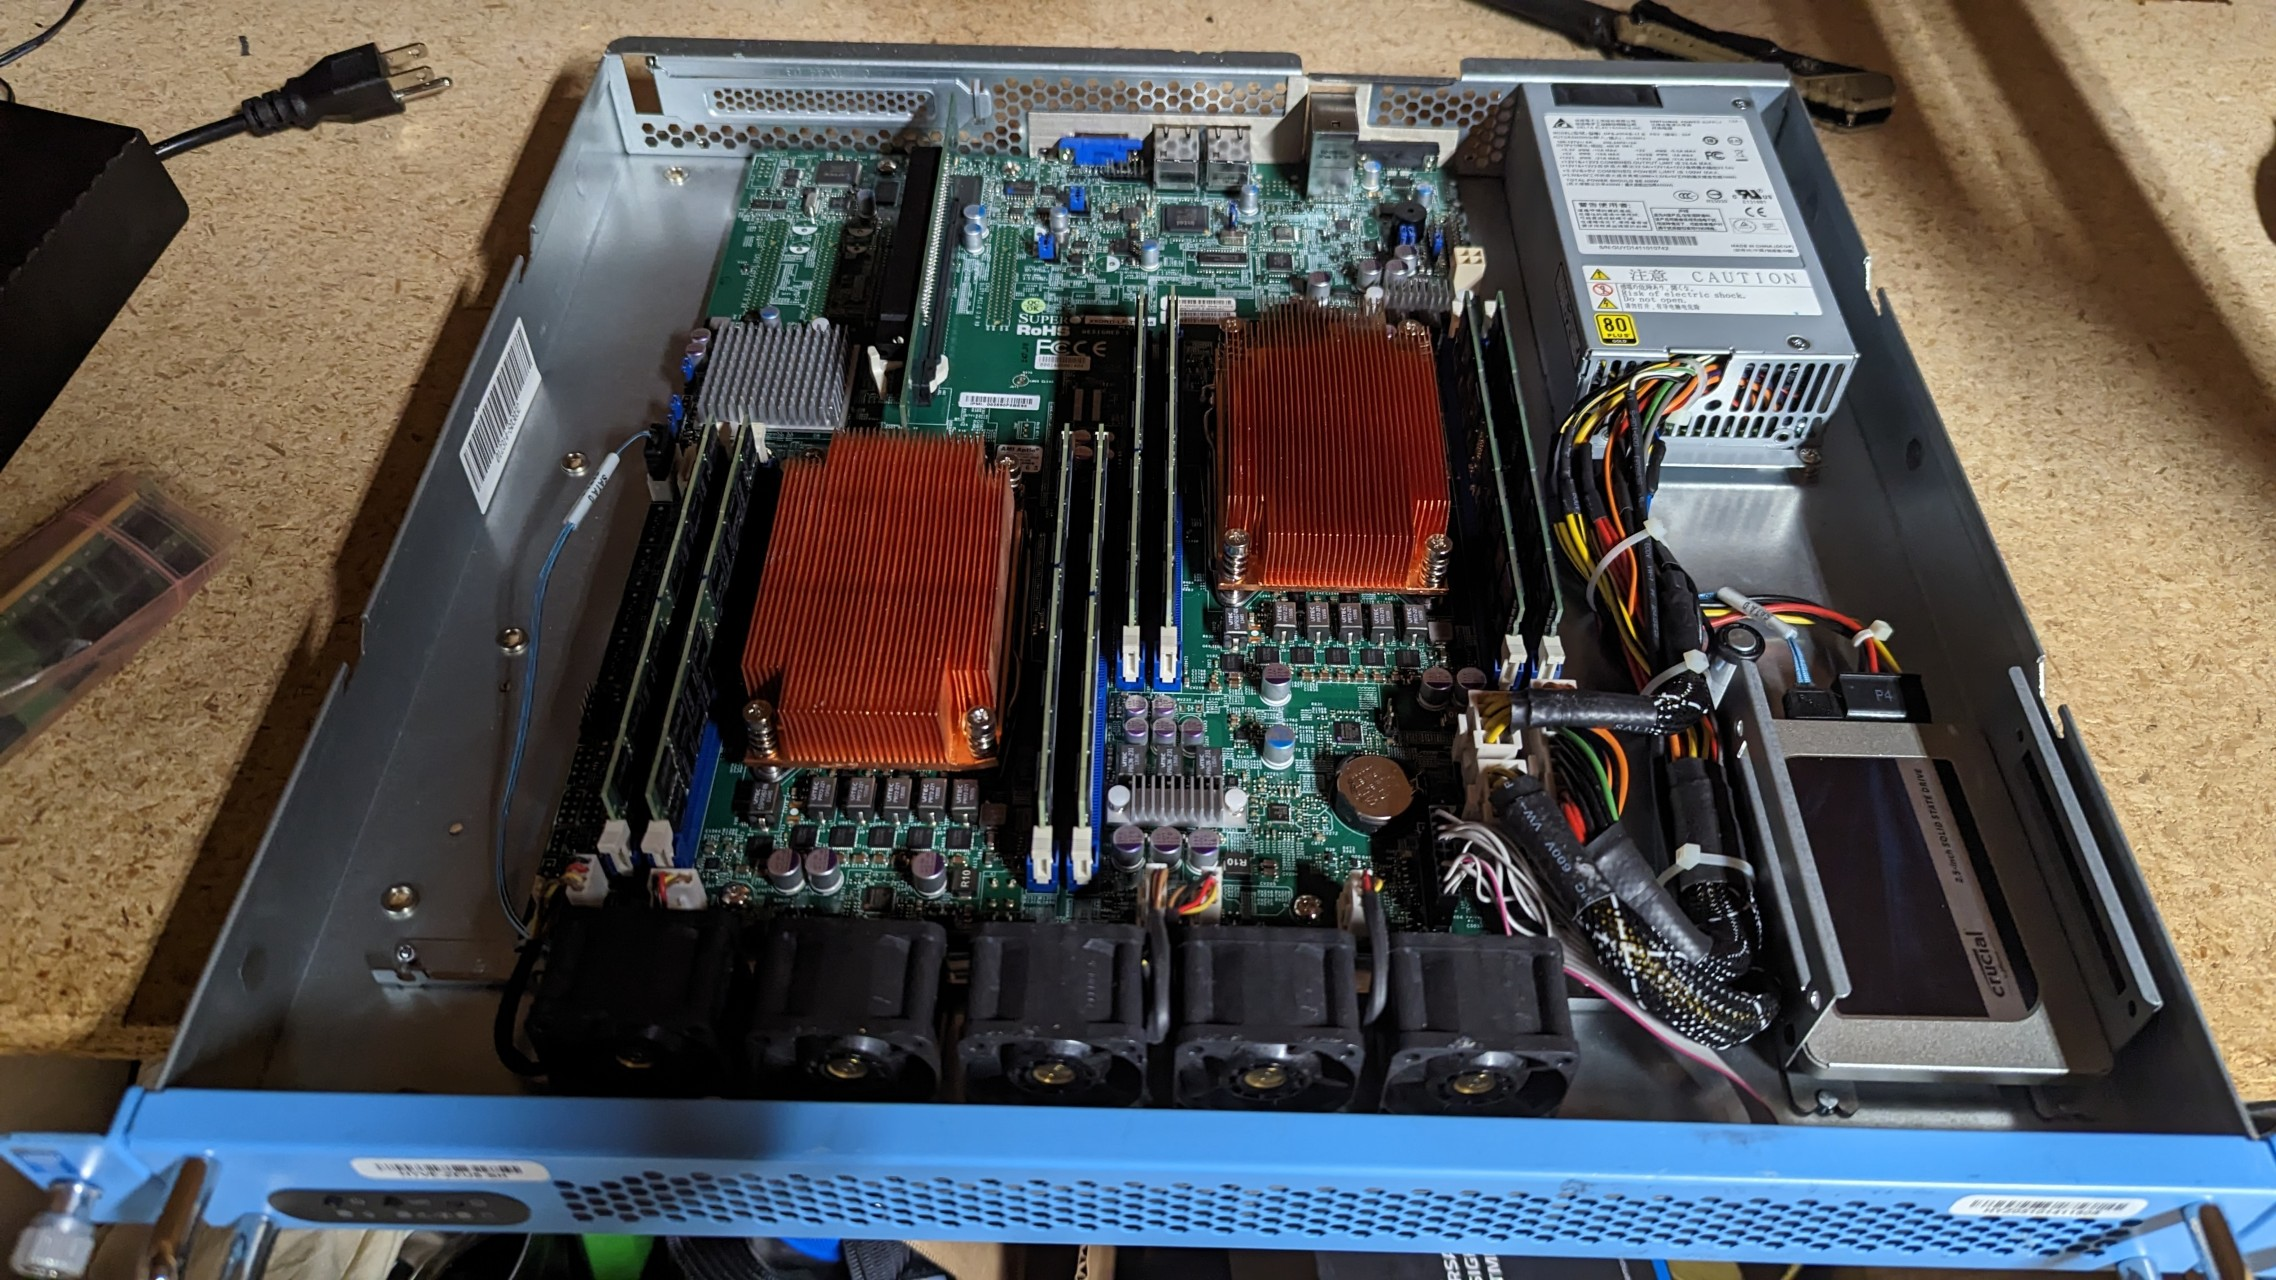
Being a total Craft Computing nerd, I had seen his review on a Hyve Zeus v1 server. There's a company named ESISO that's been selling them forever on ebay for ~$120 per-unit. Not a bad deal for a dual-socket 1u server!
With 8-dimms, a PCI-e 16x slot, and IPMI onboard, I totally saw the opportunities available and snatched one right up!
I already had a ton of DDR3-ECC RDIMMS laying around from that T710, and just "borrowed" them and put them into the Hyve Zeus server. 128GB of RAM in one host was something I hadn't seen for a hot minute!
I also took the opportunity to upgrade my R210ii that I had recently acquired, however they have their own caveats. They explicitly use DDR3-UDIMMS, and will not accept RDIMMs due to the Xeon e3-12xx v1/v2 CPUs not supporting them. I had a bit of a hard time finding RAM at first, but I found a vendor selling kits pretty cheaply and got it hooked up.
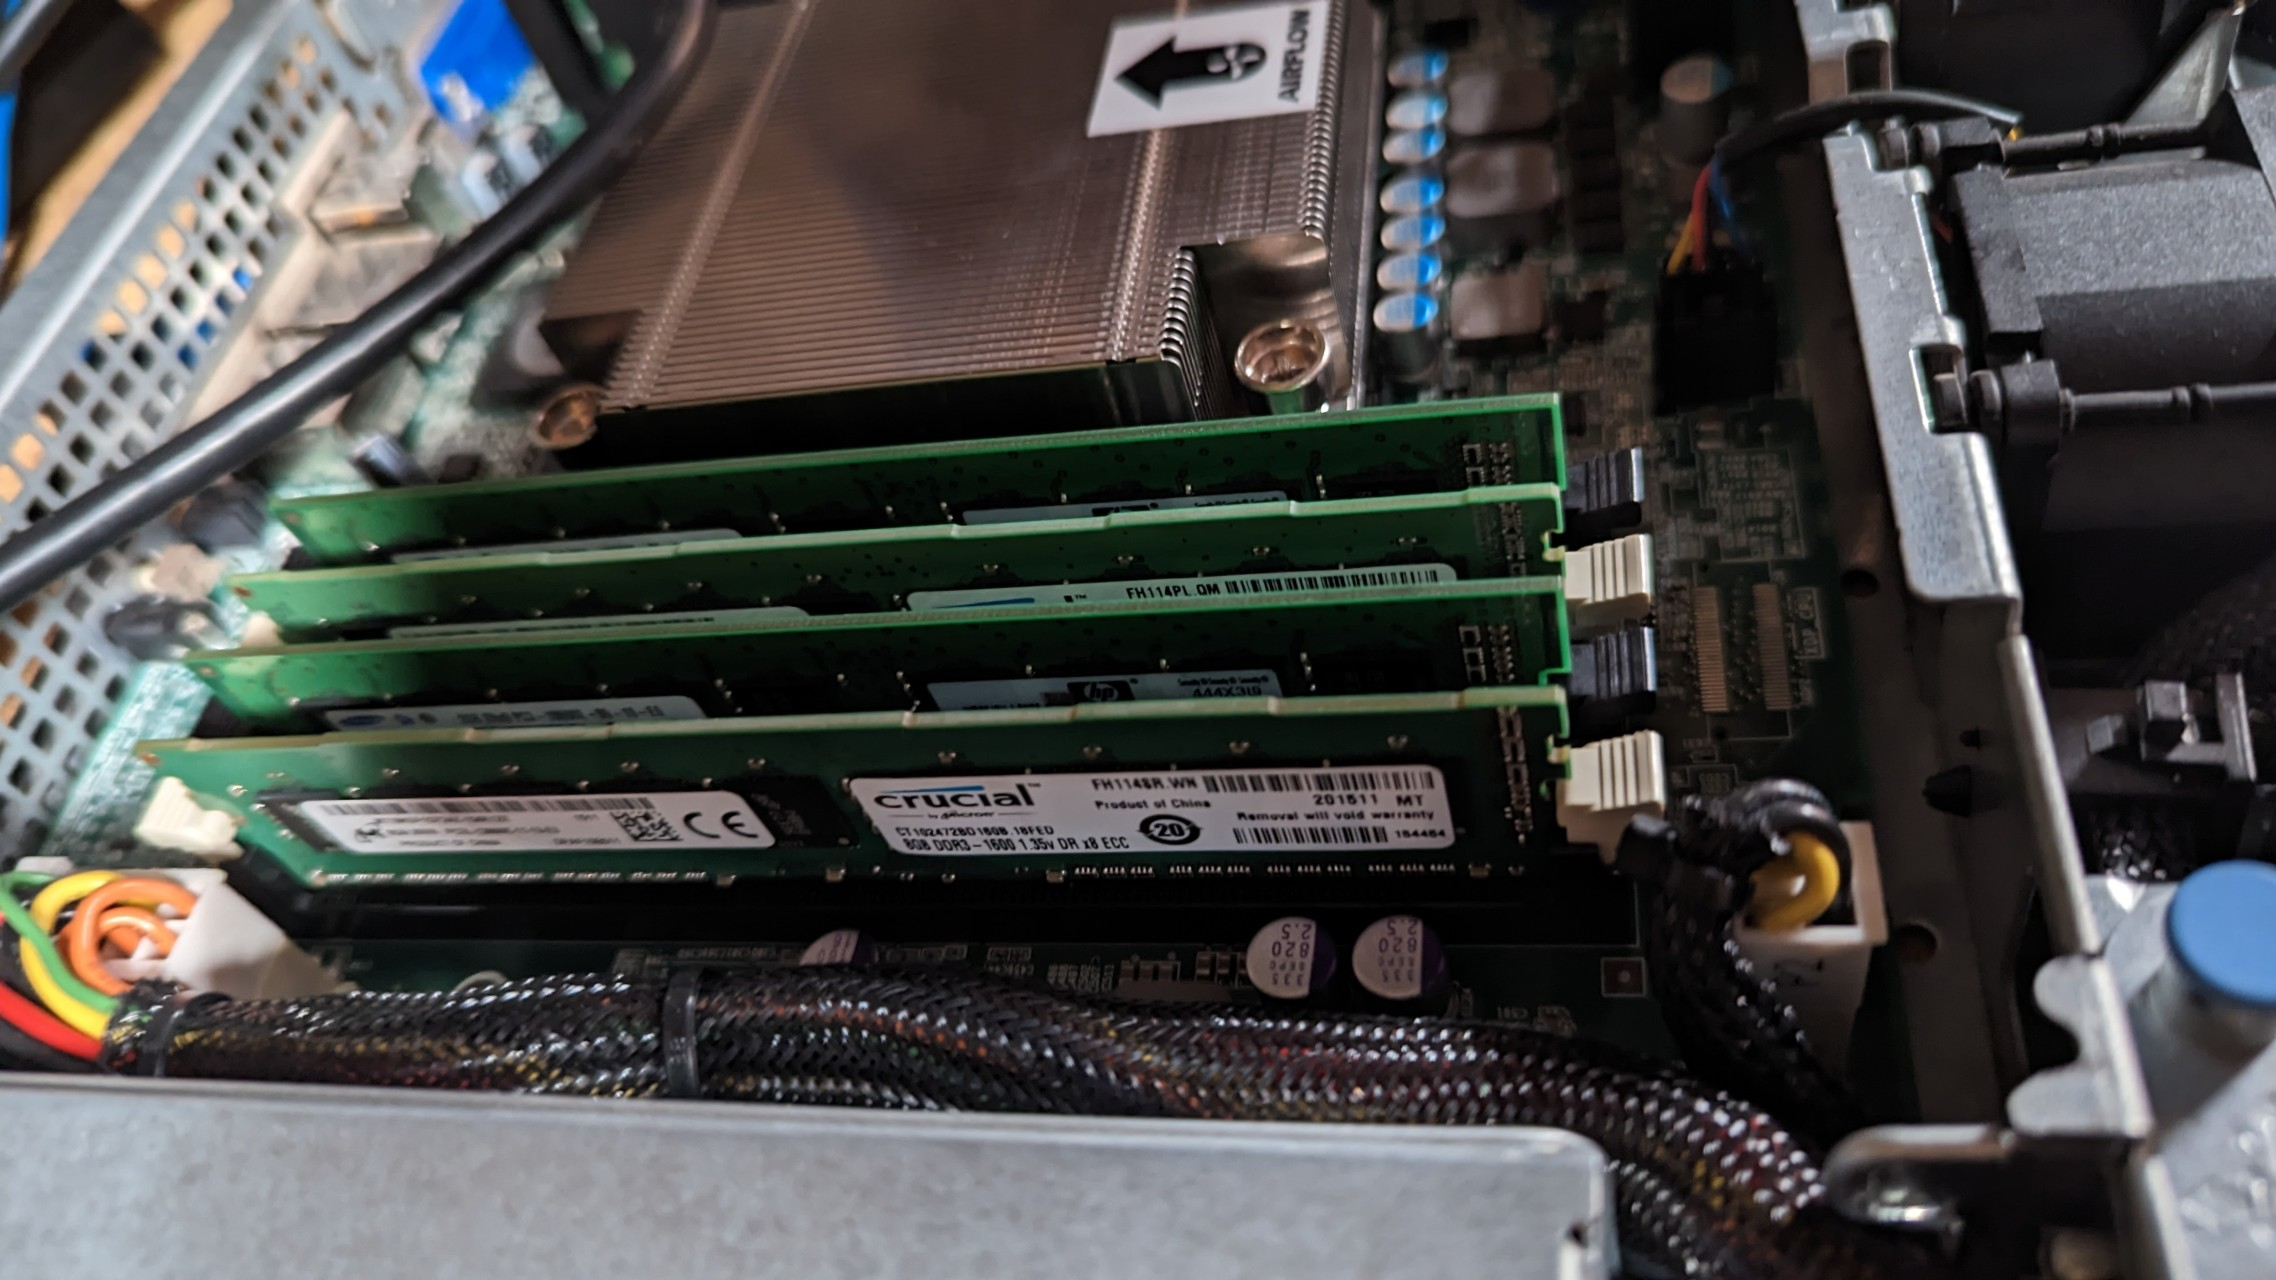
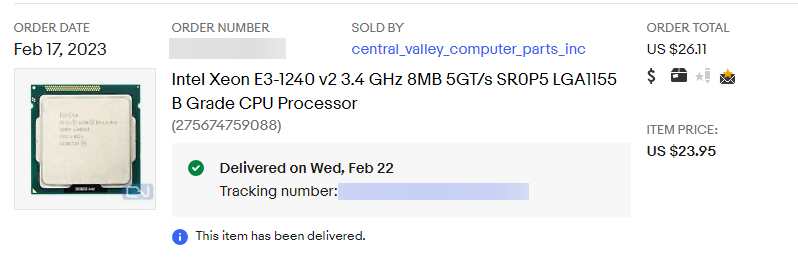
While upgrading the RAM, I also took the opportunity to upgrade the CPU to a Xeon e3-1240 v2 from an e3-1220 v1, moving from 2c/4t to 4c/8t and a much lower TDP rating.
This setup change uses a little bit more power, but I'd say the power-draw contrast is worth the space I've opened up to grow further down the road!

Until next time! Missed you all! ♥️