Home Office Project!
So, our roommates moved out a while ago, and I had a word with my partner, and we both decided it was time I got my own office!
I'm going to be focusing this post on the things we did to transform what was just a small basement bedroom into the perfect home office for me, with some extras!
Well, you gotta start somewhere, right?
First and foremost, I had to decide on a few things;
- What kind of flooring did I want?
- What color(s) did I want the room to be based around?
- Did I want to change anything layout-wise?
- Did I want to add anything to the room? (Outlets, datadrops, etc.)
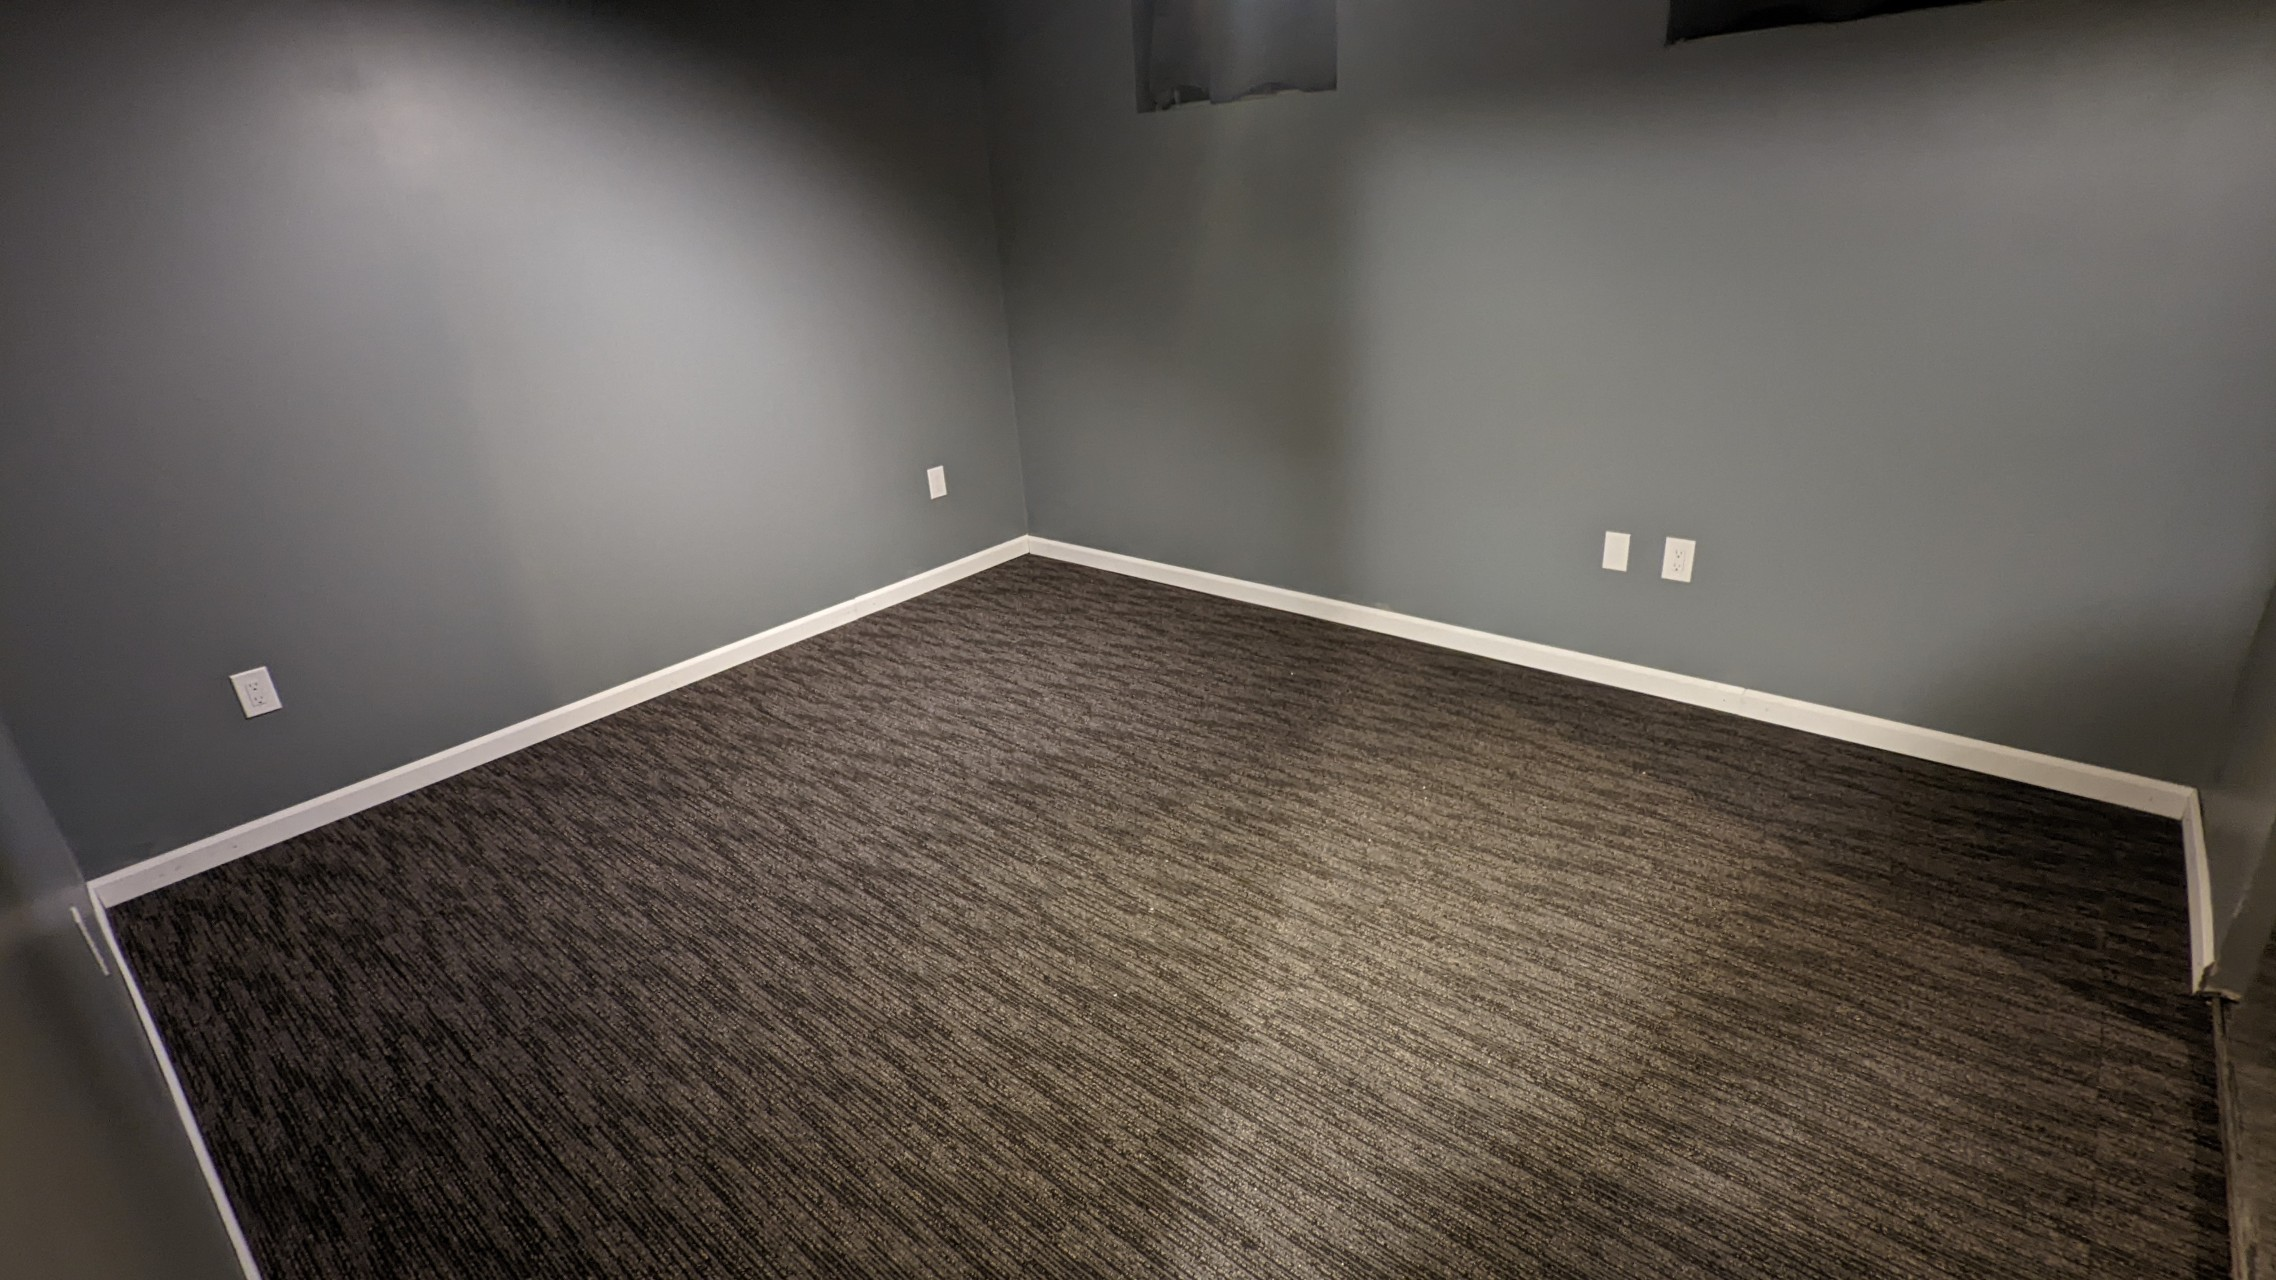
I decided I wanted a modern theme for the room, based on grays and whites and minimalistic flooring.
From there, I chose my colors; White (Baseboards), Stable Gray (Walls), and Black-gray (Flooring).
Next was what kind of material; Latex Paint, Original (Sanded Down, Repainted) Baseboards, and Carpet Squares.
Finally, I decided to redo all of the electrical outlets and switches, as well as the lighting fixture as I found that beige and 90's circular outlets weren't exactly going to fit the whole "modern theme" I was going for.
I also wanted a data drop so that my PC could be hardwired in, or so that I could potentially work on lab projects in my office if needed.
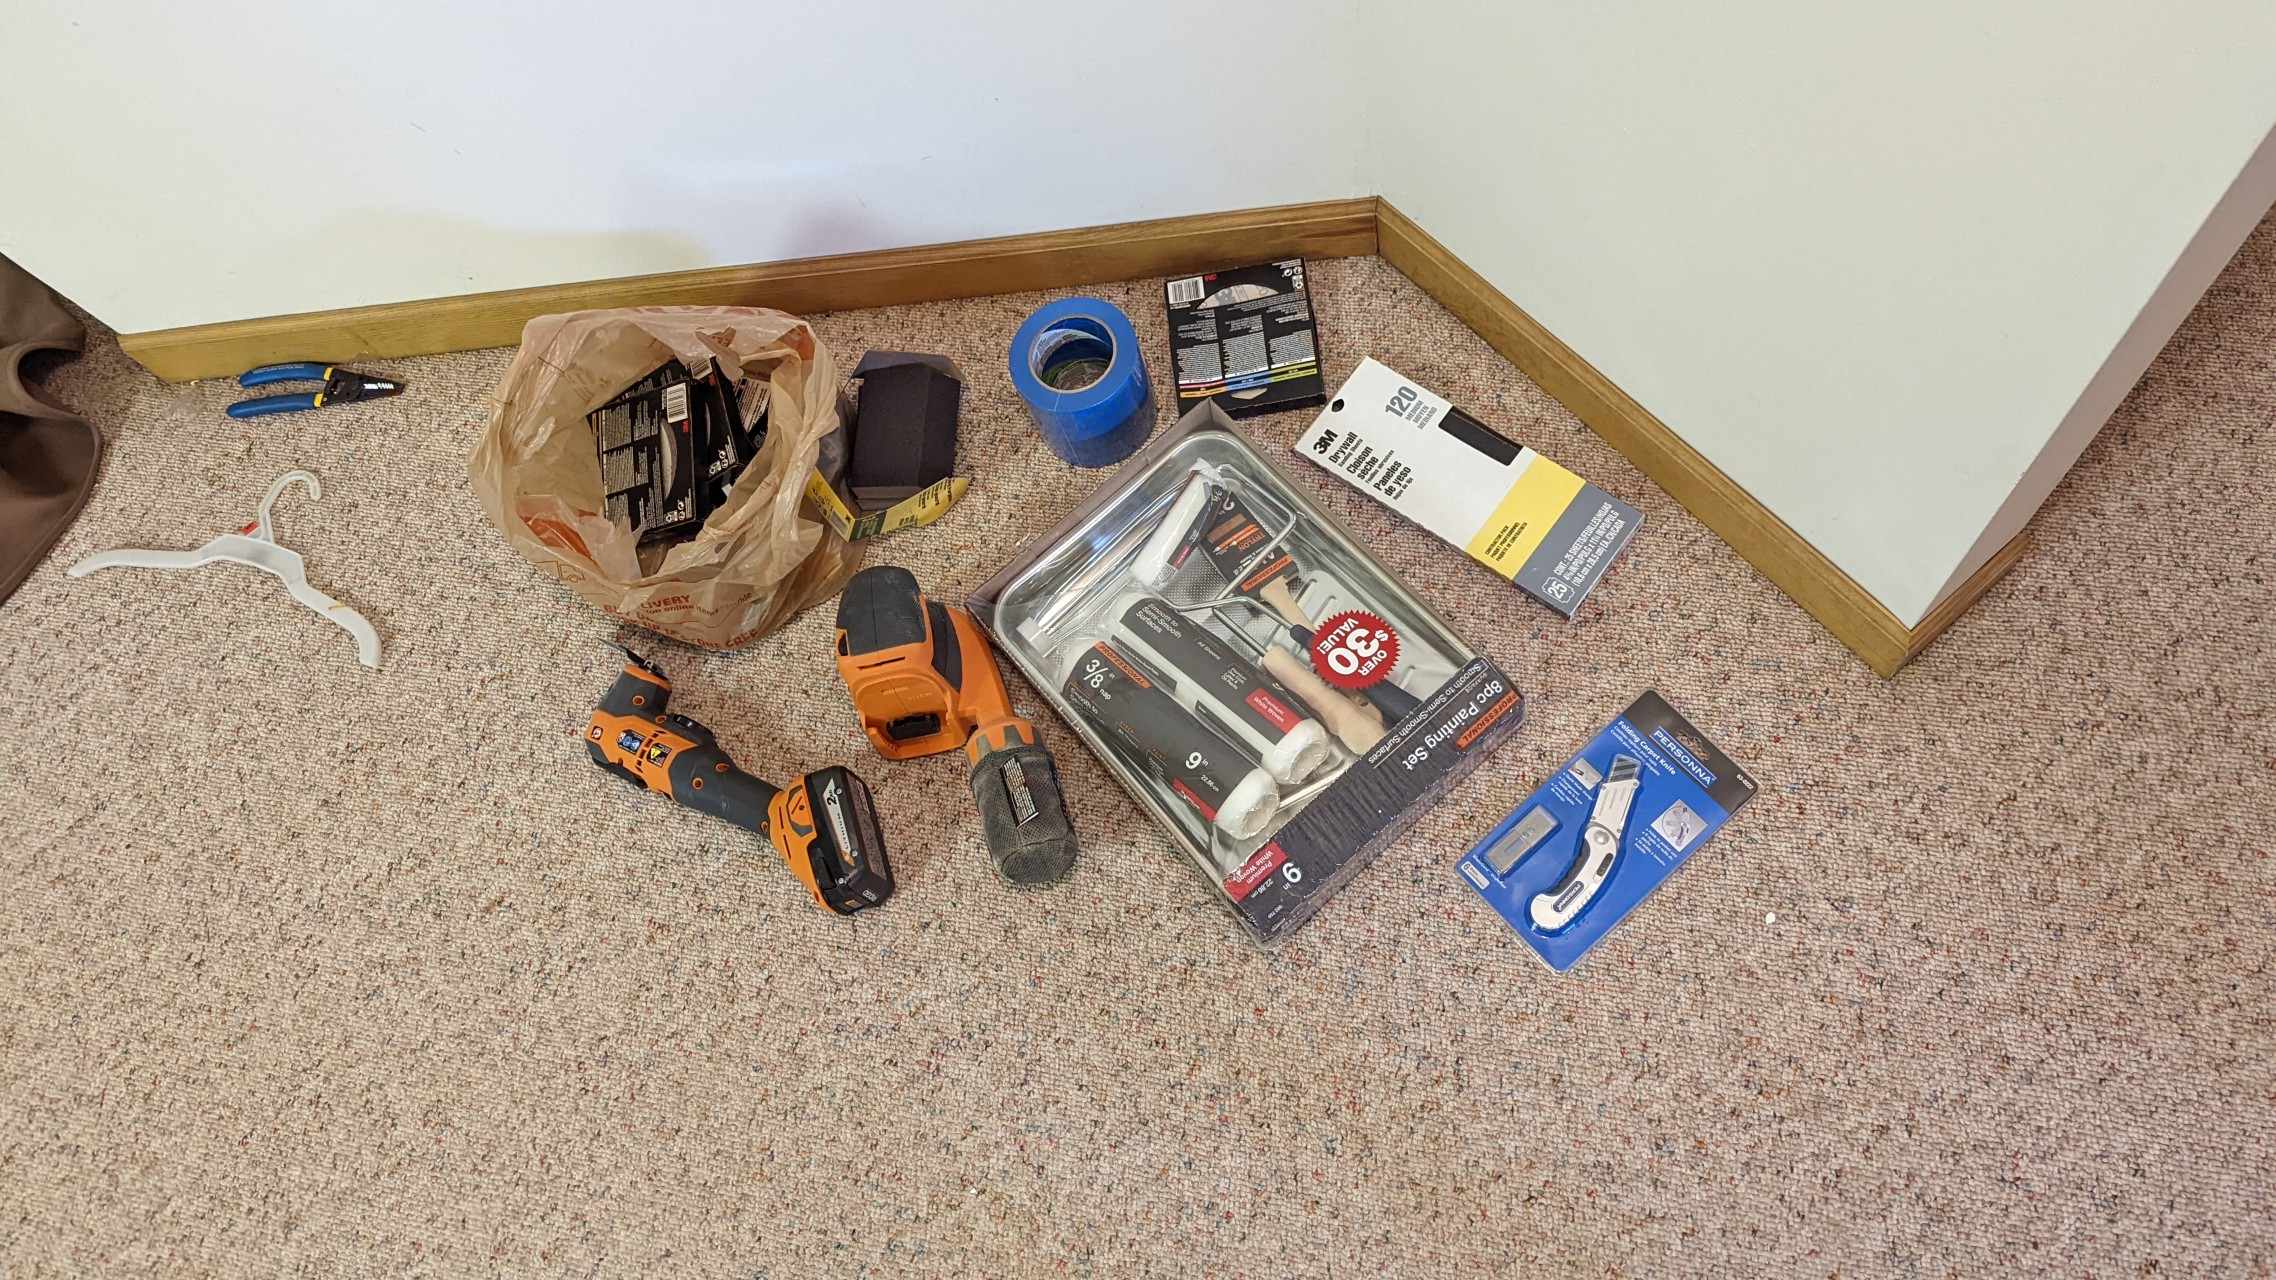
We made a few trips to Home Depot over the course of a month to gather supplies, and got to work!
Tape, paint and lessons learned
Now, neither of us are experts at painting, hell, the only thing my partner had painted before was the side of his carrier during his service in the Navy. I don't think that's quite the same thing...
First, I went to work pulling the trim from the room, making sure NOT to split the wood, or ruin it in any way. Not too bad, pretty straightforward.
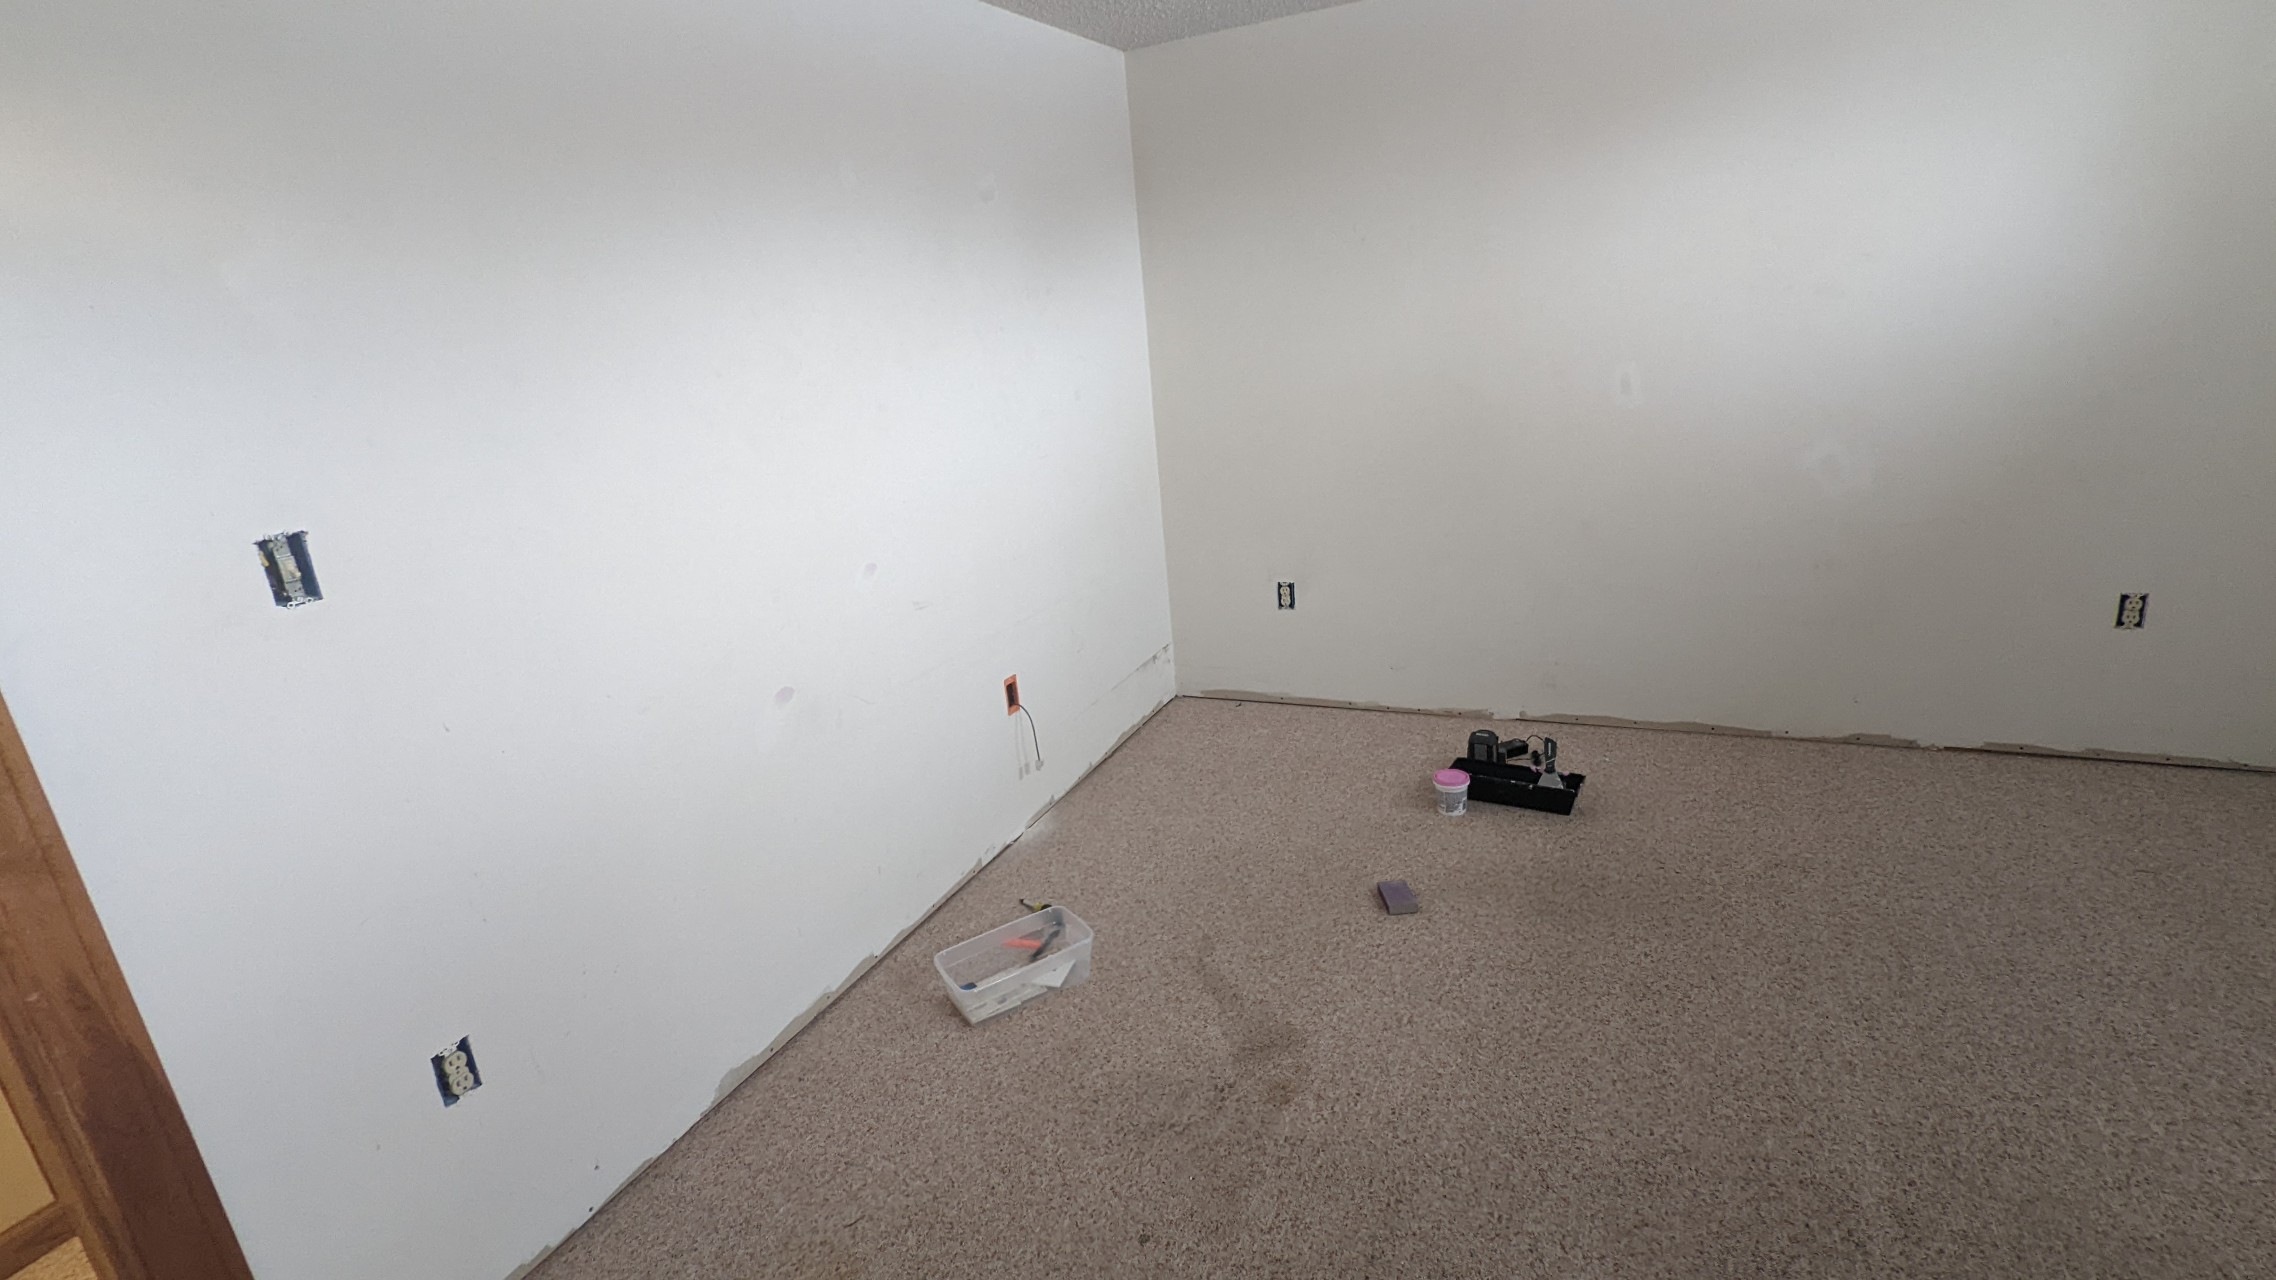
Then, we taped the doorframe(s), window sills, and whatever else needed to be taped.
Finally, we got to work painting, mixing the paint with a stick and pouring it out into trays and using rollers.

Painting required ~2 coats, but not bad overall. Touchups were made with a paintbrush in the corners, or in spots that weren't quite right.

Removing the existing carpet
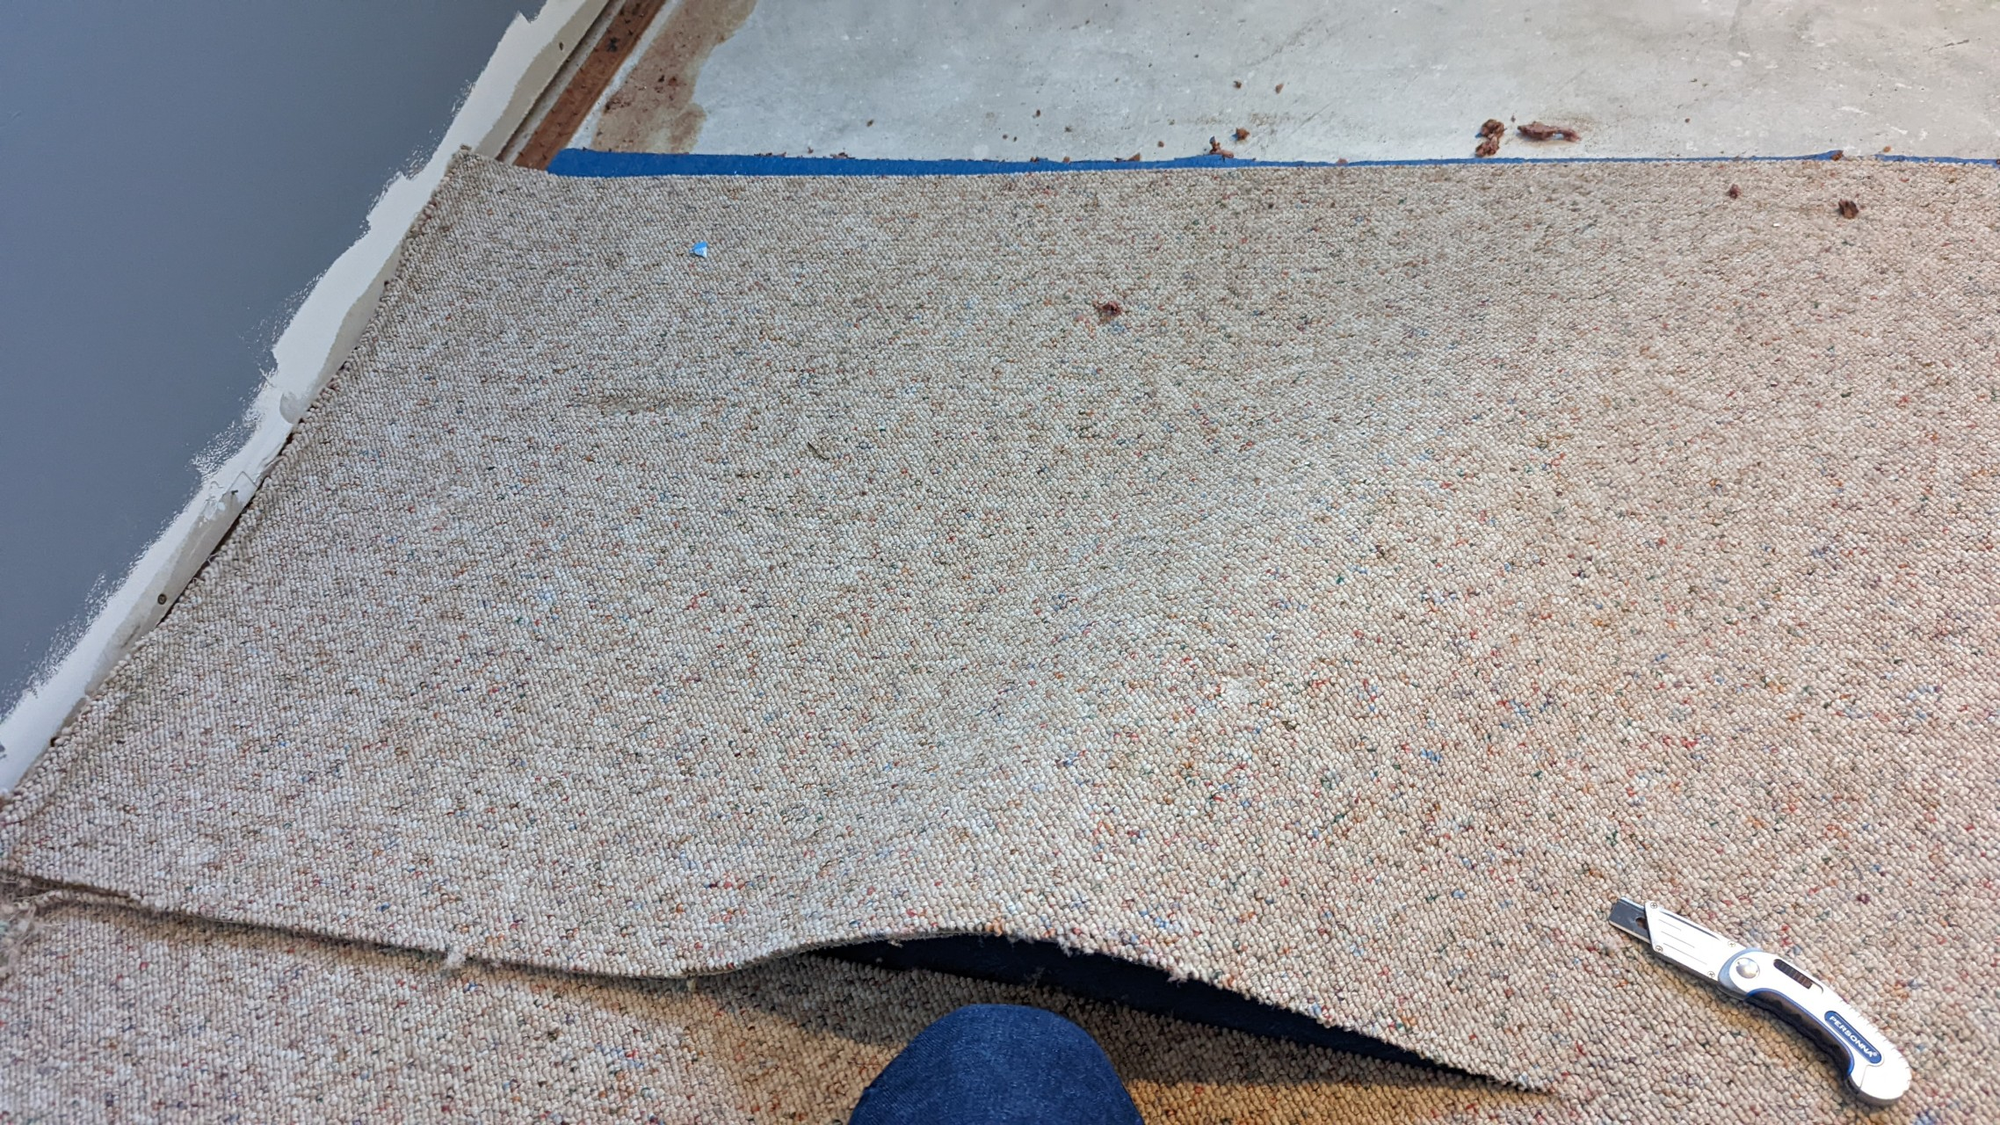
After we wrapped up painting, we had to remove the old nasty-looking carpet.
In hindsight, we should have removed the existing flooring BEFORE painting the room, but meh, is what it is. Just touch-up everything you mess up.
Using a carpet blade, we removed the flooring in sections, carefully rolling it and stacking it elsewhere. This is when things got a bit "dangerous" as we were now exposing raw material (i.e. tack strips, bare concrete, wood, etc.)
After we got the flooring out, we tackled removing the tack strips and adhesive that bordered the room. The previous homeowners had used a nail gun to nail the tack strip into the concrete. Using a prybar and our feet, we hammered the prybar underneath the tack strip and stomped on the prybar to blow the nail out and raise the tack strip.
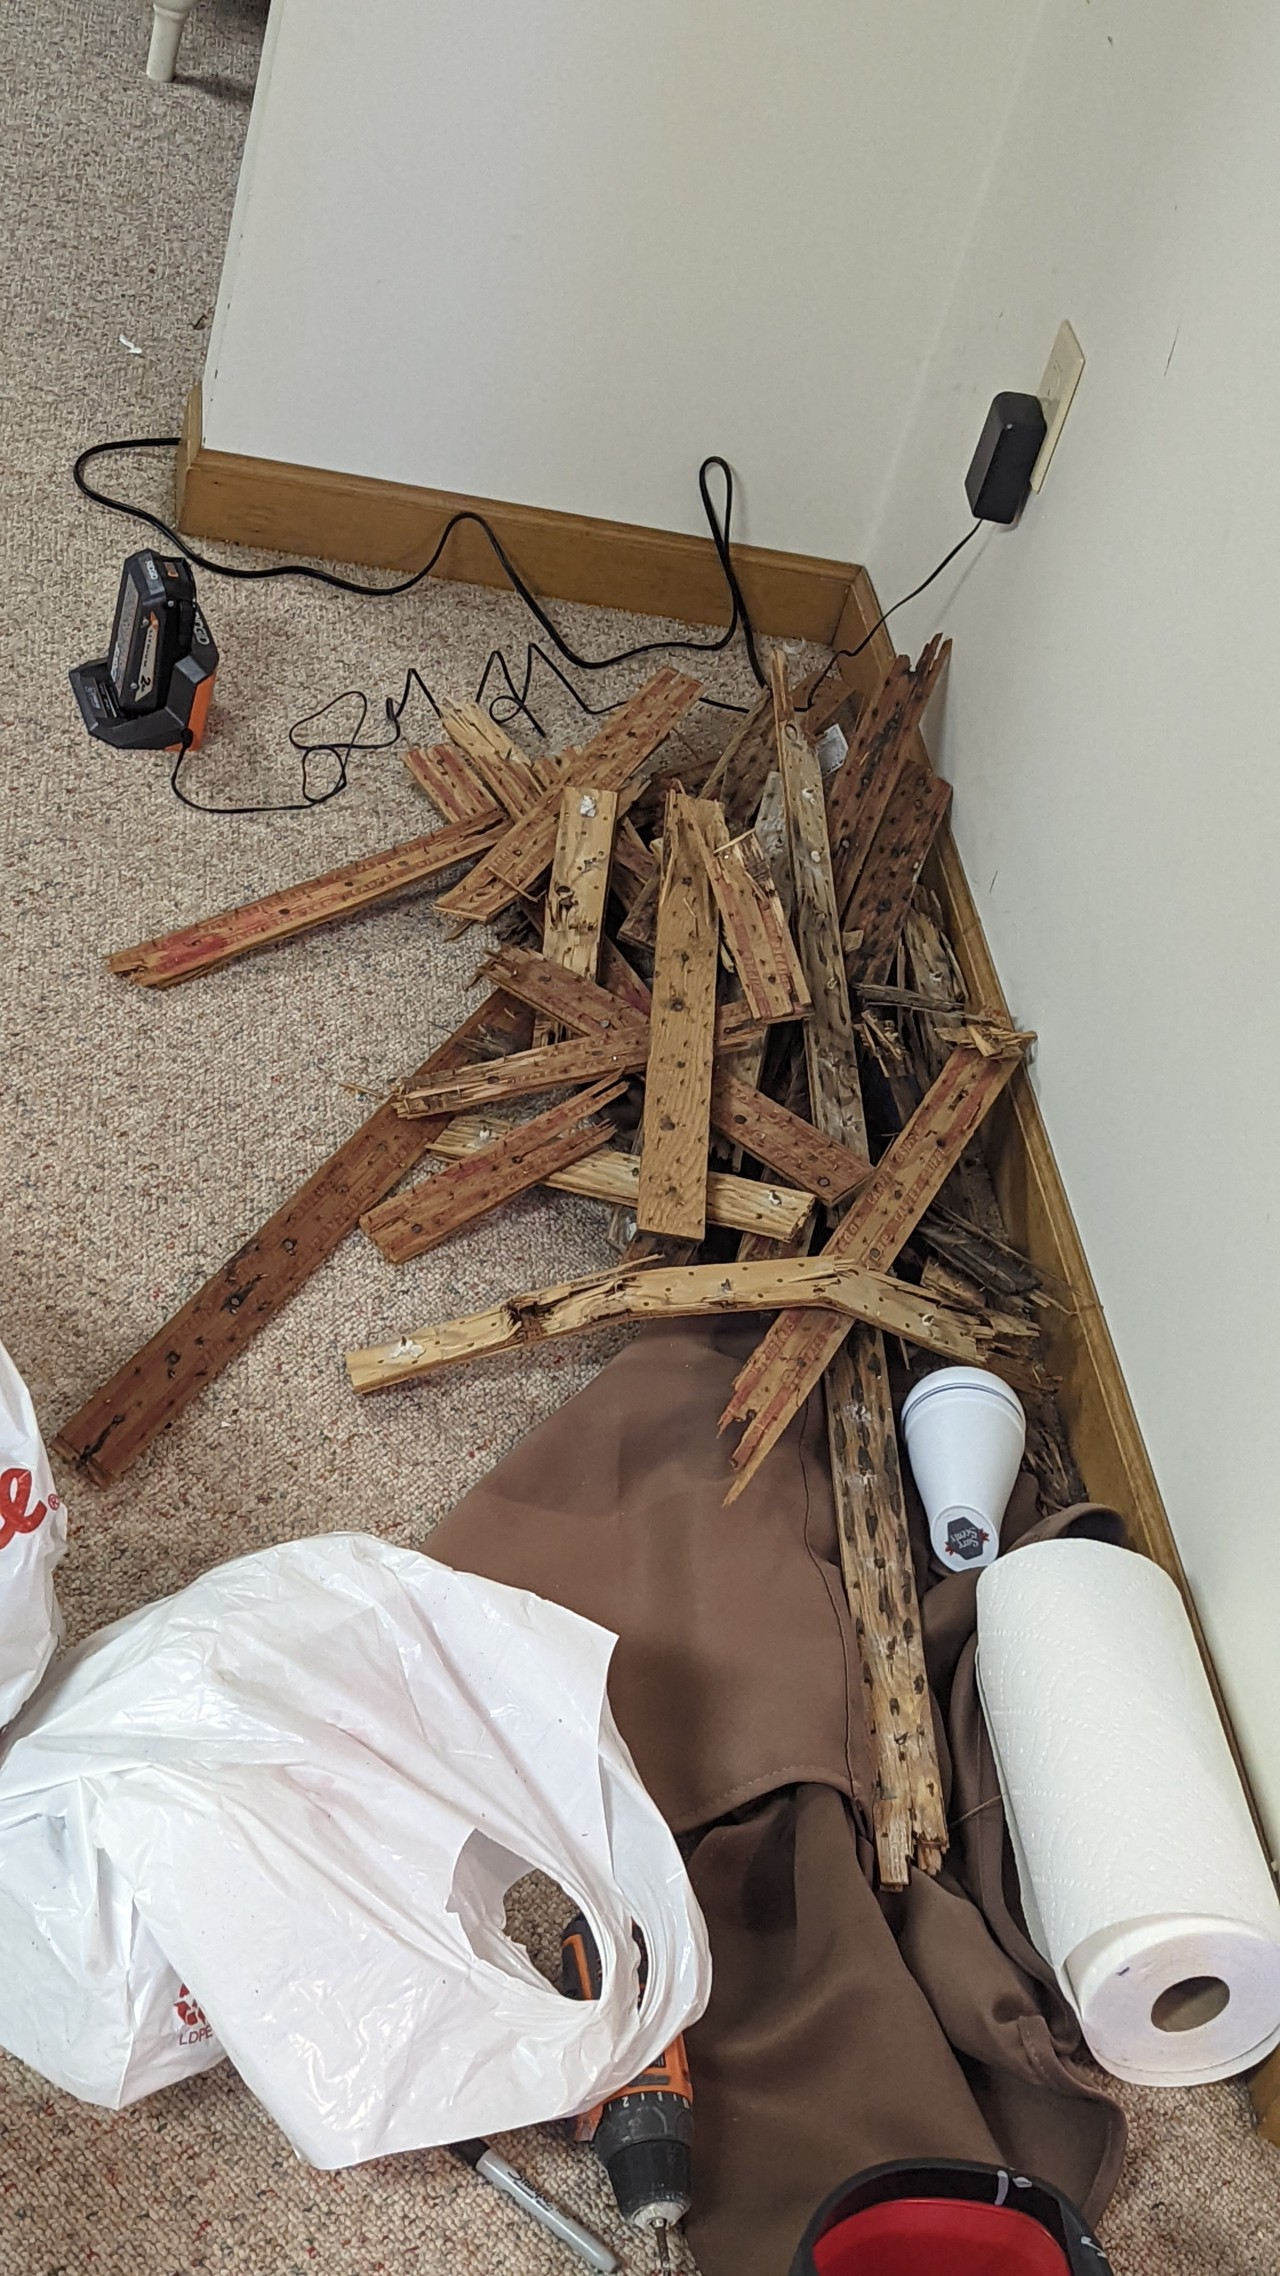
After removing the tackstrip, it became apparent that it took chips of concrete out of the floor along where it previously once was. Simple fix, we took some Quickrete sealer and filled the holes, and smoothed it over with a putty knife.

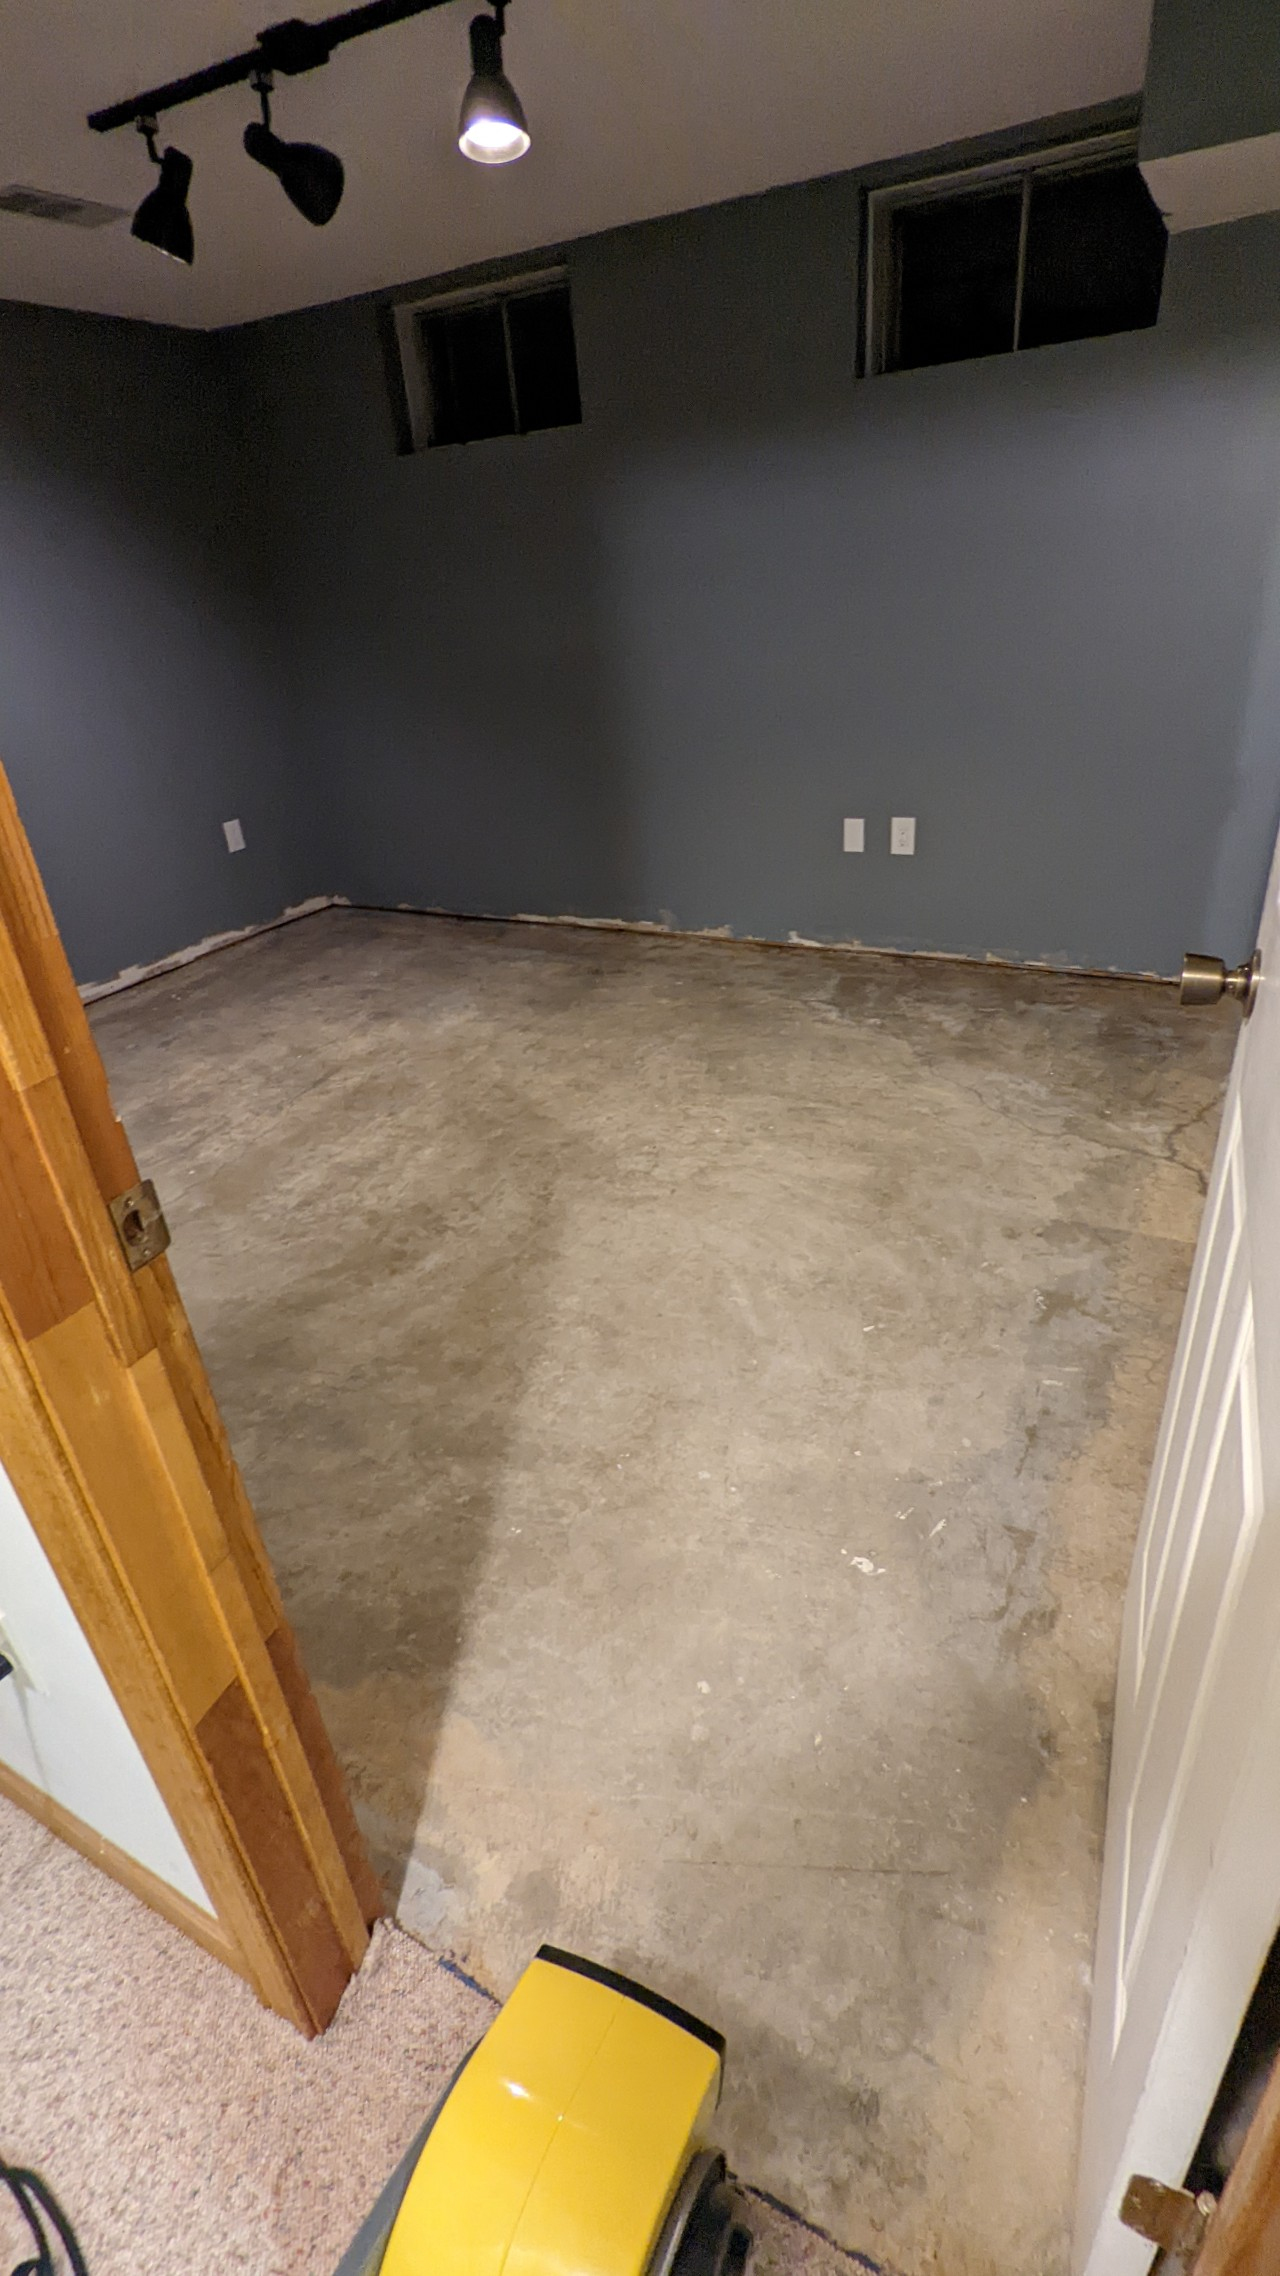
After that, (yes this is tedious as hell) we had to clean and etch the concrete in preparation for adhering the carpet squares.
First we removed the adhesive from the concrete using adhesive remover.

Then, we used concrete etching solution to etch and expose the concrete.
Finally, we used concrete sealant to seal the concrete from water exposure and to get a clean surface.
Phoe-nix the elec-trician!
Then, after we got the flooring out, I came in and did electrical.
Now, listen, I'm no electrician, but I learned a thing or two from my dad over the years. This wasn't a perfect job, but I tried my best and stuck to standard electrical safety code. I do not condone doing your own electrical work.
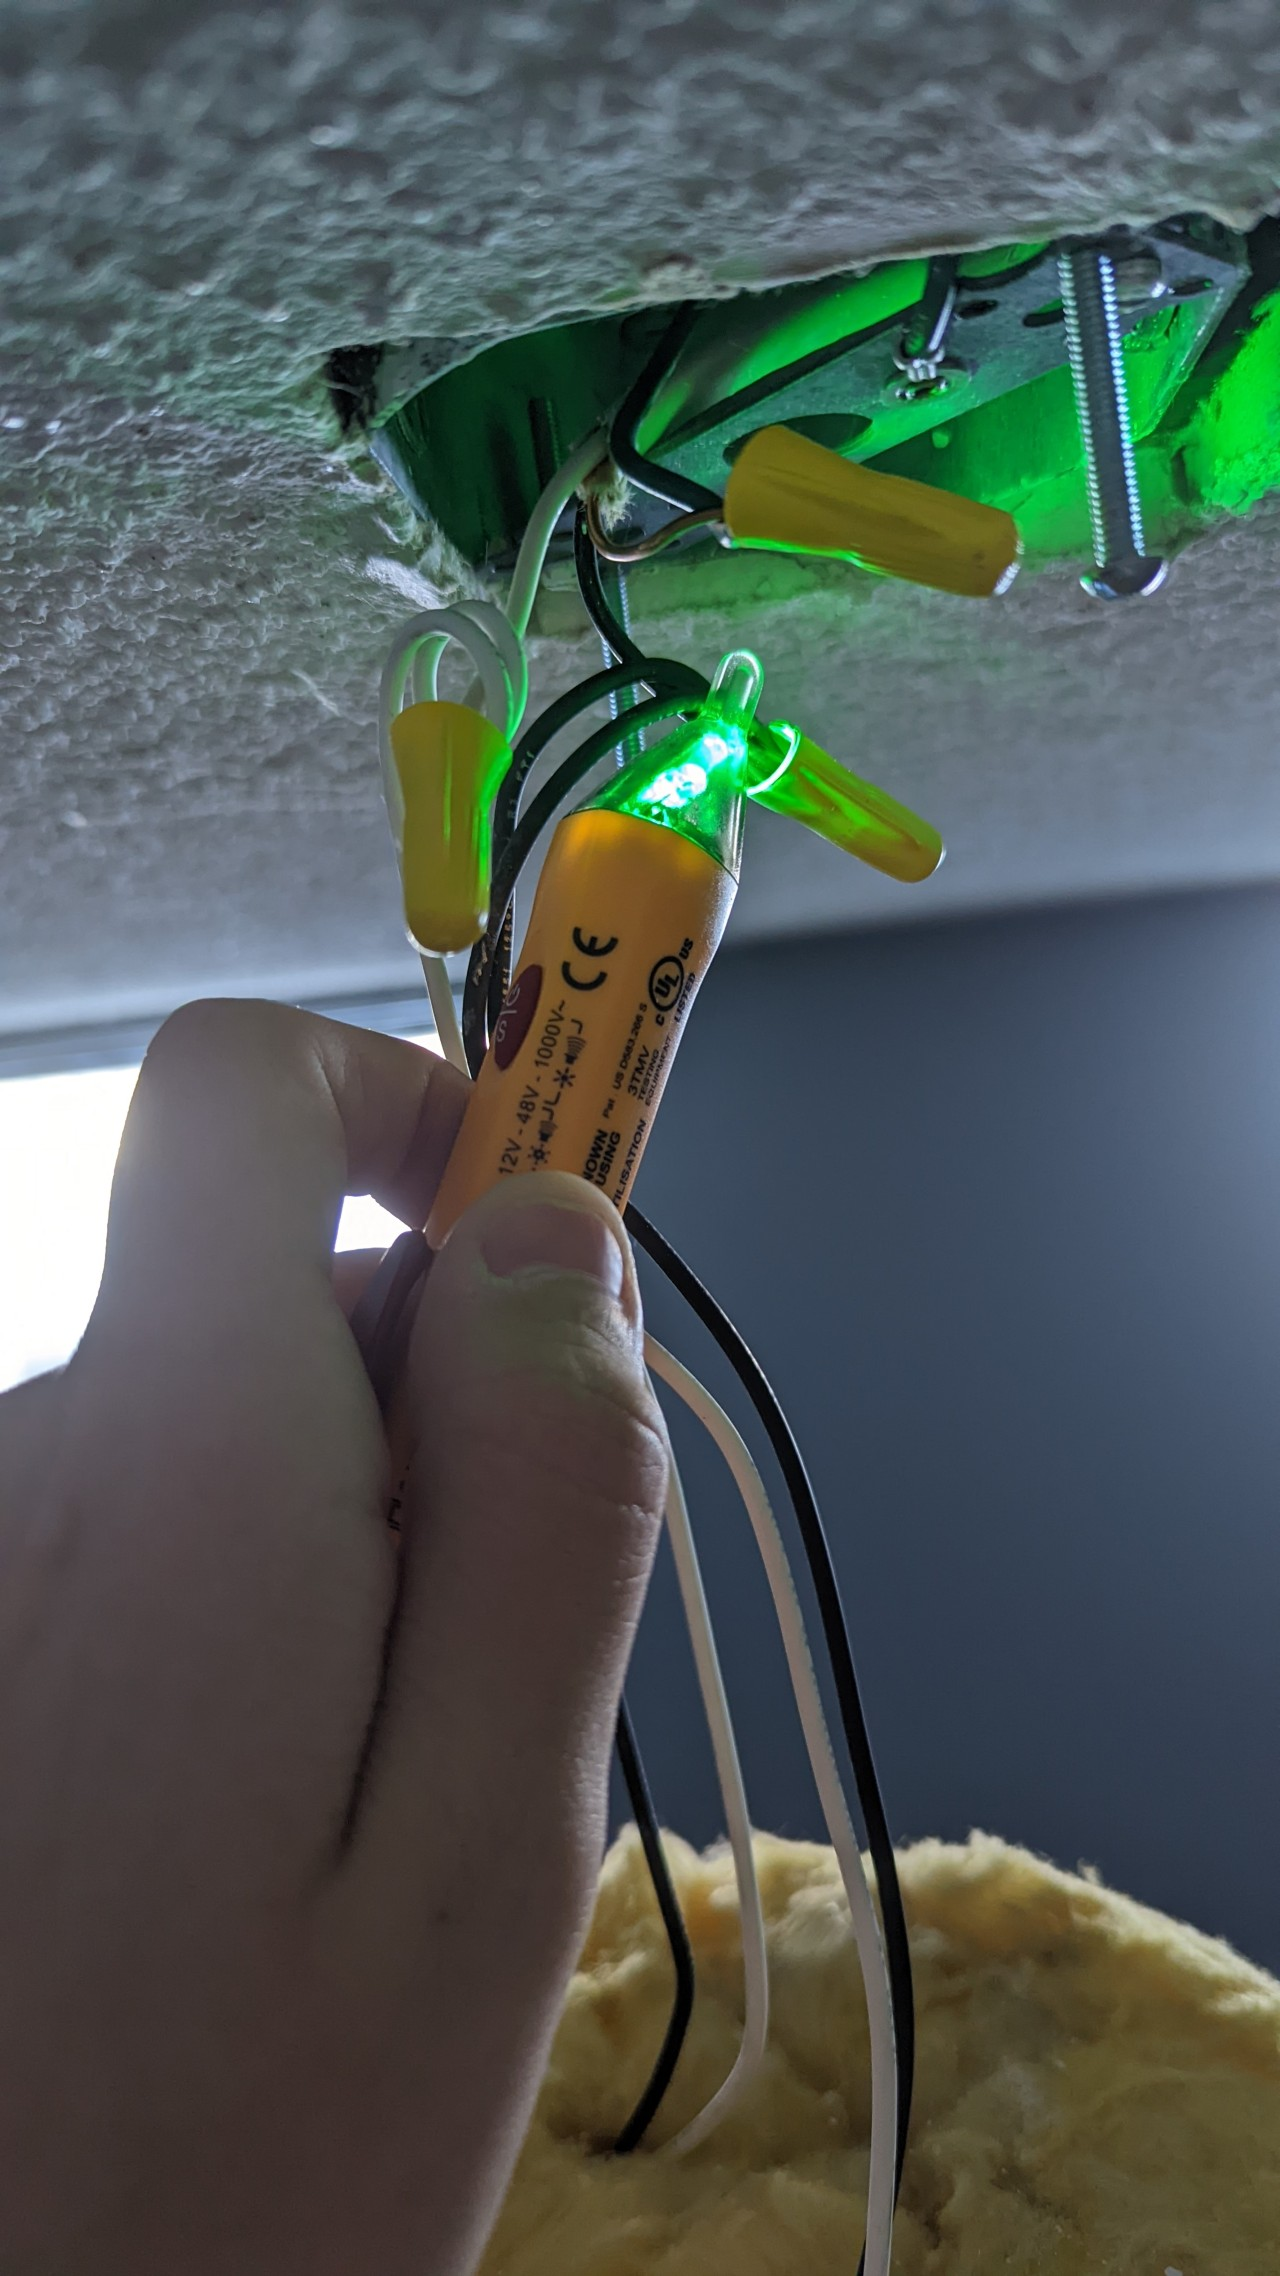
Basically, there were 4 outlets, a hole in the wall for a data drop, a switch, and a light fixture.
I picked out all white, squared and tamper-proof outlets, as well as a white LED-nightlight rocker switch.


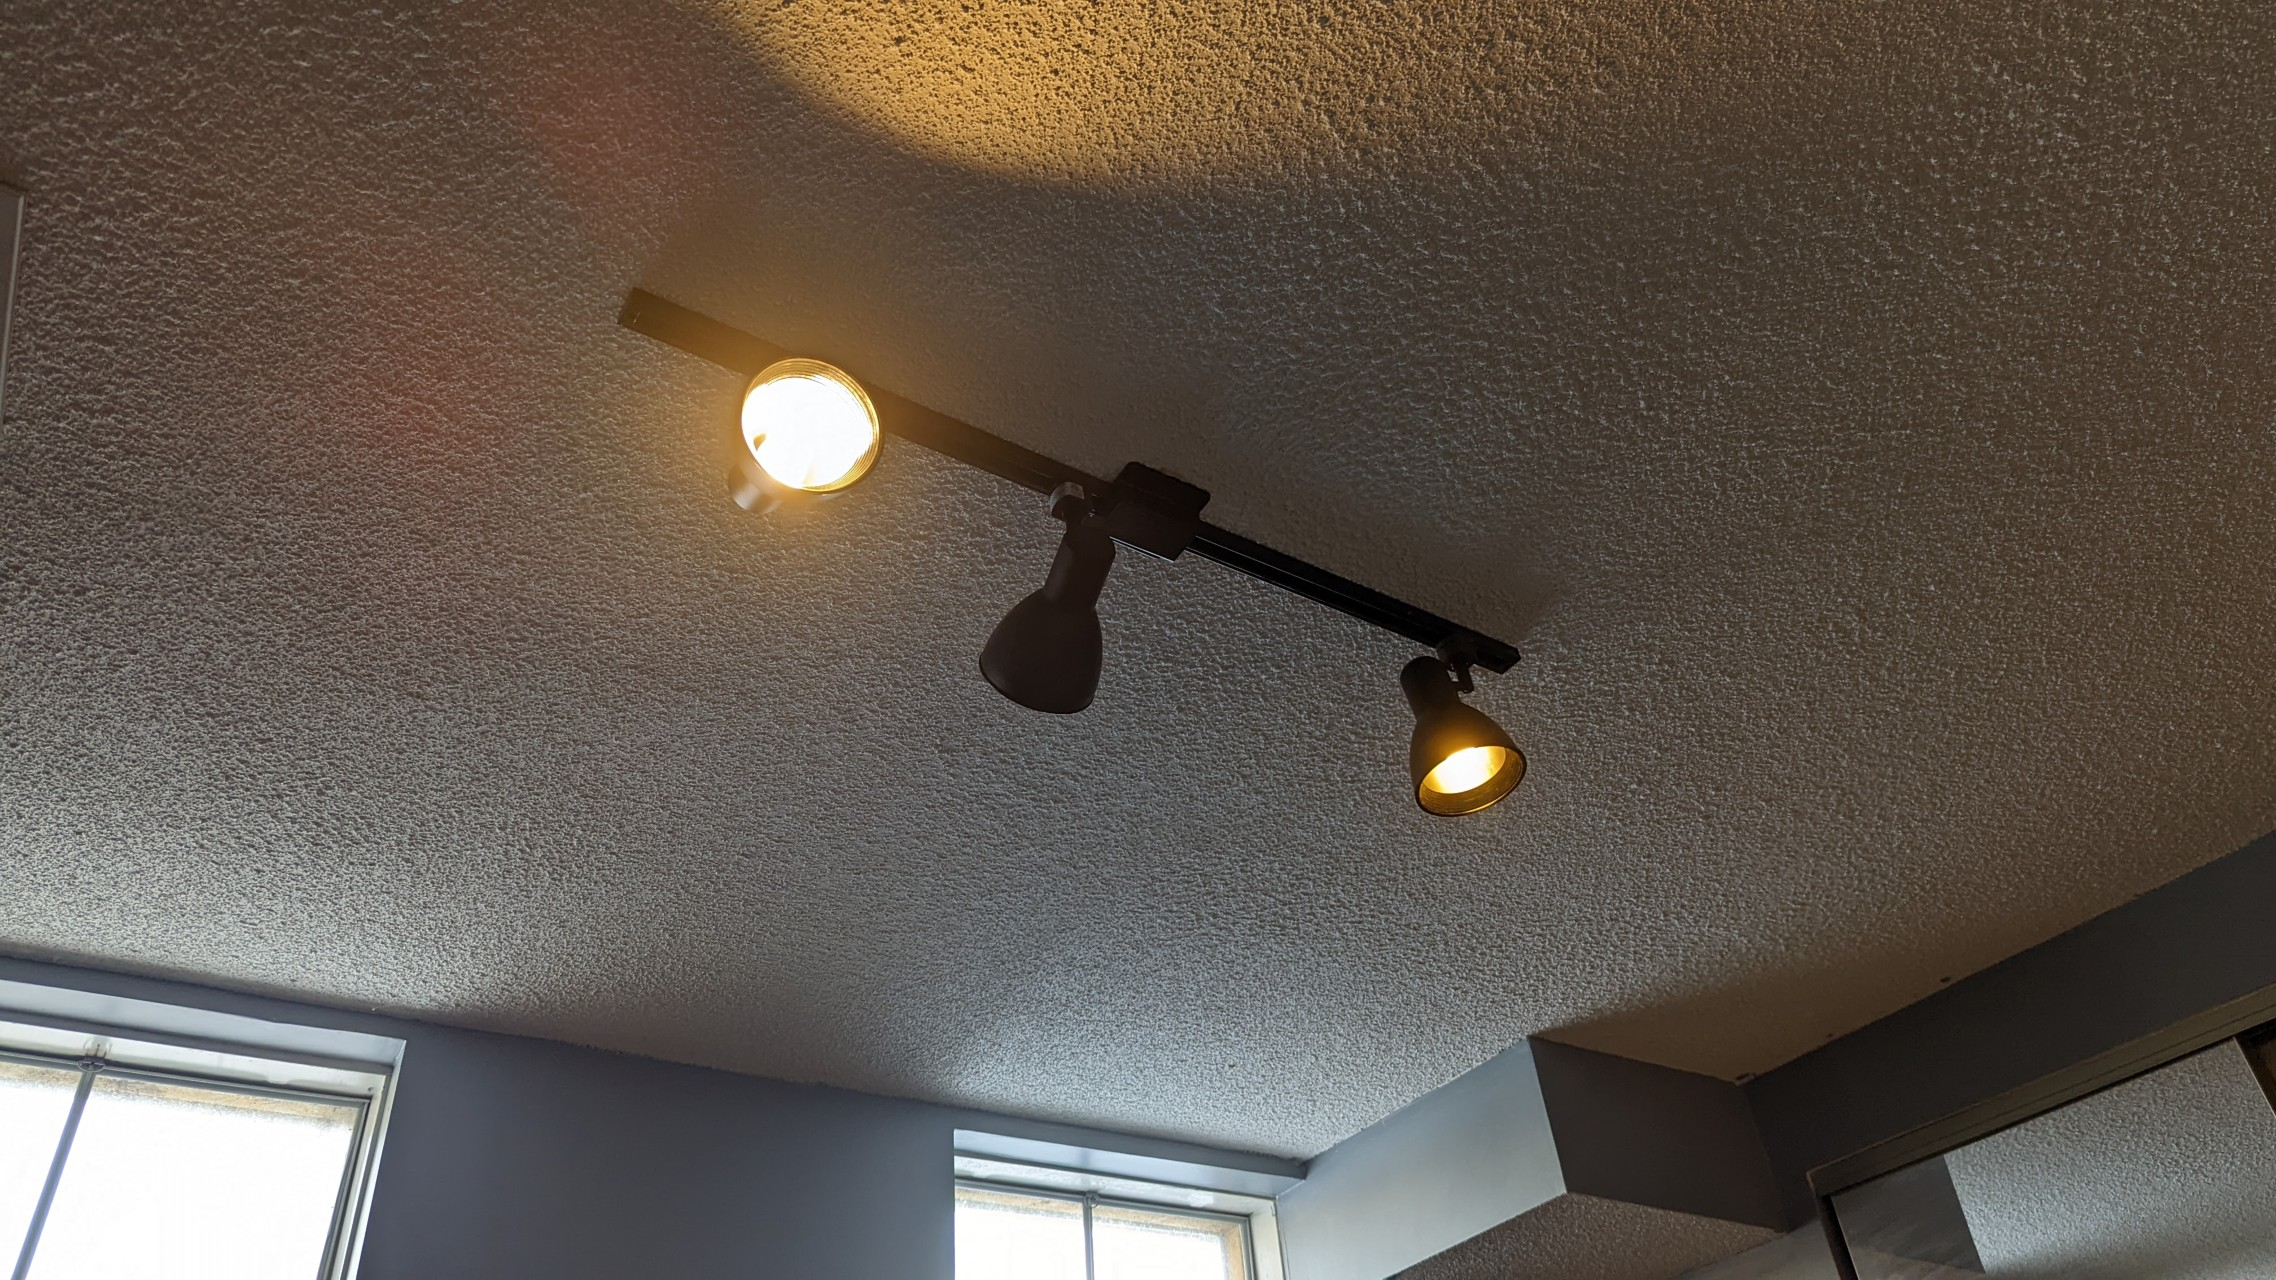
For the light fixture, I re-used an old track light I had purchased a few years ago at Home Depot on sale.
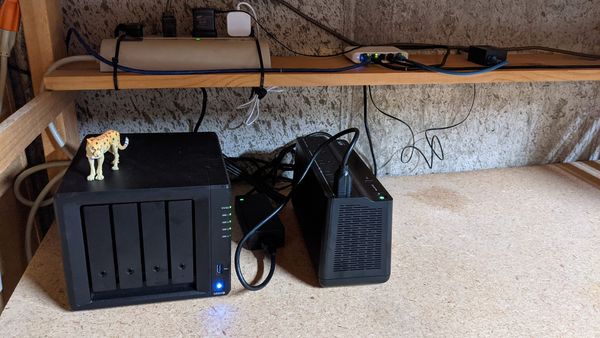
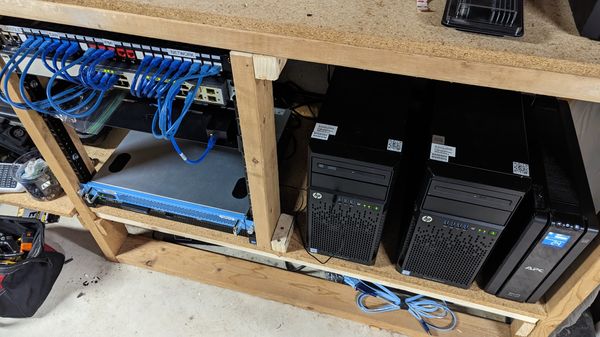
And finally, that pesky data drop. I pulled a run from my switch-rack at the opposite side of the house across the unfinished part of our basement, and wired it up in the office.
Not too shabby, the only issue I had was having to re-cut and trim down leads in the outlets for push-in style wiring. You have to cut the wire to the EXACT length of the hole, leaving no exposed wiring. Exposed wiring = arc hazard.
Carpet Square Time!
We're about halfway there!
After the concrete sealant cured, we centered the room with chalk-tape and started laying down carpet squares to see how it would all fit.
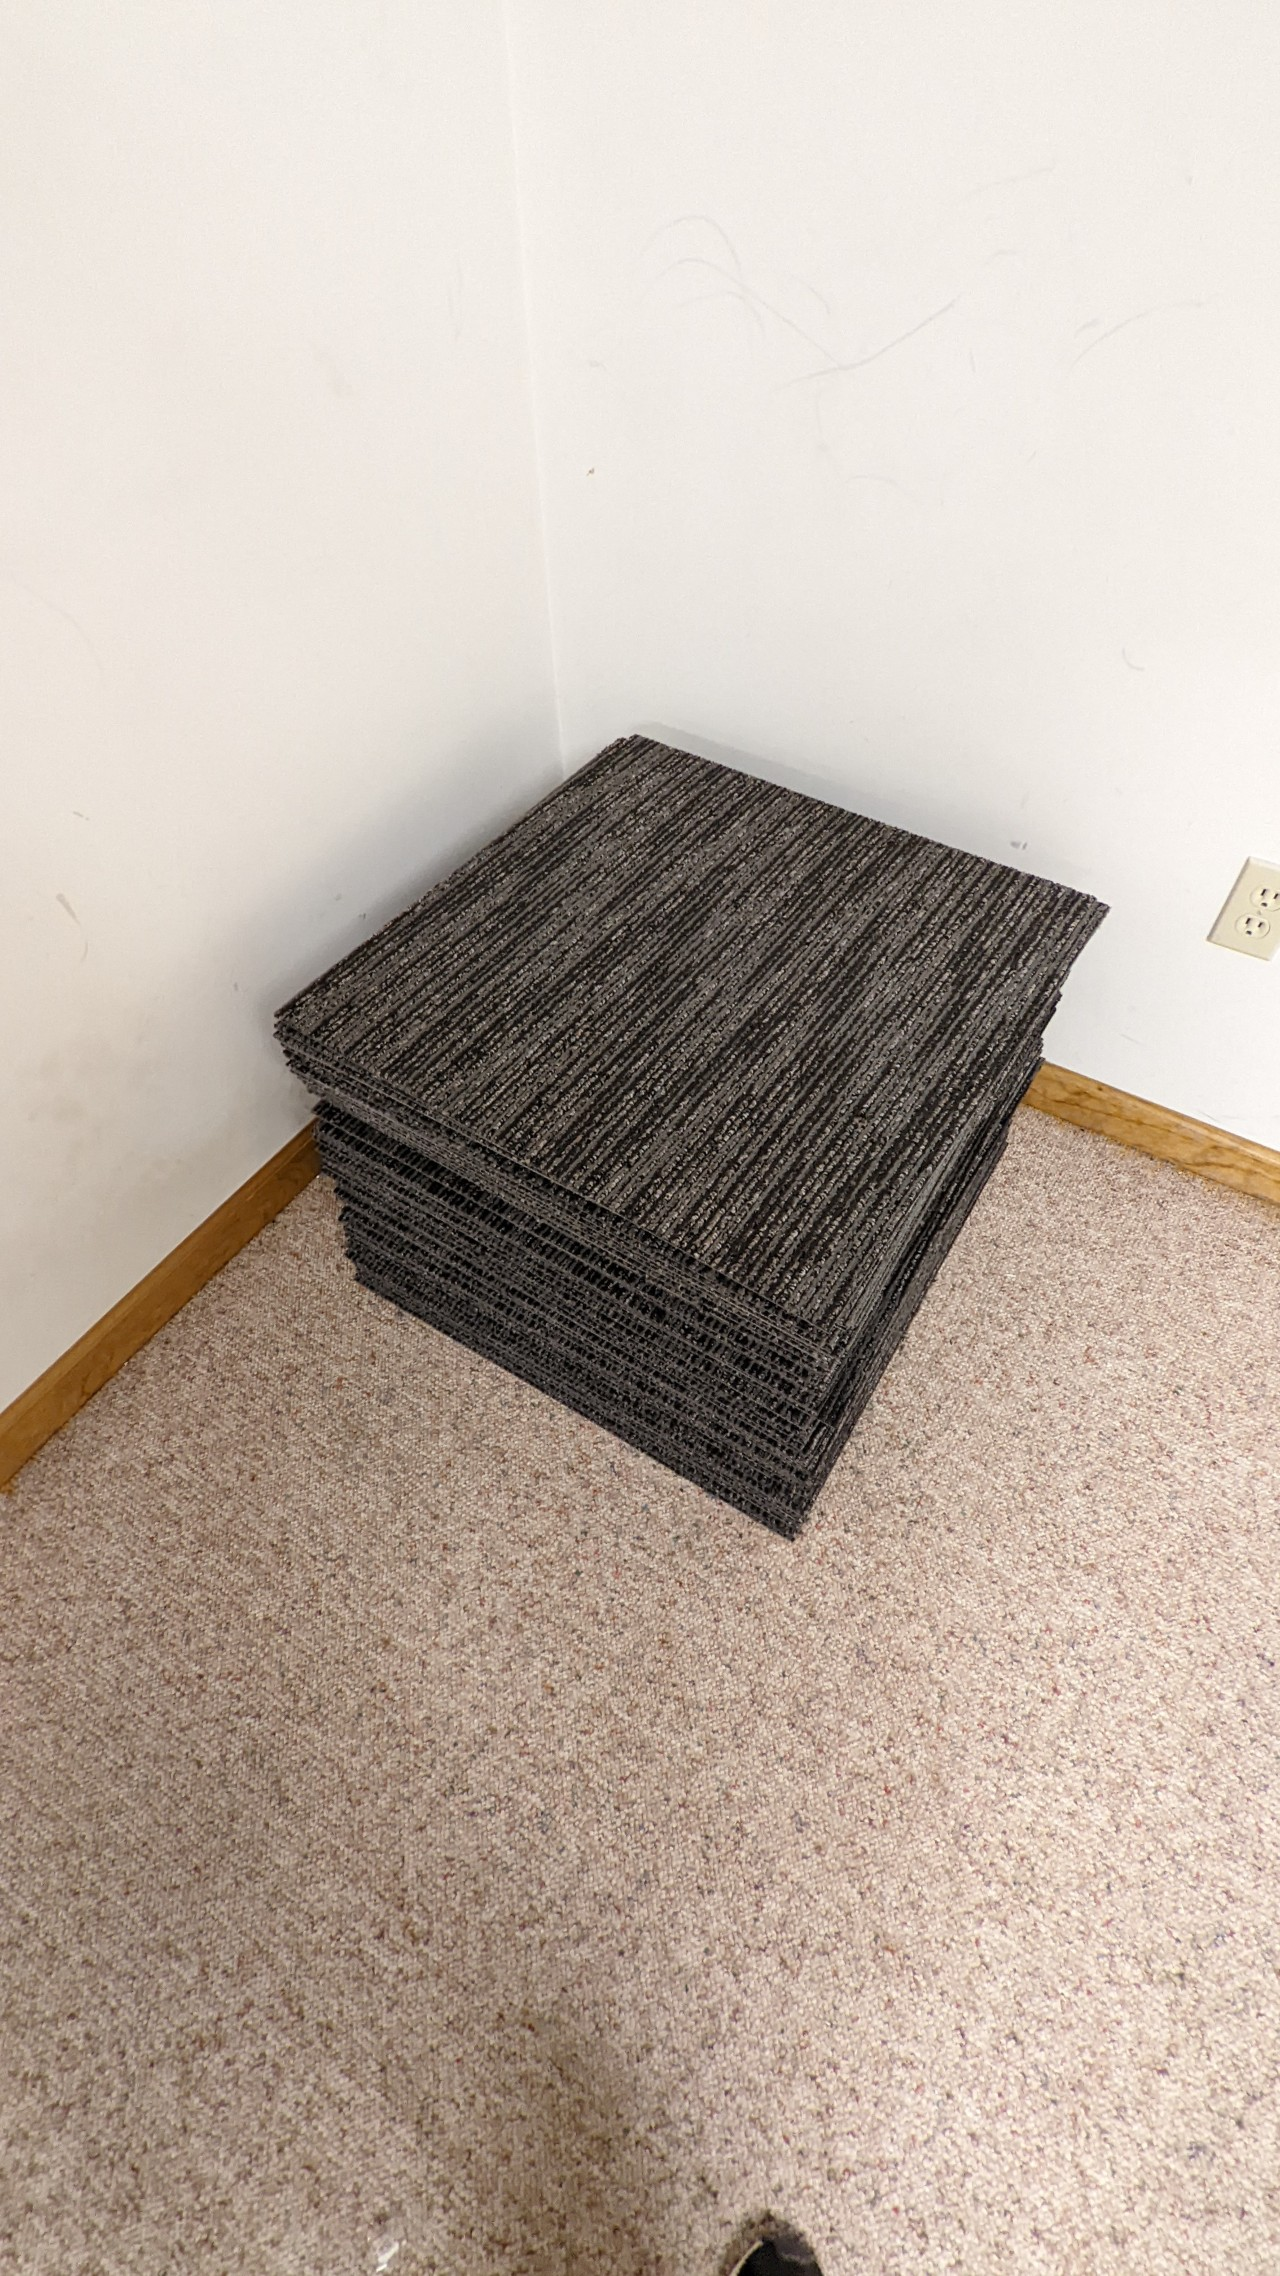
Now, if I had to pick the most difficult, most aggravating part of this project, it would definitely be cutting those damn edge pieces of carpet square. You have to remember to flip it over, rotate it 180° and then line it up and cut, hoping you don't cut your finger open, or screw it up.
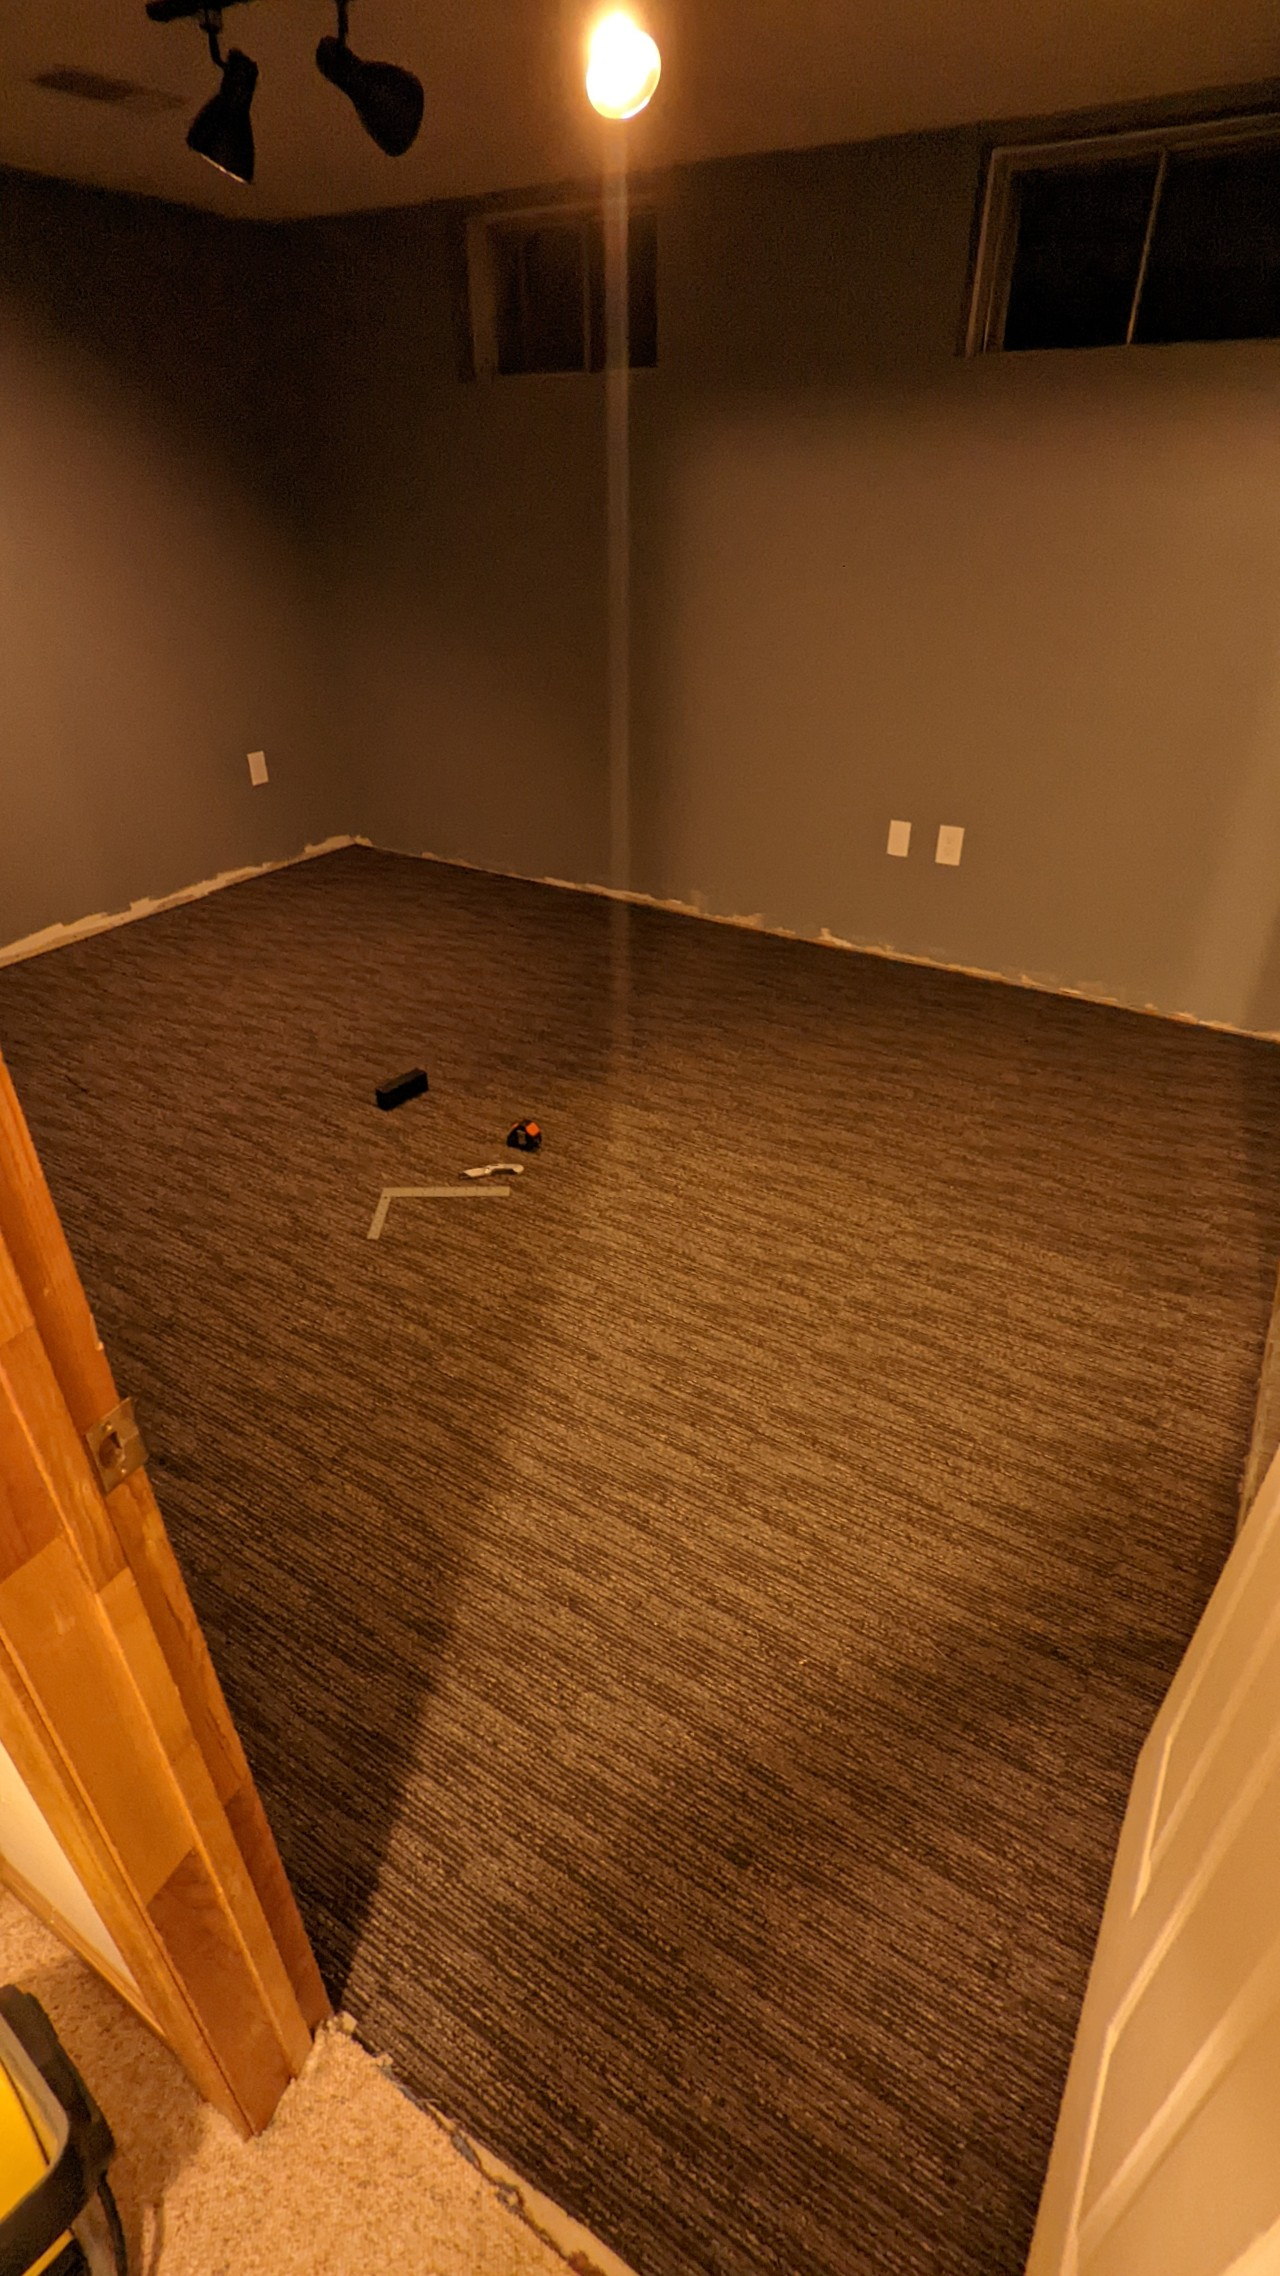
After a dry-fit, we used spray-contact (industrial) glue and glued the tiles down in place.
So... About that trim...
Now, for the trim.
The original trim was this veneered-oak color that absolutely DID NOT match the room's aesthetic. We were debating on keeping it as-is, but ultimately we decided to change it.
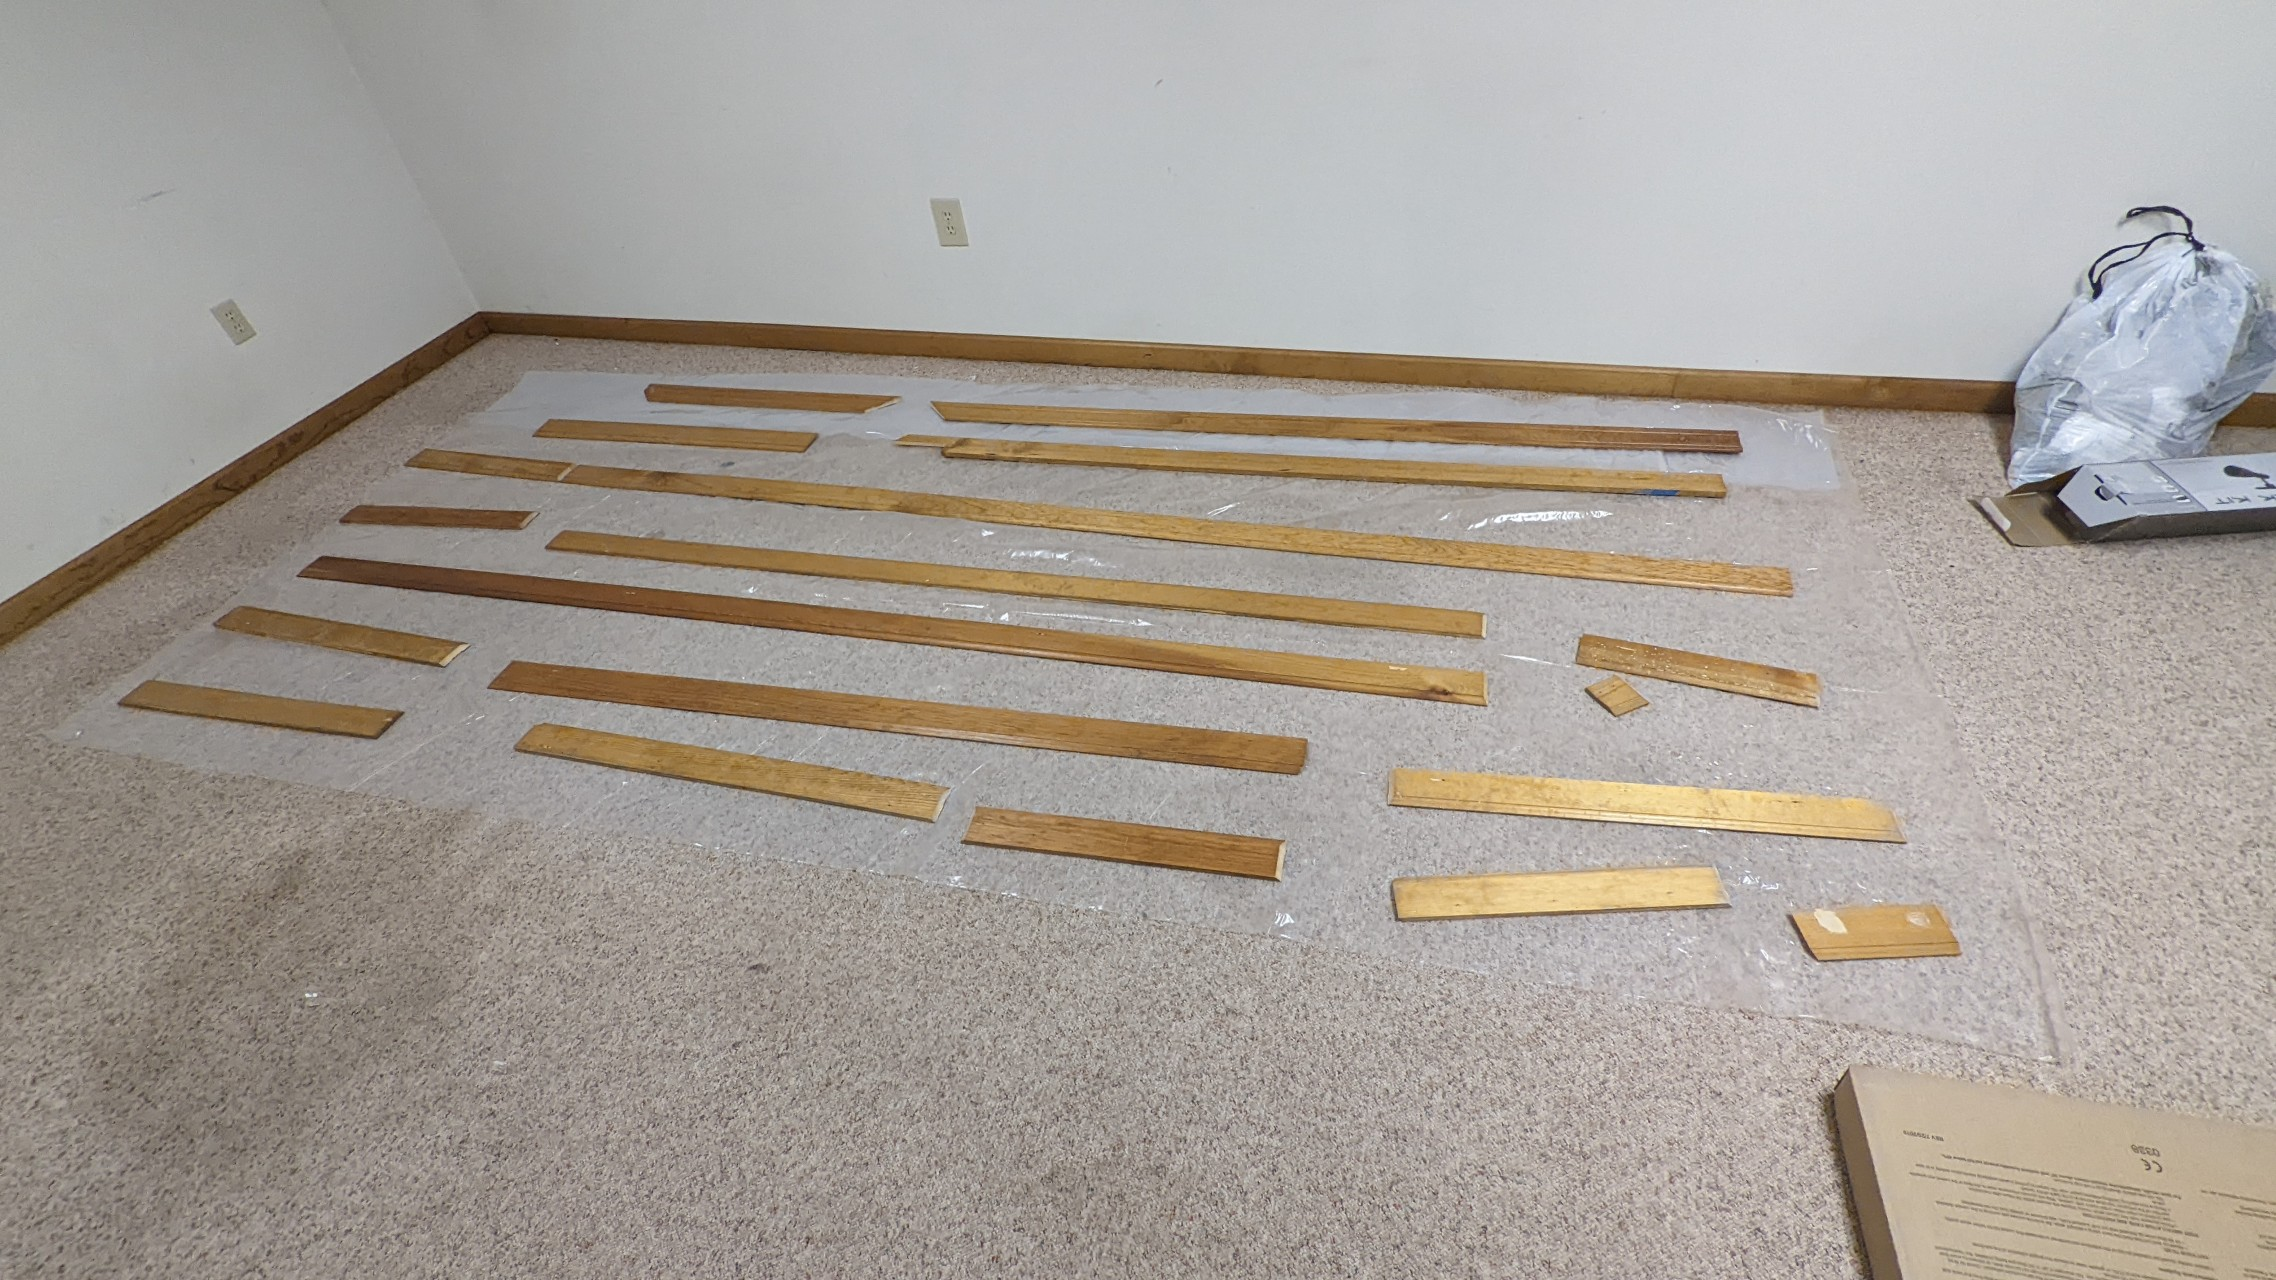
I took to my 800-grit sandpaper and blasted away the clear-coat and roughed up all of the trim pieces I removed earlier.
Then, I put on not one, not two, but three coats of white paint onto the trim. Fun-fact. Apparently it's really hard to mask over previously stained wood.
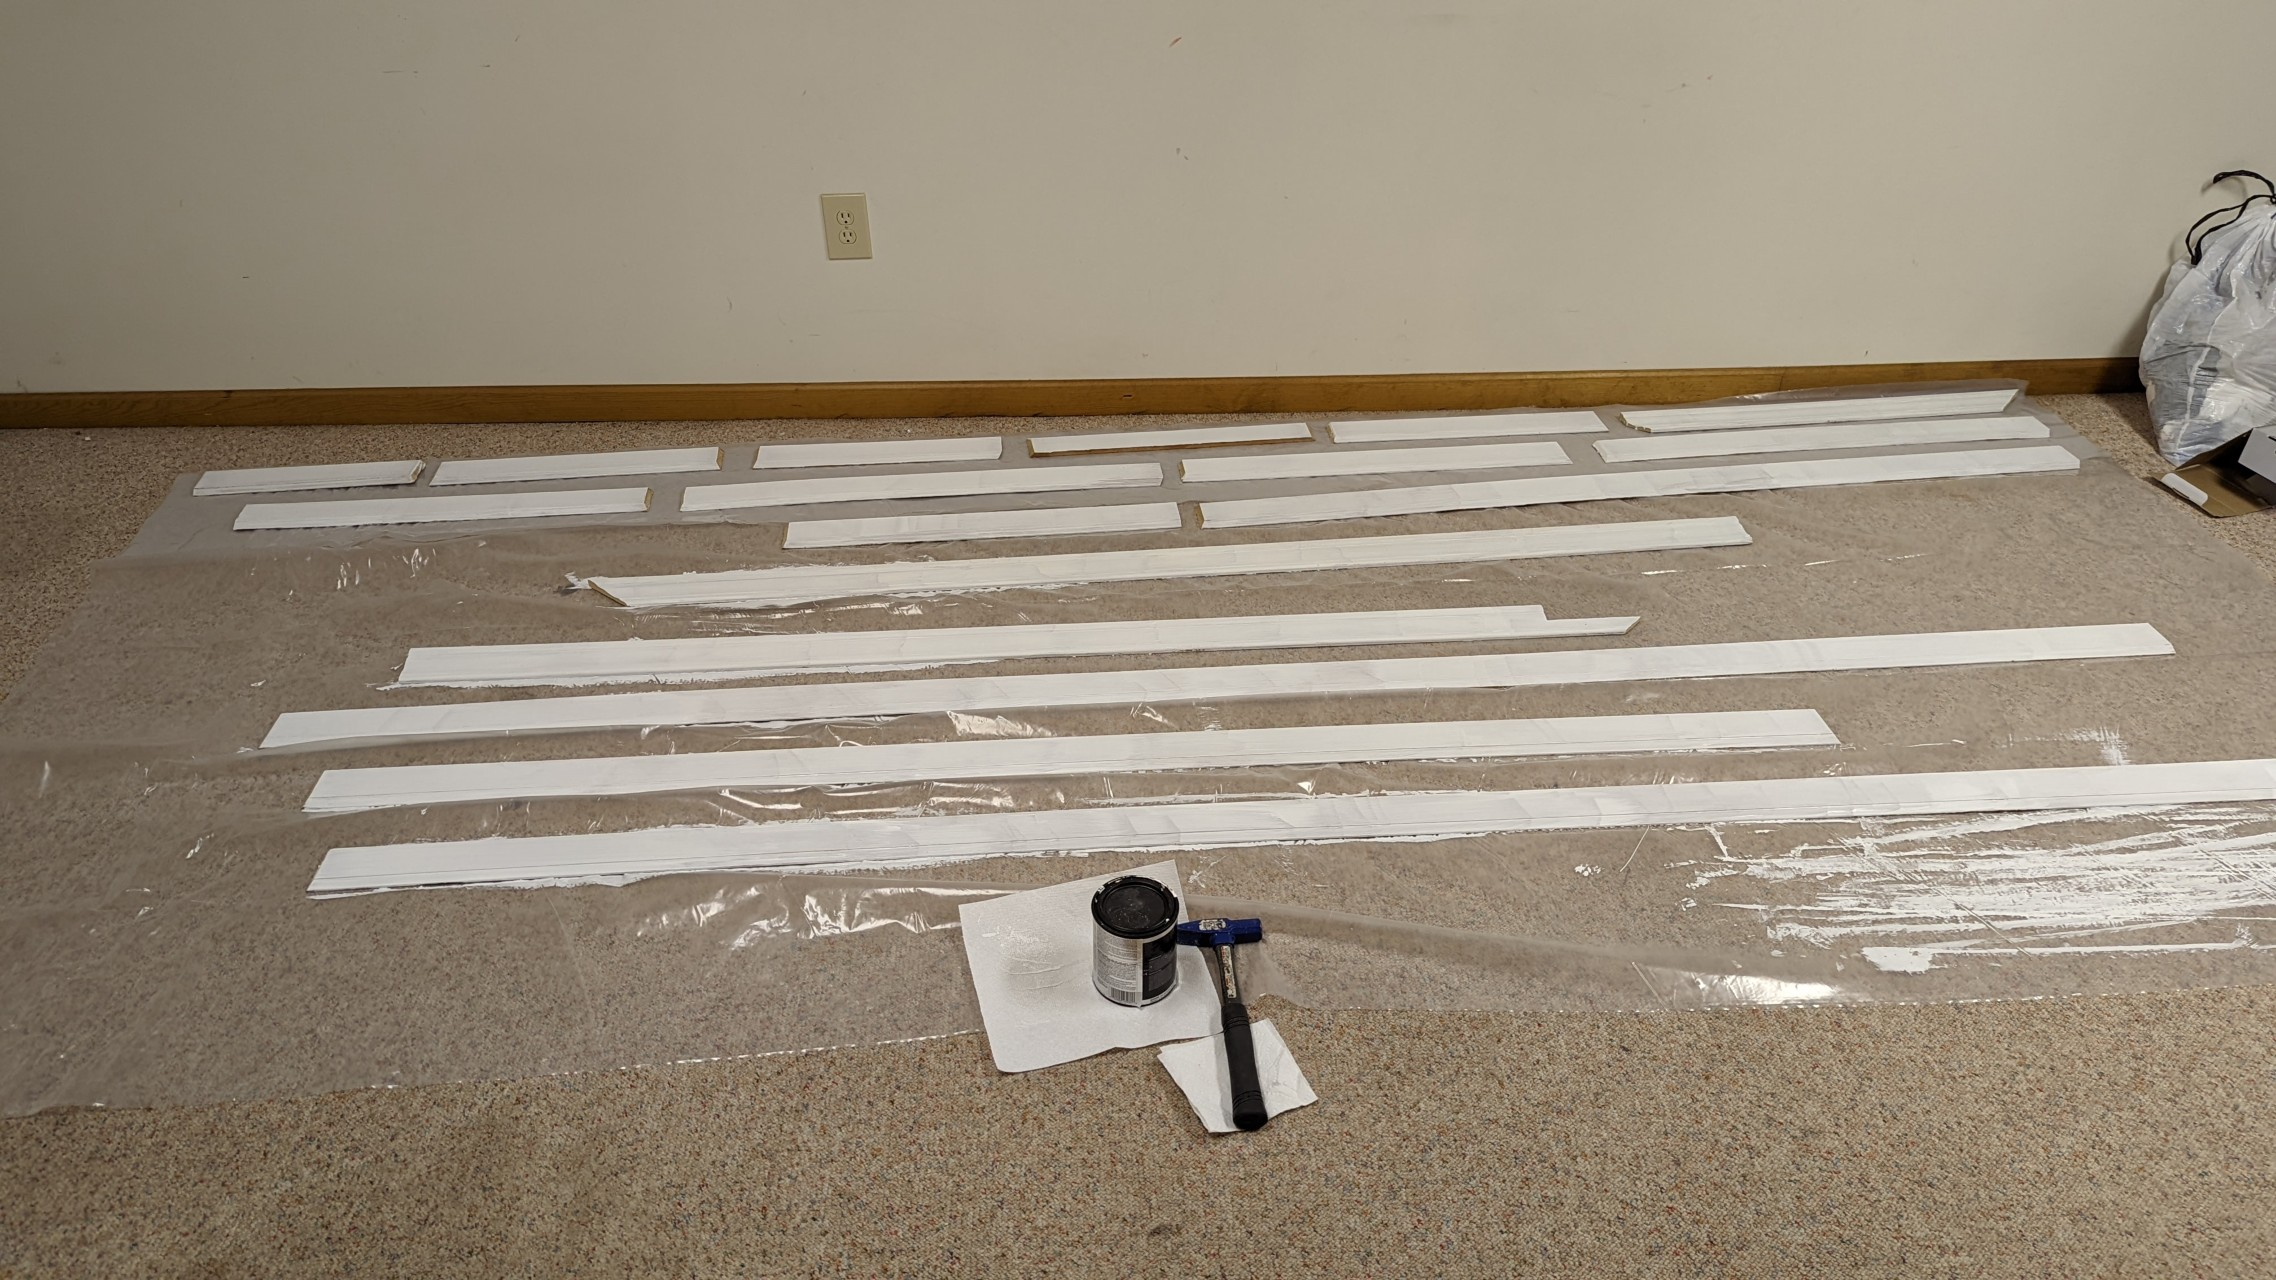
Finally, I brought the trim back into the room and instantly realized I forgot to write the order of placement on all of the pieces and ended up playing trim-tetris.
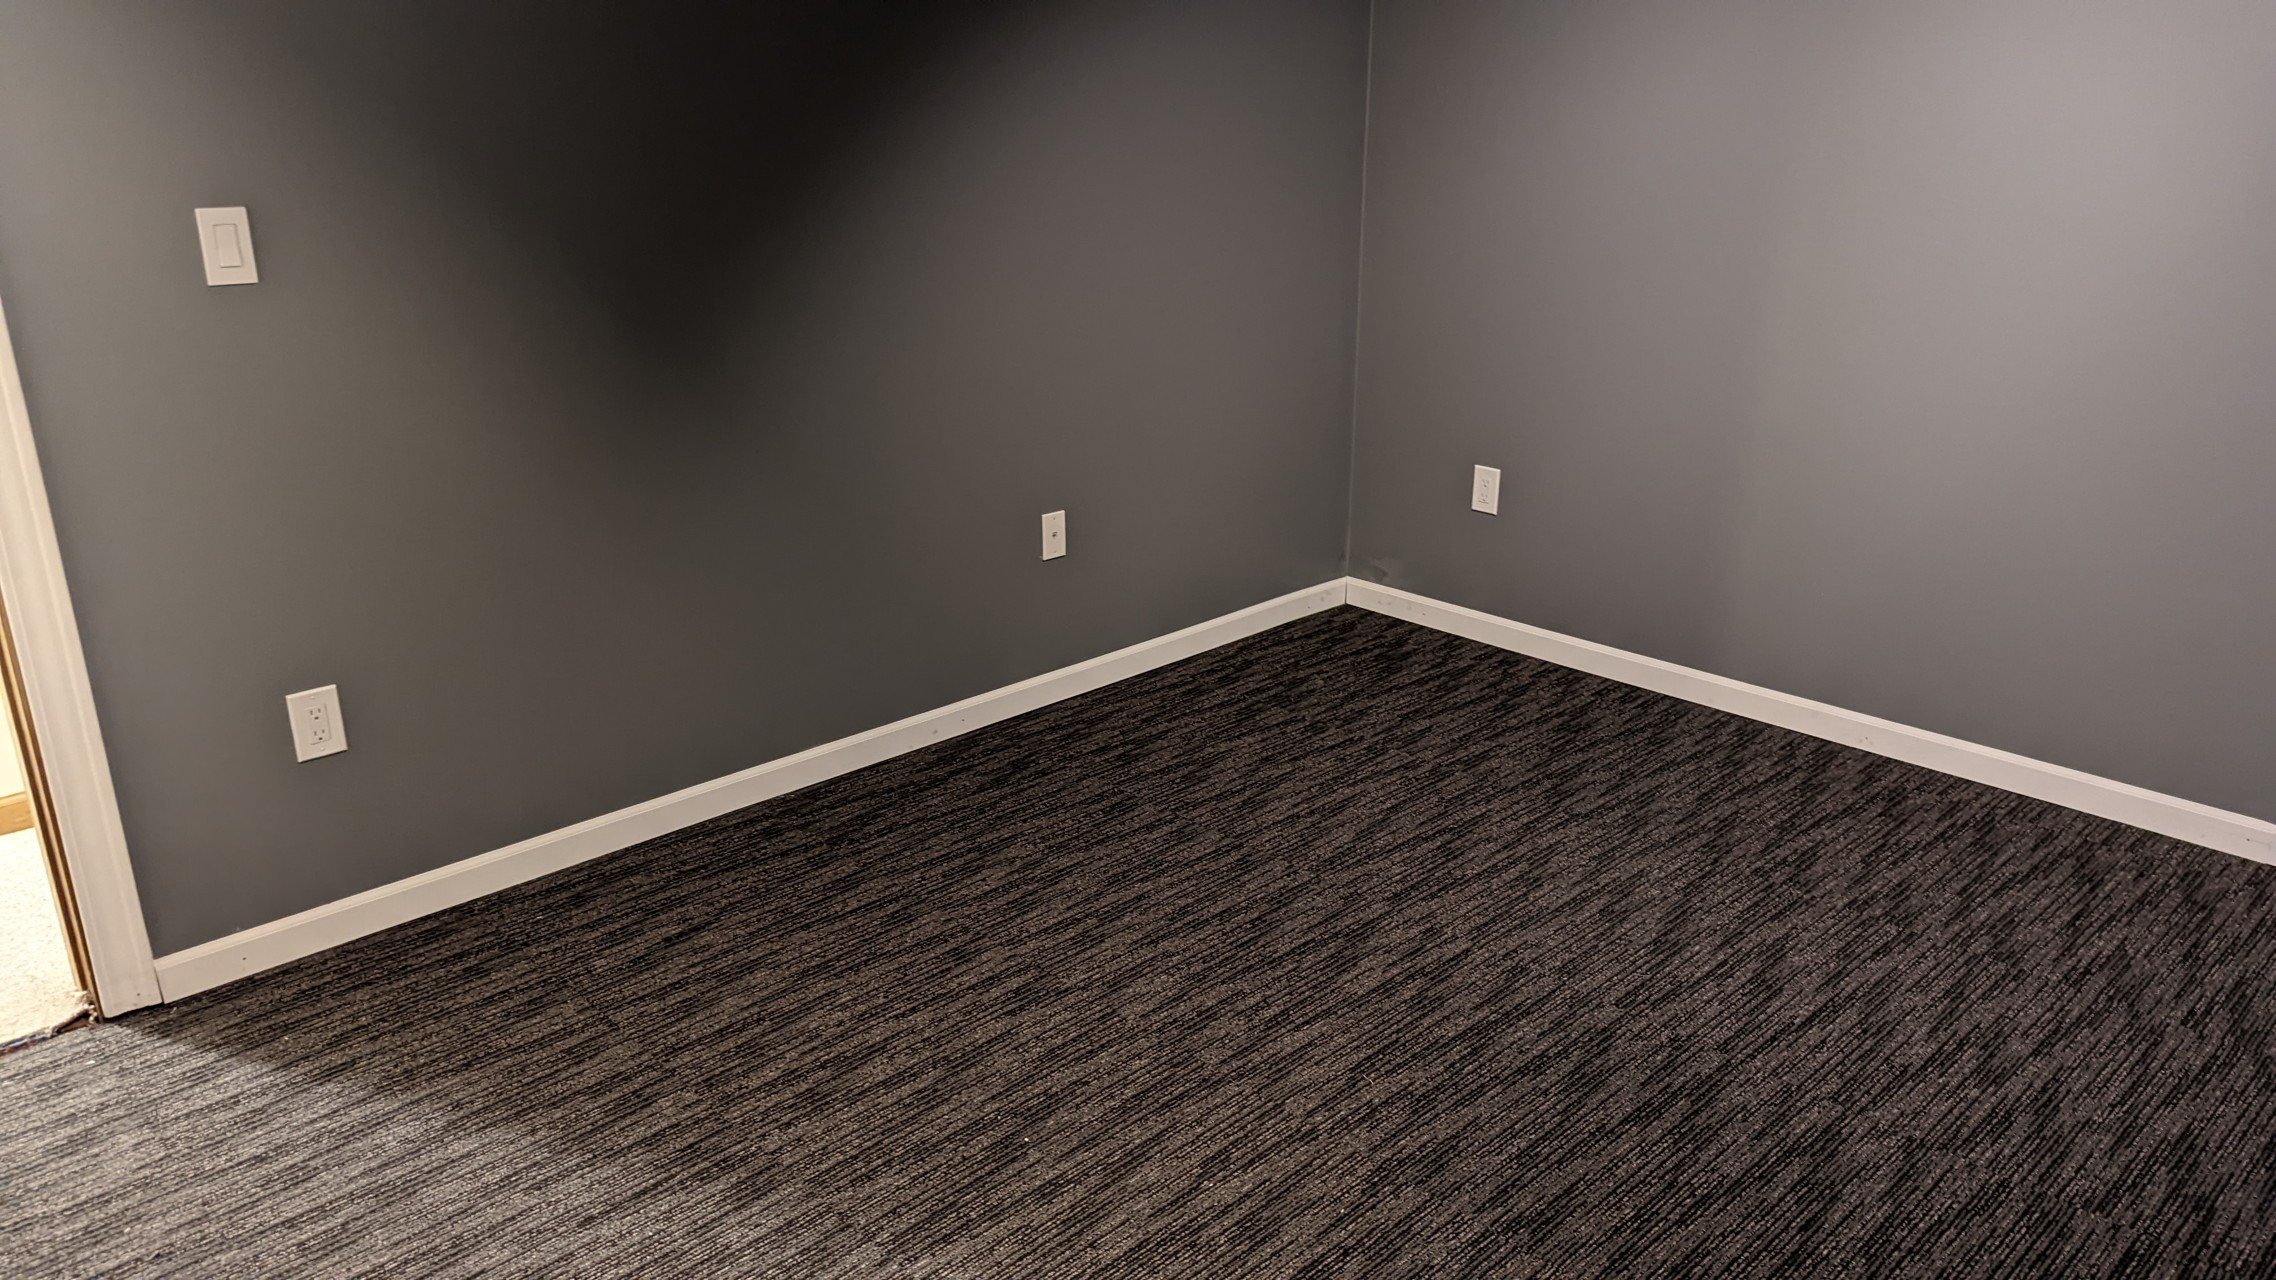
After lining up the trim, I nailed it in and ta-da, room finished!
NOPE. THERE'S MORE
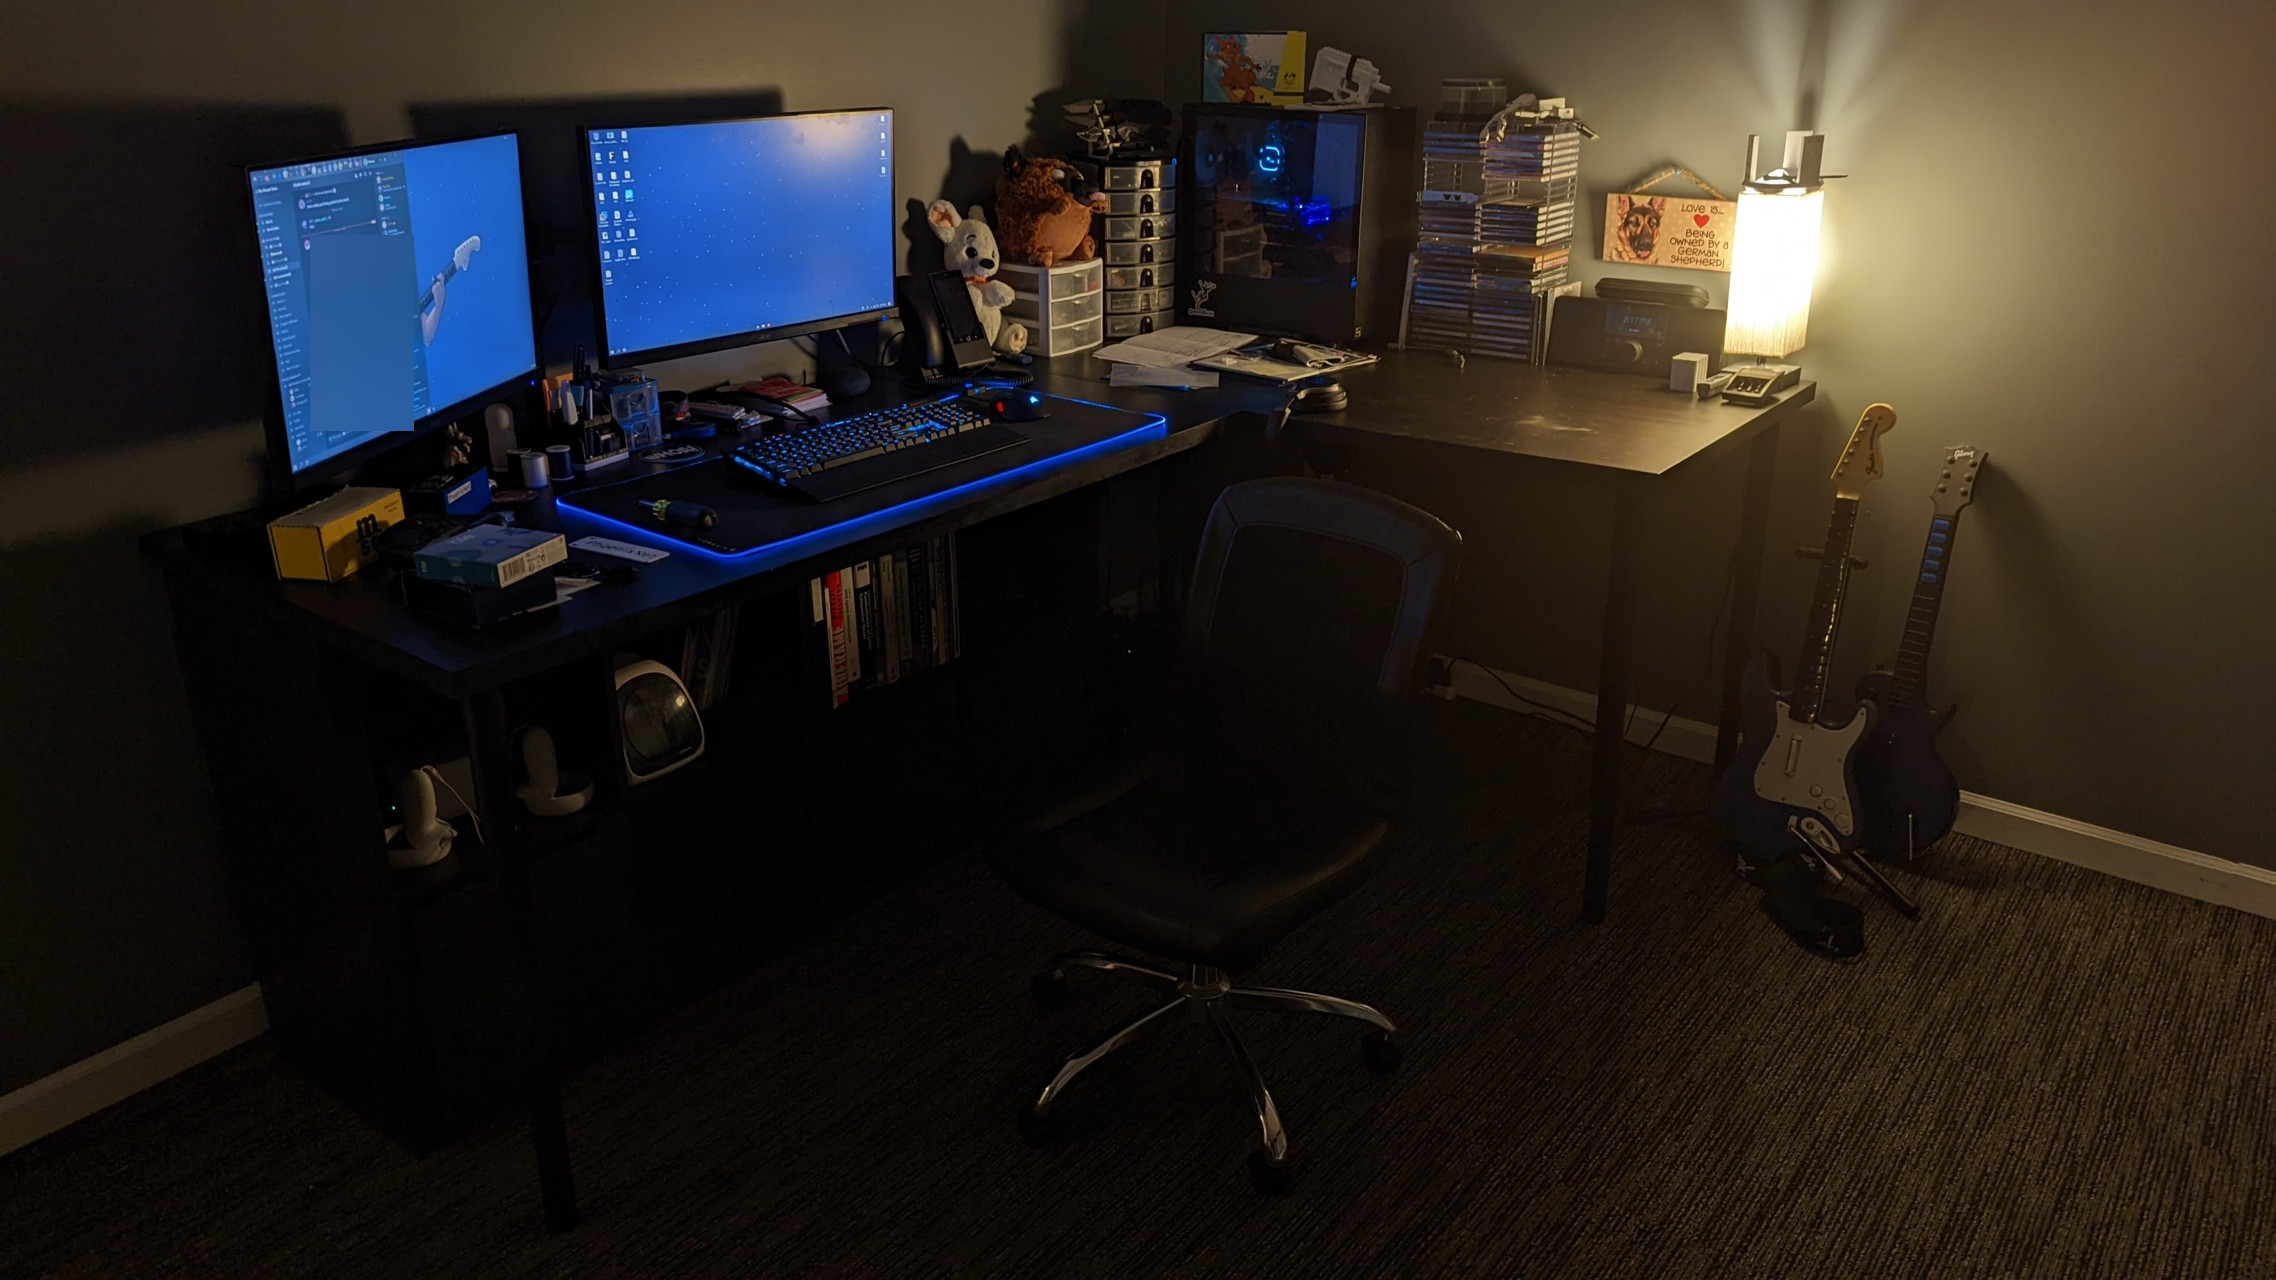
Furniture, fine details, lighting, etc.
After getting the actual room finalized, I spent the next couple of days actually filling the damn thing.
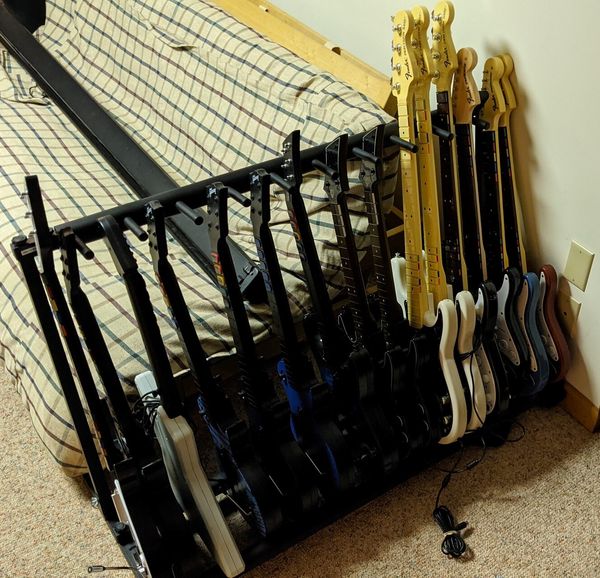
I pulled the office furniture I already had upstairs in our previously shared office downstairs. (Shelving, Desk, Chair, Guitar Stand, etc.)
I had to "formulate" how I was going to arrange things down there, since my desk was going to be flipped from how it was previously configured. Not too bad.
Then, I made sure to put EVERYTHING on the UPS this time. Monitor(s), Desktop, etc. Last time I made that error and I wasn't able to safely shut down my PC once because the monitors weren't on the battery, but the PC was.
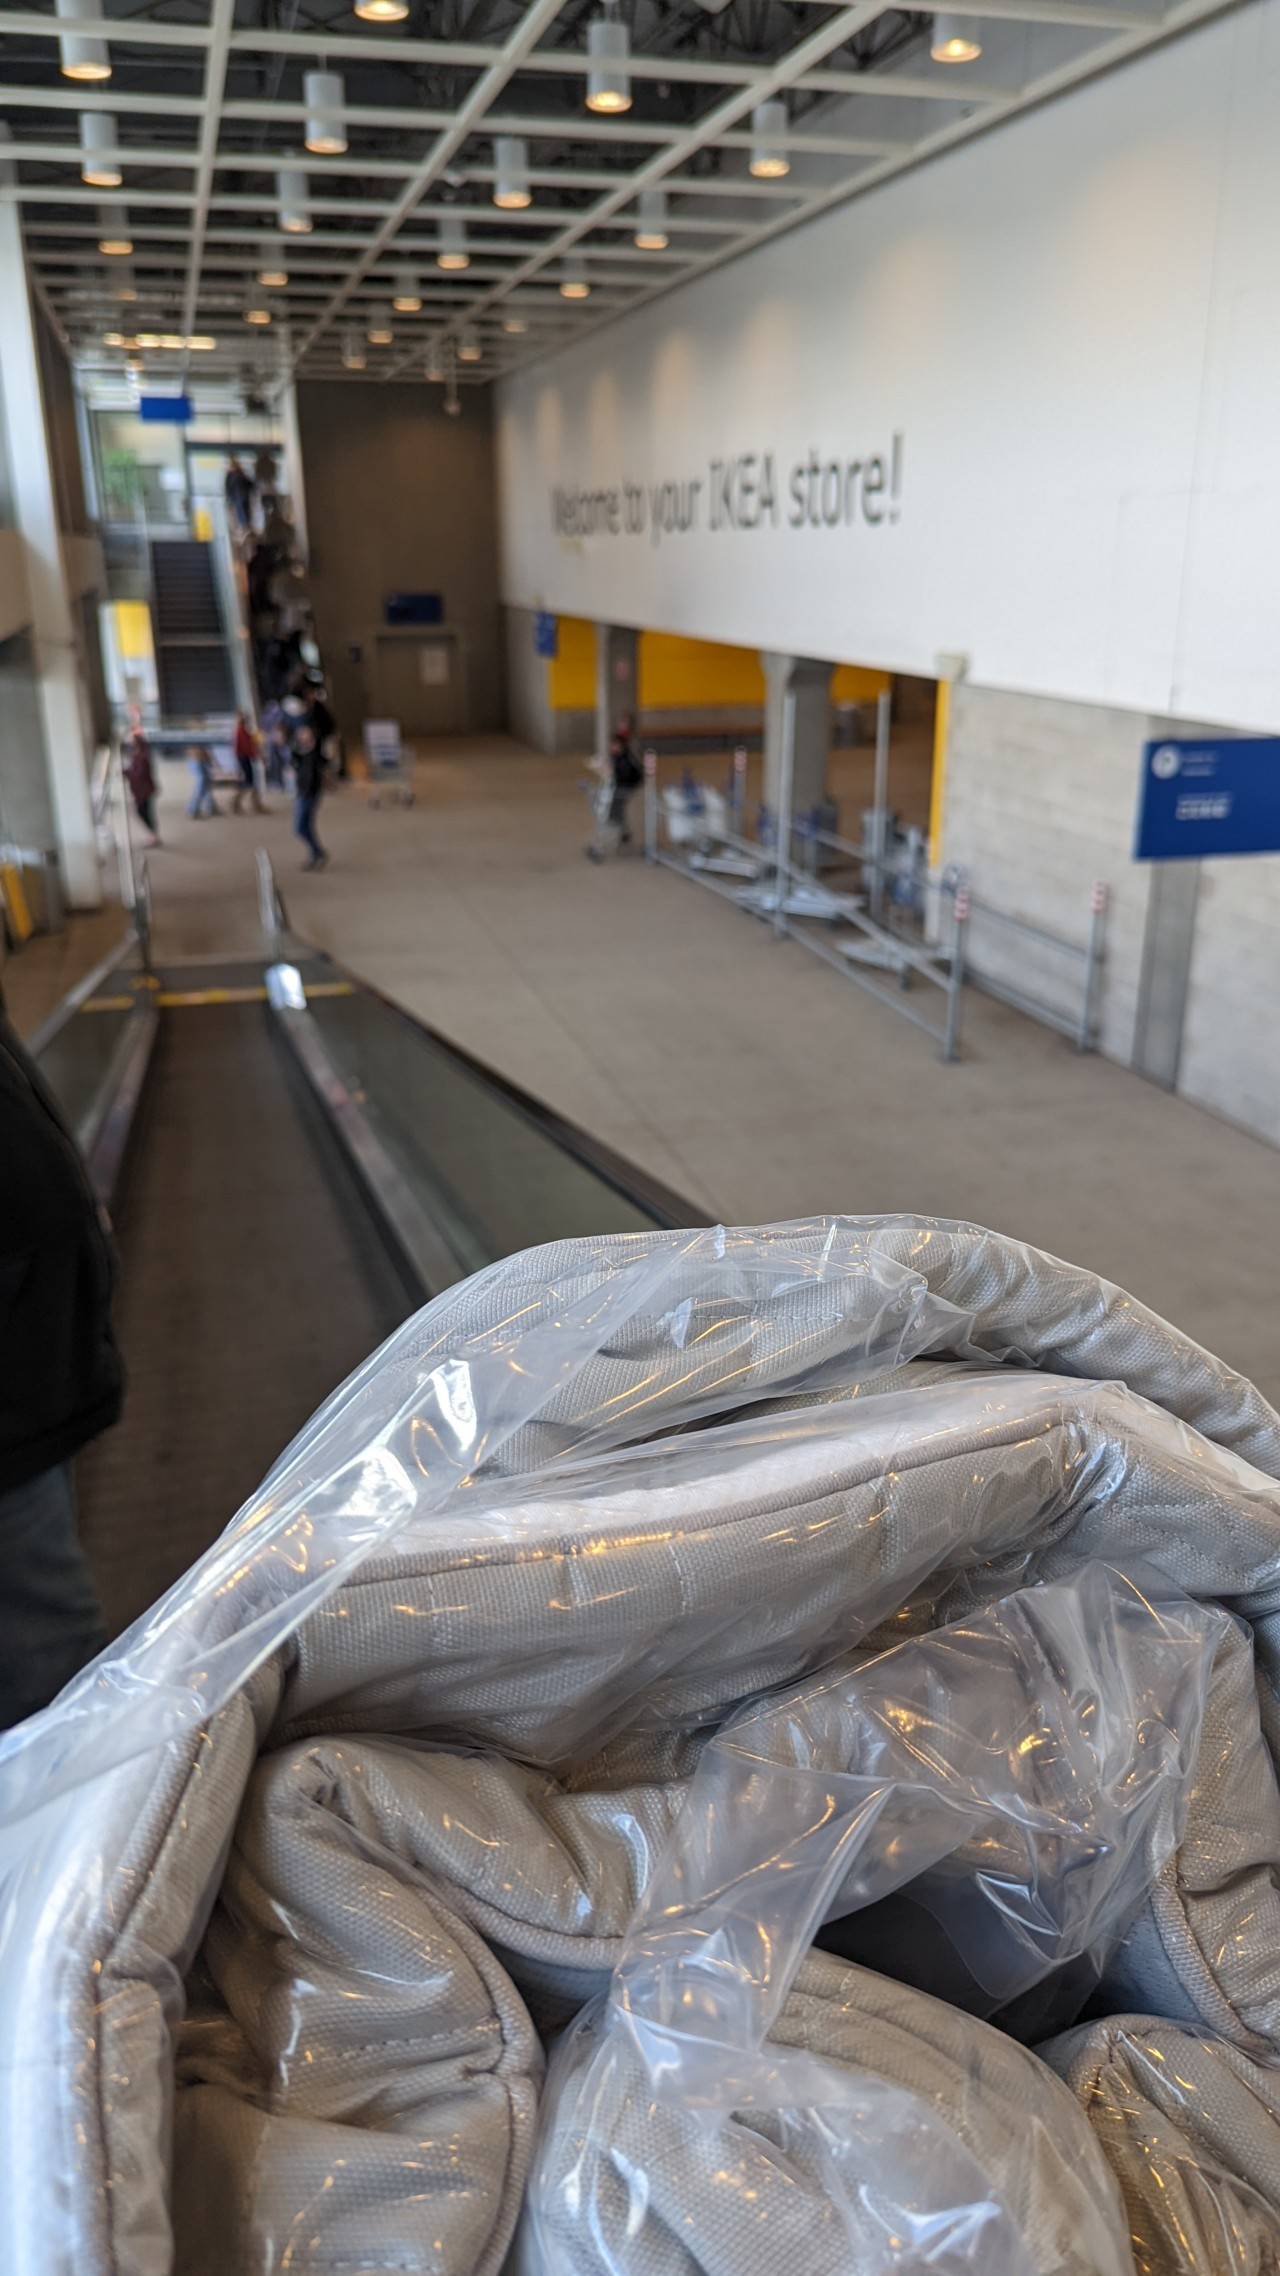
I also arranged for my parents to drop off my daybed I left with them when I moved out, and assembled and placed that in the room. Such a shame we threw out the old mattress, ended up having to make a visit to IKEA to grab a new one.

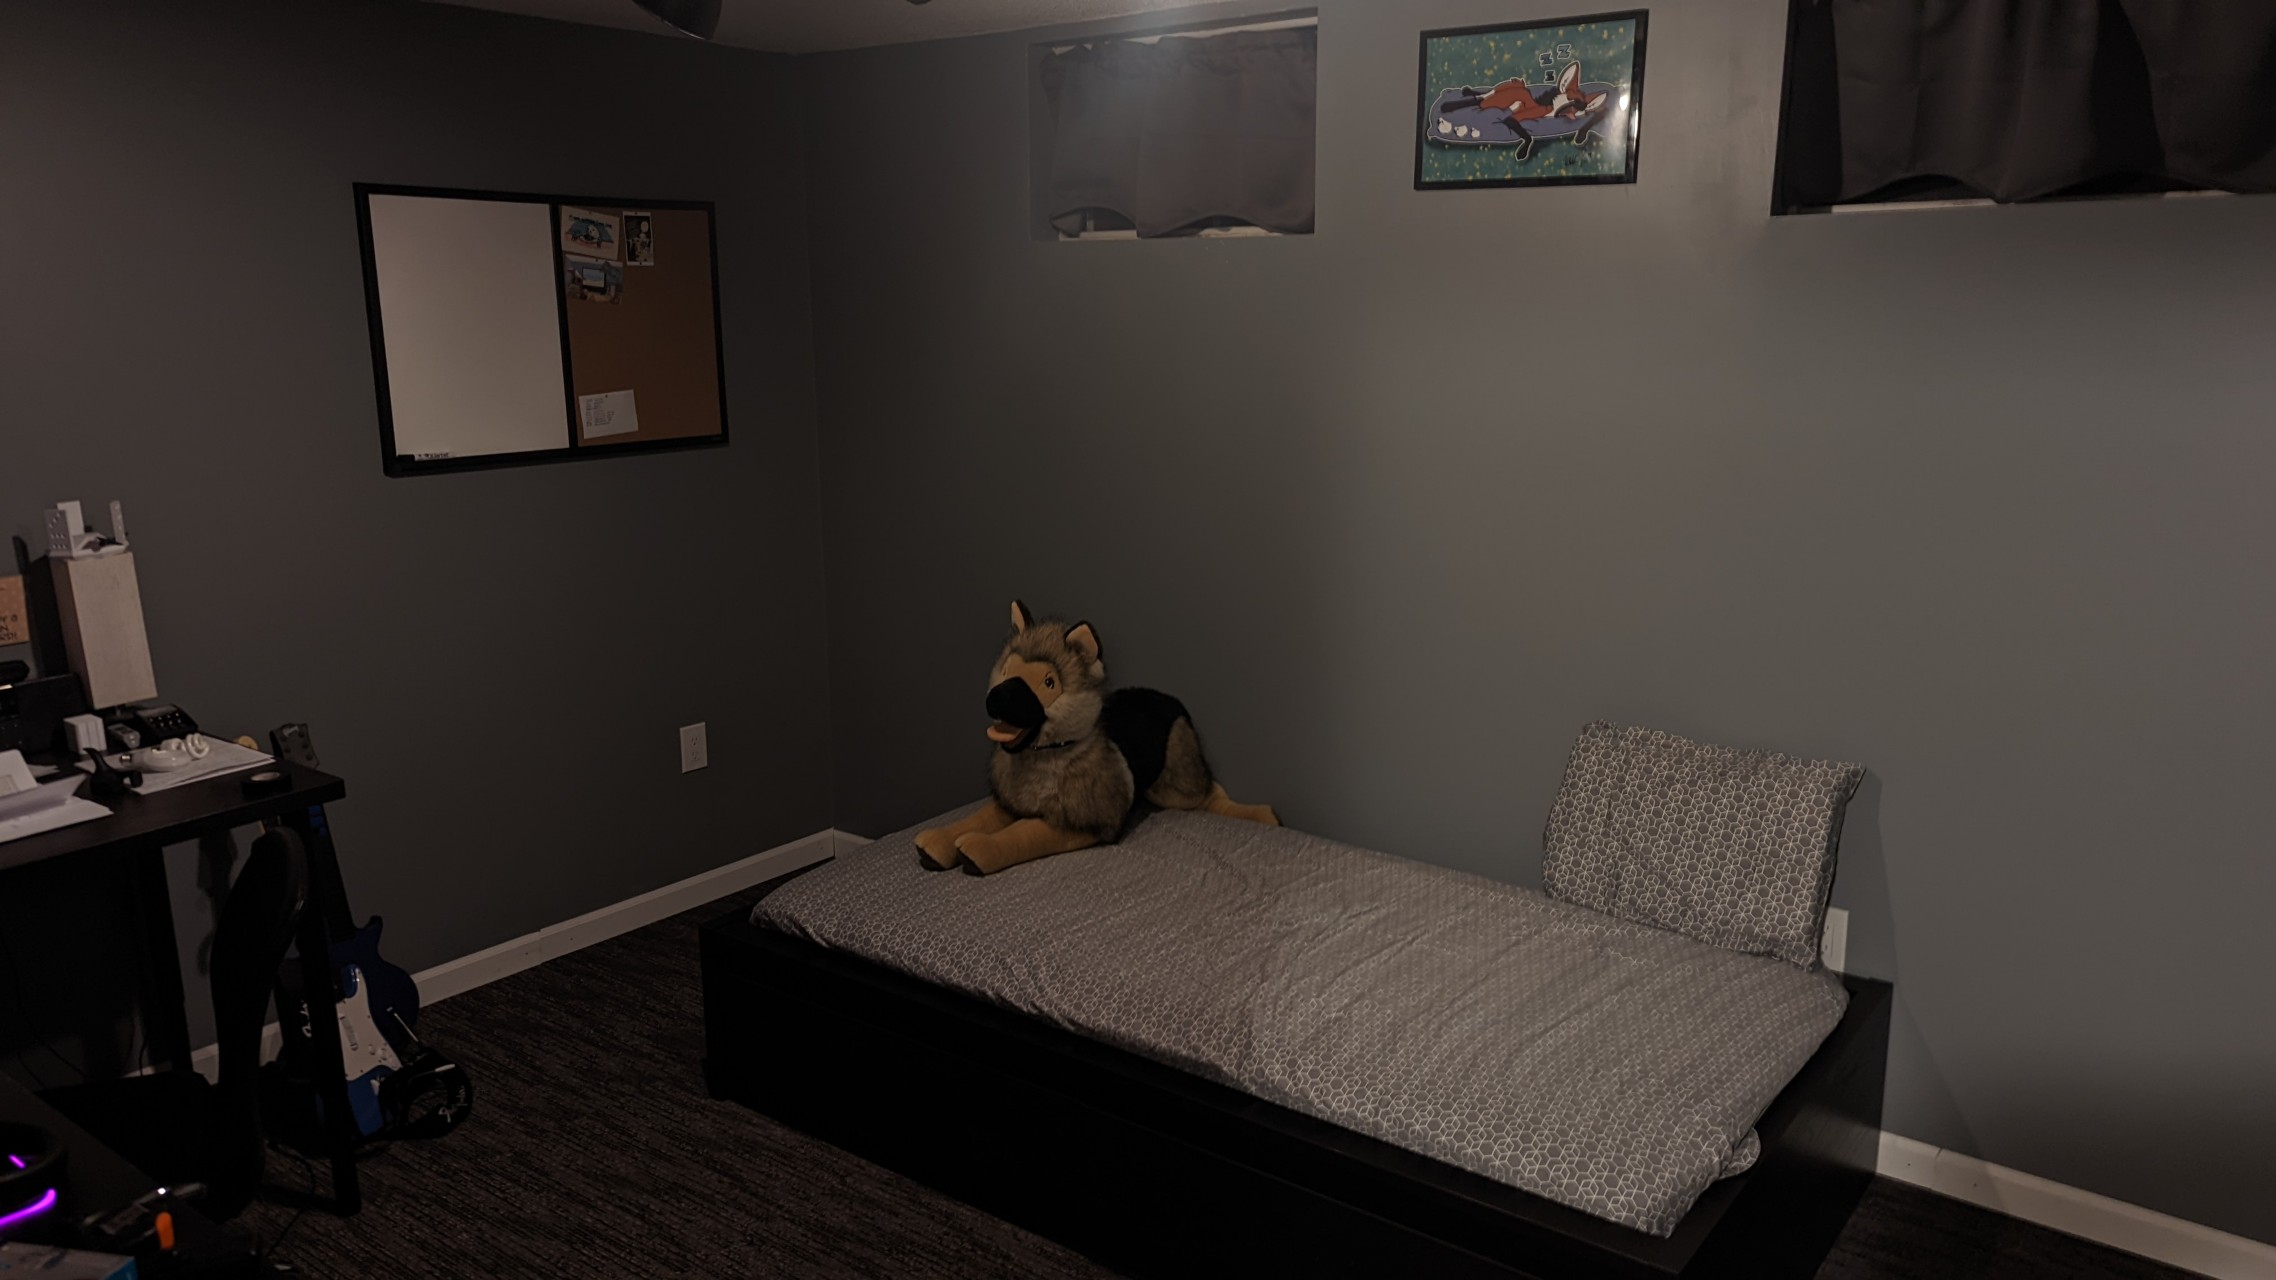
I've been slowly filling the room with art, I've only got one piece framed, but I've got some frames and other goodies for the wall on order to eventually fill up that sweet real-estate.

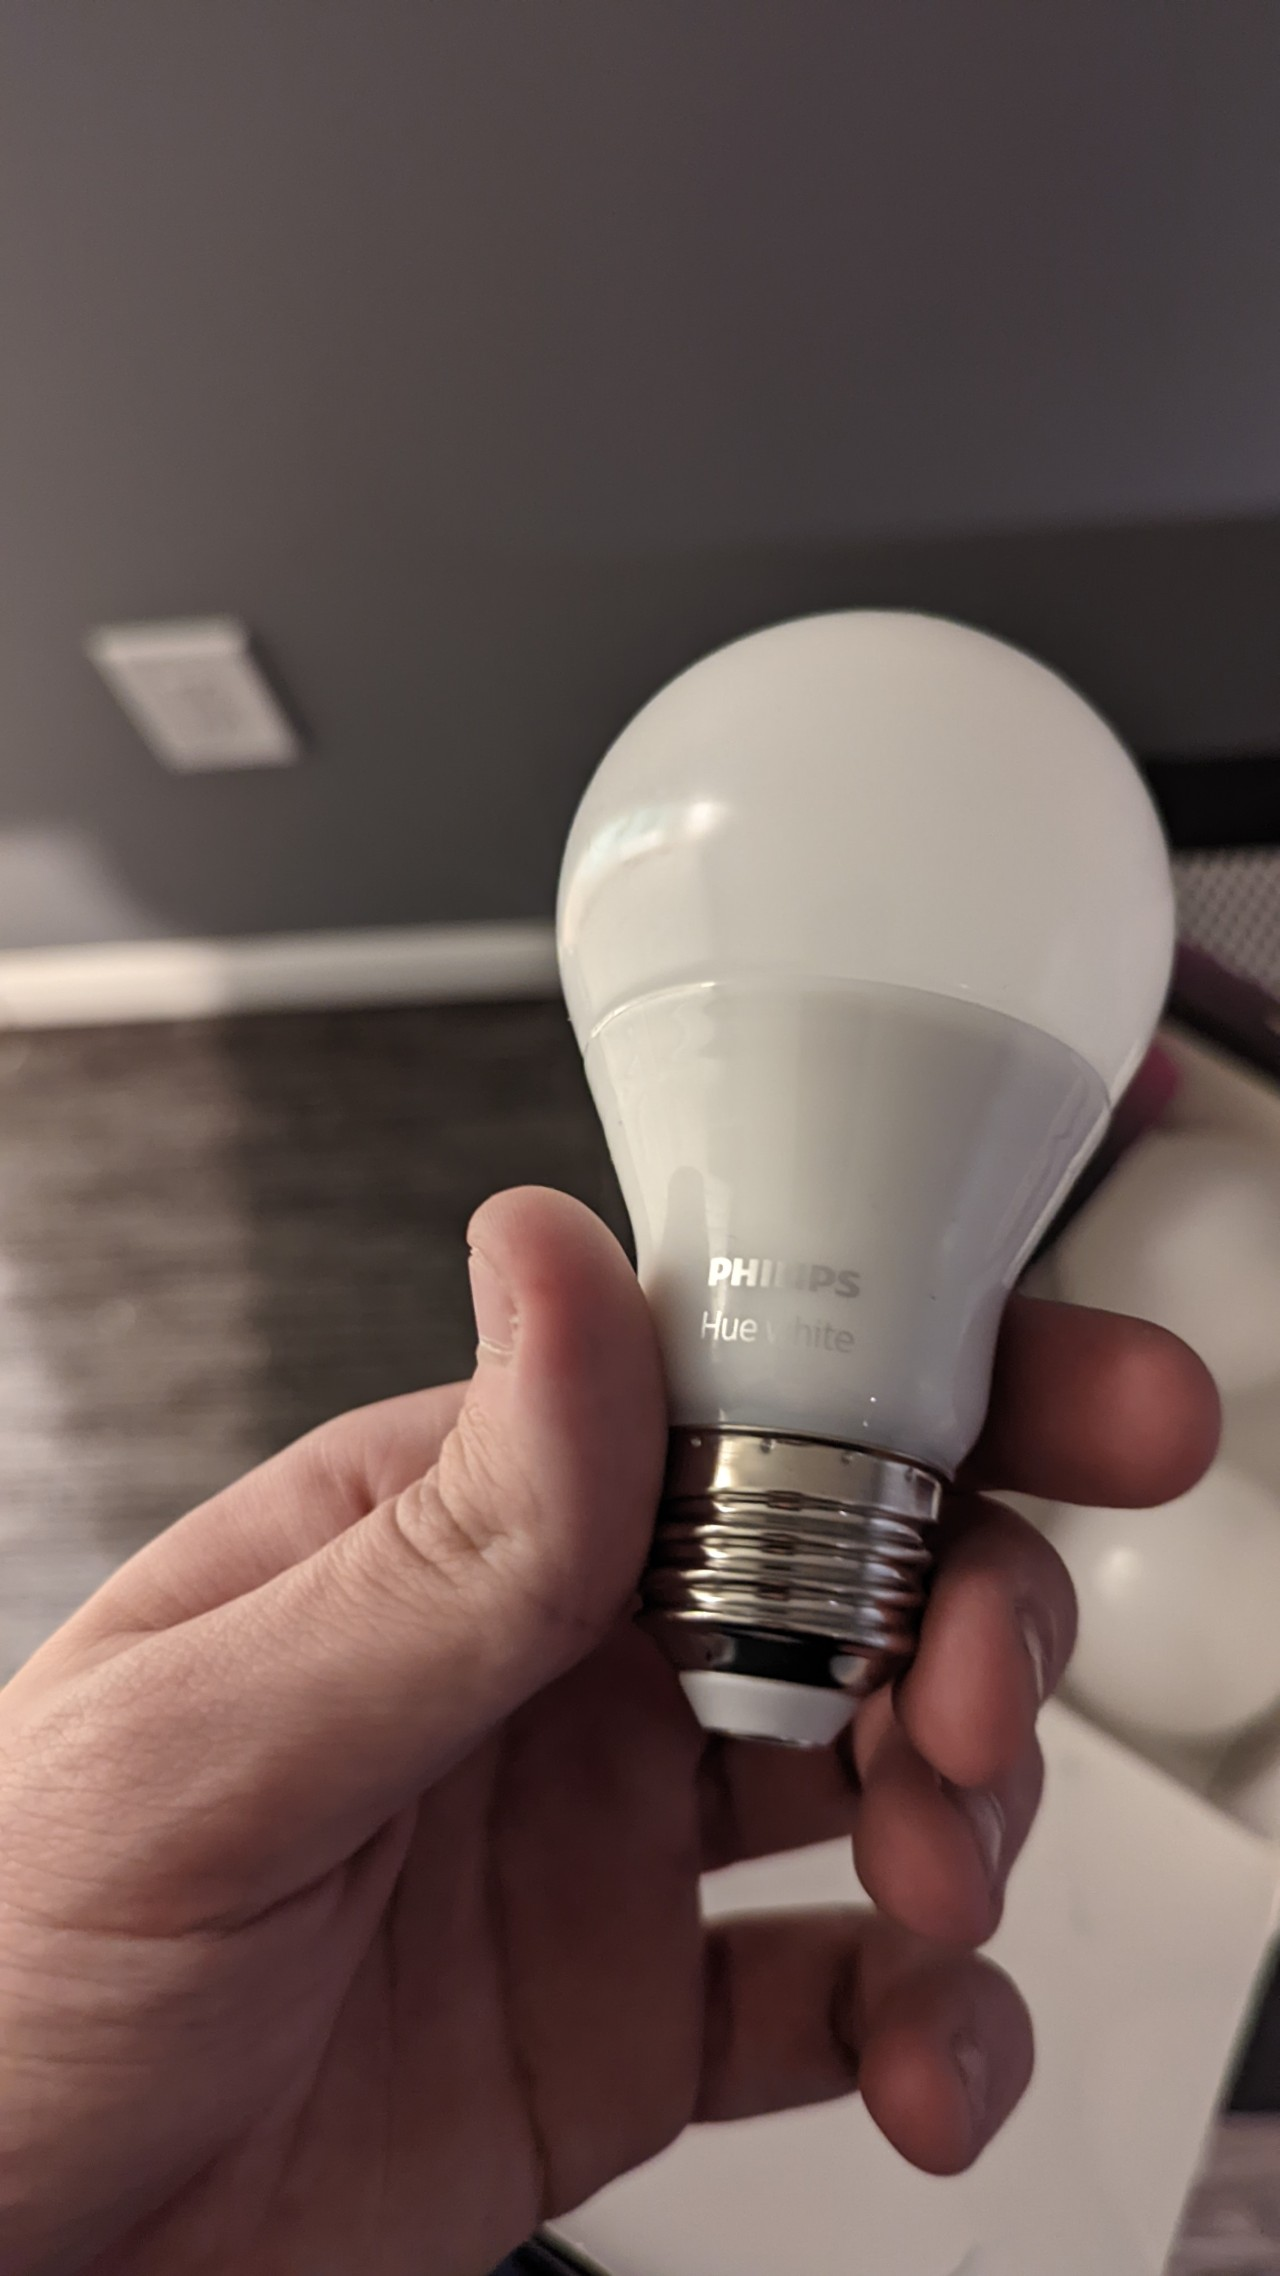
I purchased some Hue A19 lights to put in the tracklight, they really change the feeling of the room with colored light. It's like giving the room a new paintjob with just a tap.
Funnily enough, my first attempt at ordering those lights didn't go quite as expected. I got them in the mail, and when I opened the box, the last guy to have purchased and returned them thought he was smart, and replaced them when Hue WHITE lights instead of Hue White + Ambience A19. Prompt return.
Other than that, I had a lot of fun learning new skills with my partner while we worked on this project together.
Until Next Time!